

Checks
Overview
A Check is a test that Kolide runs on a device on a regular cadence which typically produces a passing or failing result.
Checks are used to achieve many different use cases, but are primarily designed to ensure a device is meeting important policy and security requirements. Checks can be directed at specific platform and group targets, including 1Password groups.
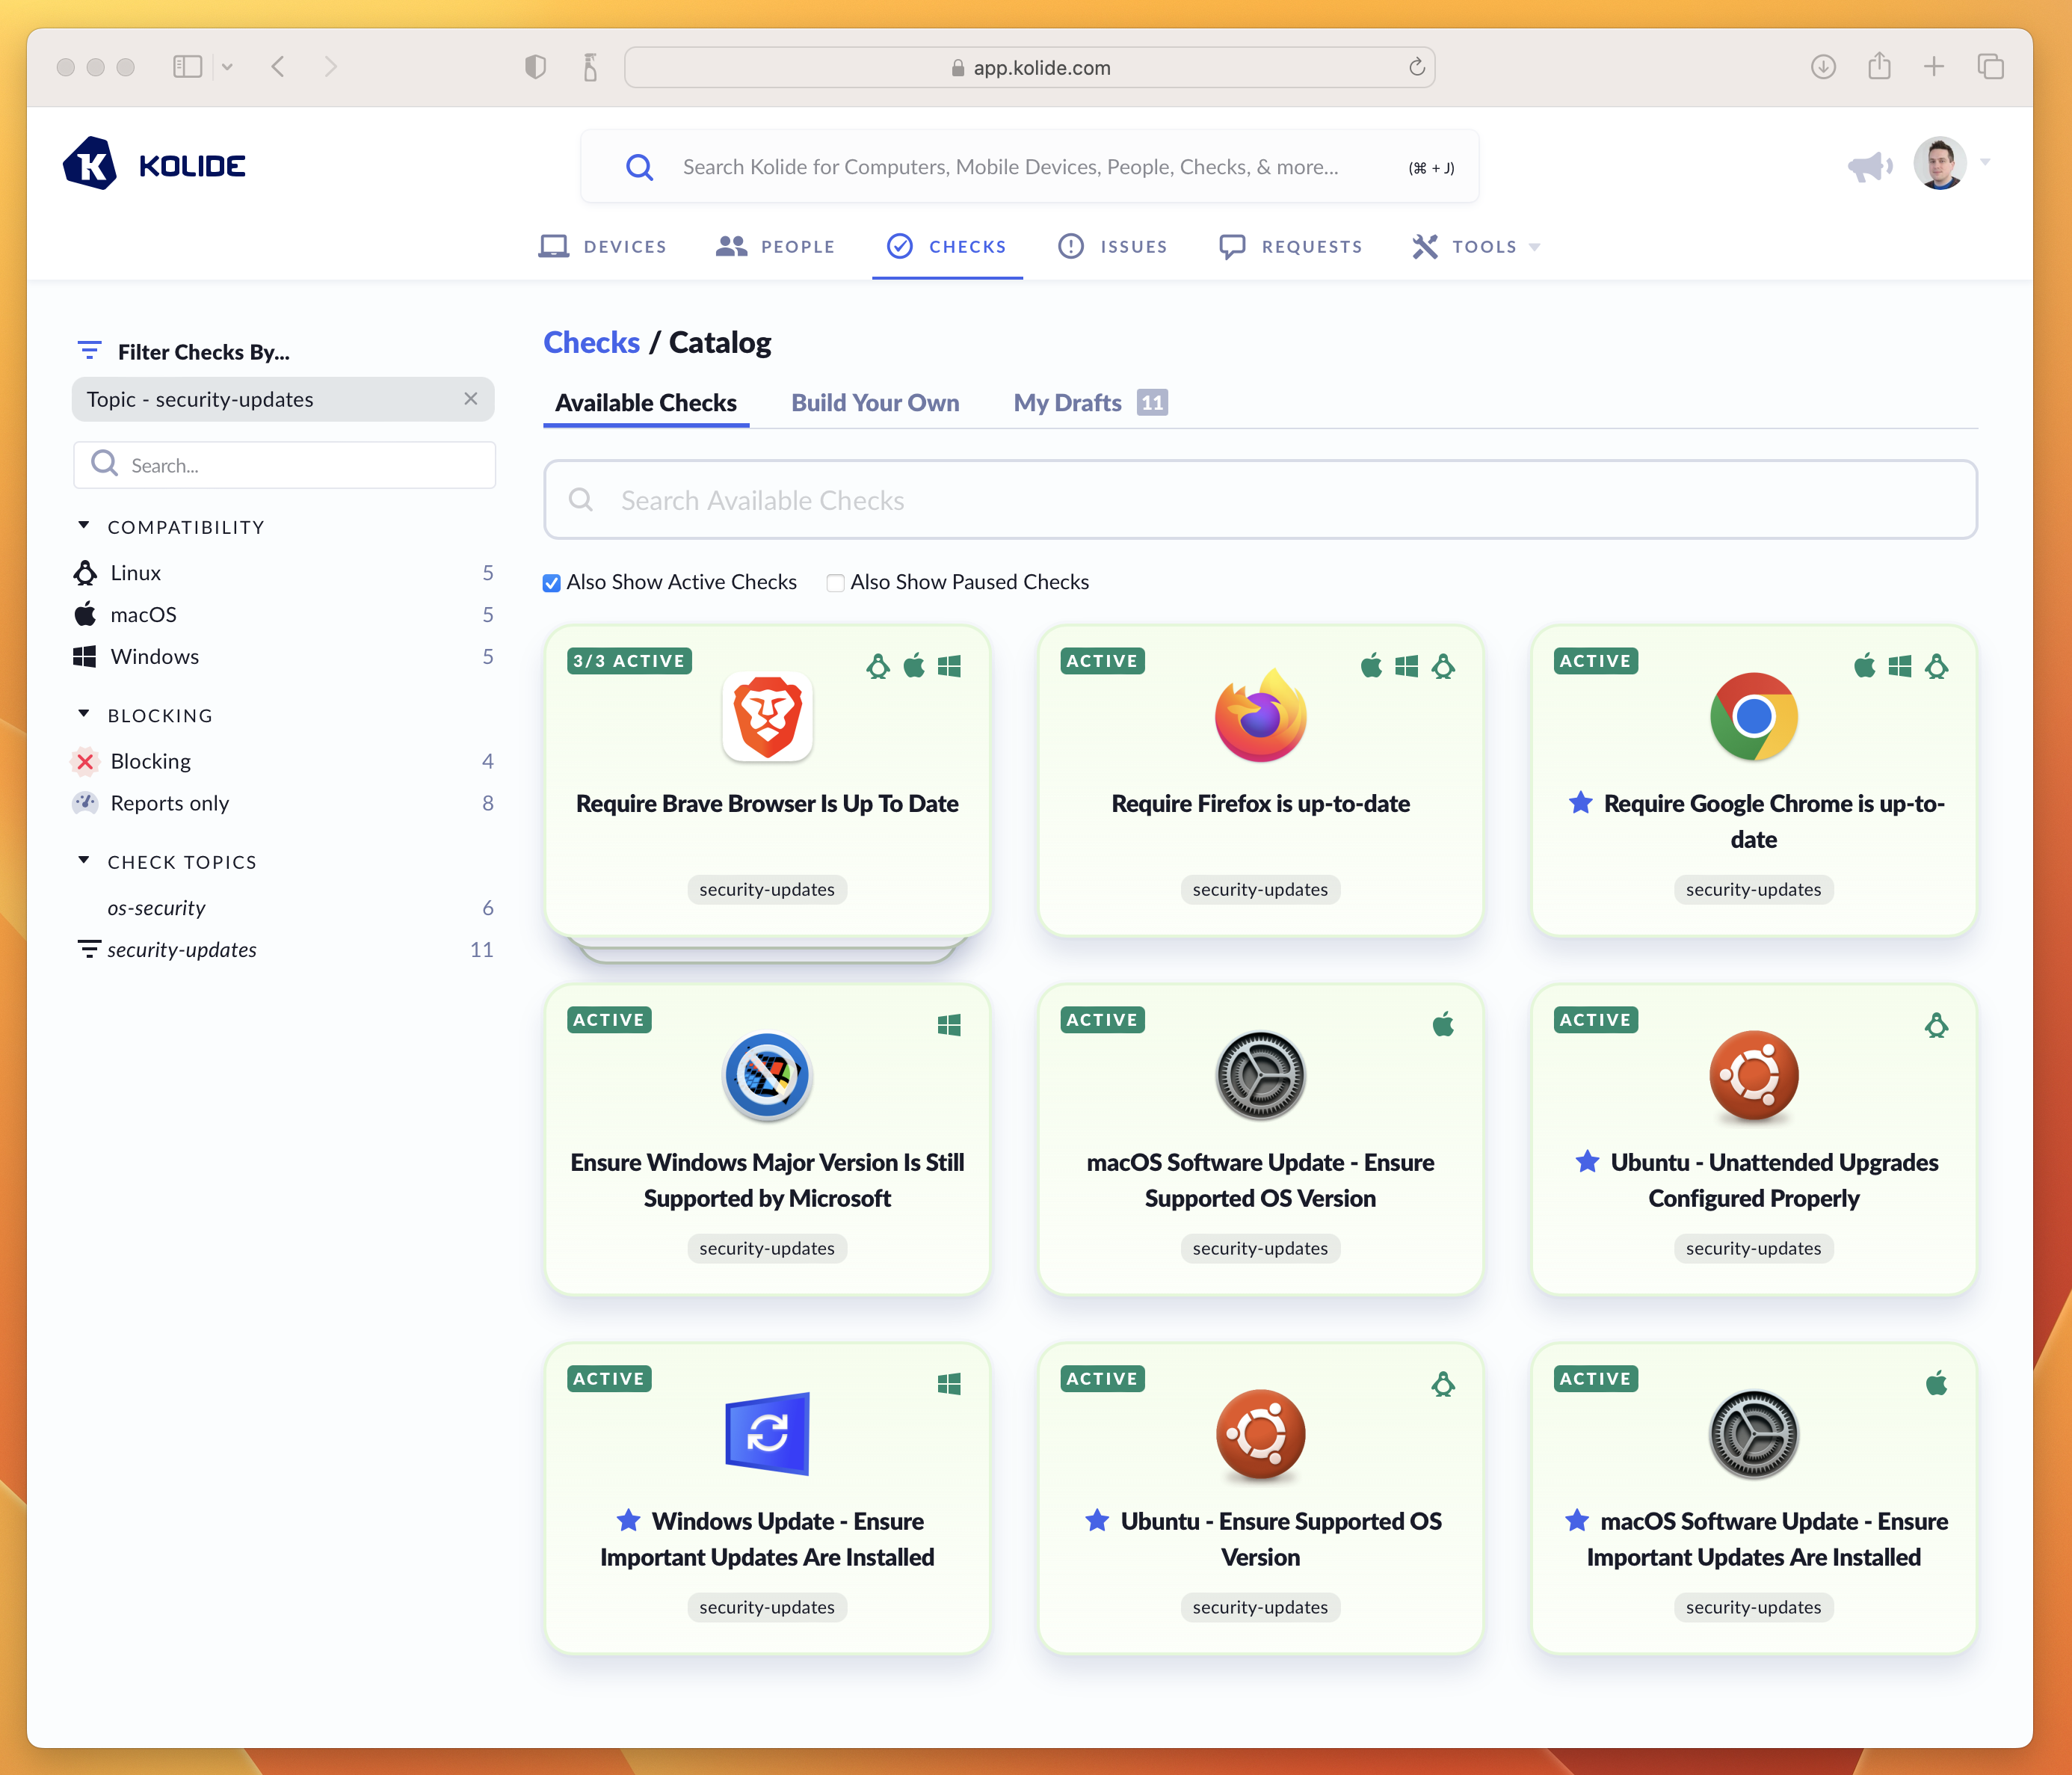
A screenshot of Kolide’s Check Catalog showing examples of Checks used to keep Operating Systems and Browsers up to date.
When a Check “run” on a device produces a failing result, Kolide generates an Issue so that administrators can track and ultimately resolve it (usually through Kolide’s end-user driven remediation strategies).
Adding, Enabling, and Pausing
By default, when you first establish your account, Kolide automatically enables Checks that help promote universally accepted best-practices for device security.
![]()
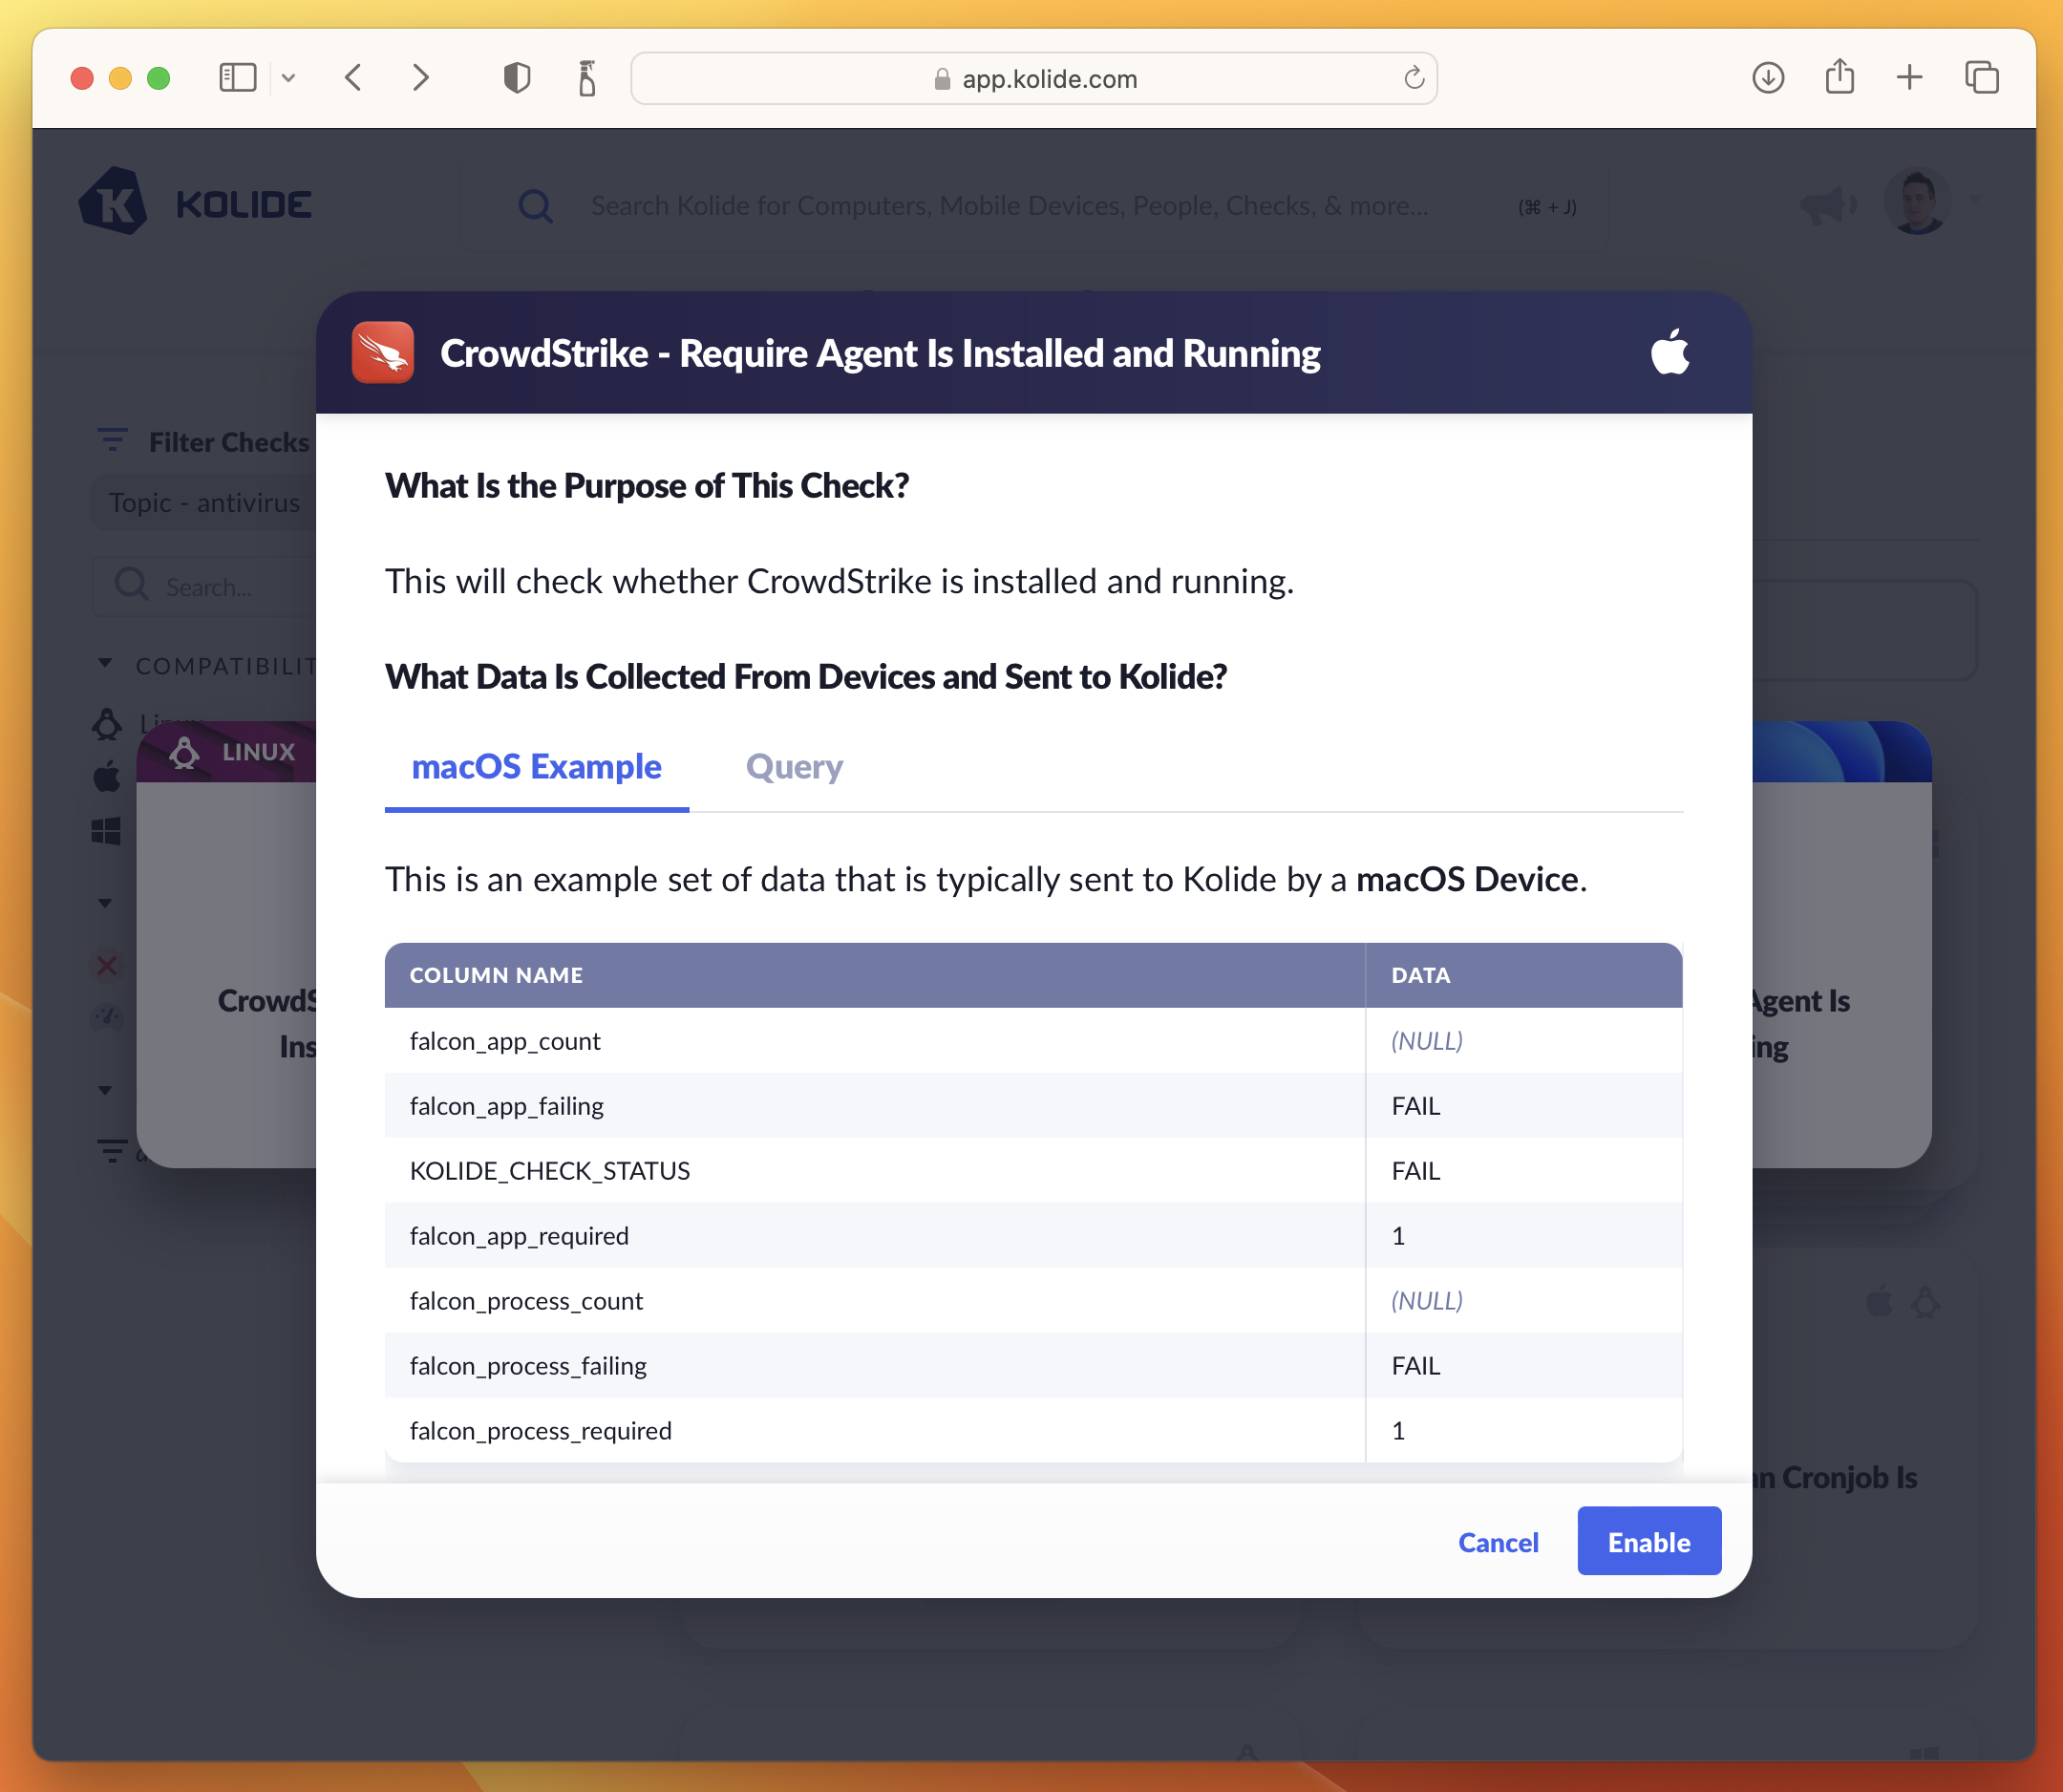
Adding a New Check
To add a new Check, follow these instructions:
Visit the Check Catalog by selecting Checks > Add New Checks
Locate a Check you’d like to add and click its corresponding card. If the Check has multiple versions for different platforms, select the Check you’d like to add for the desired platform.
In the preview that appears, click Enable. This will add the check and begin running it in “Report Only” mode.
Pausing a Check
Pausing a Check immediately removes it from the device’s query schedule and prevents any results sent by devices from being accepted or processed. In addition, a paused Check will no longer cause a registered device to be blocked.
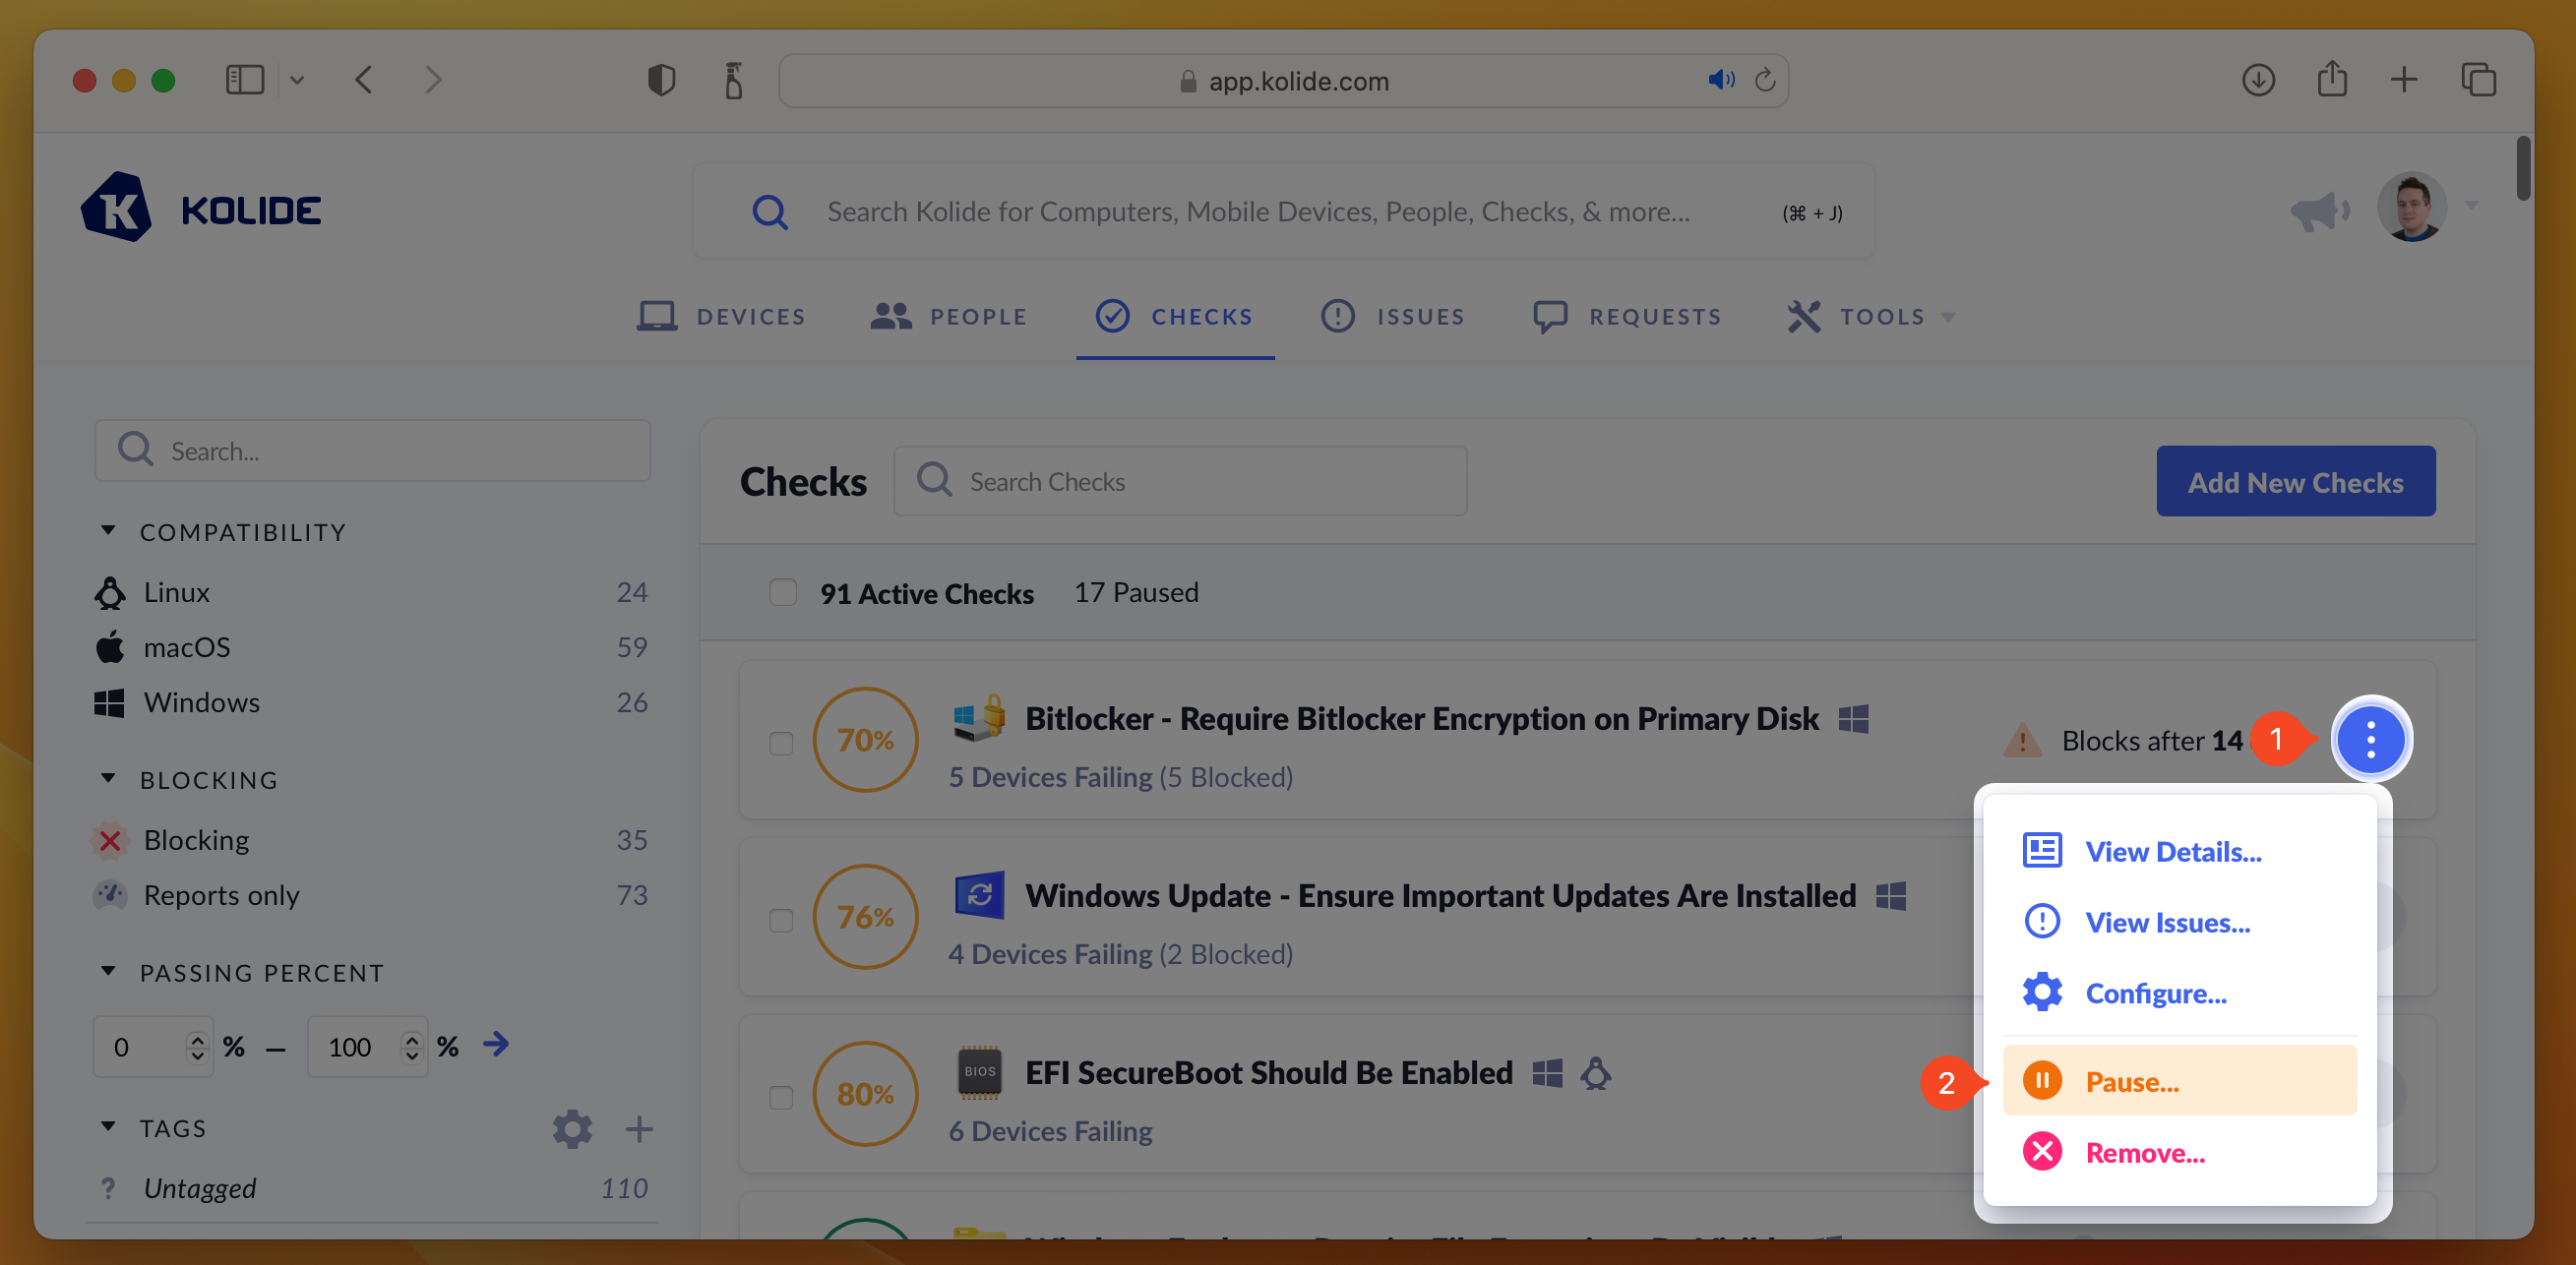
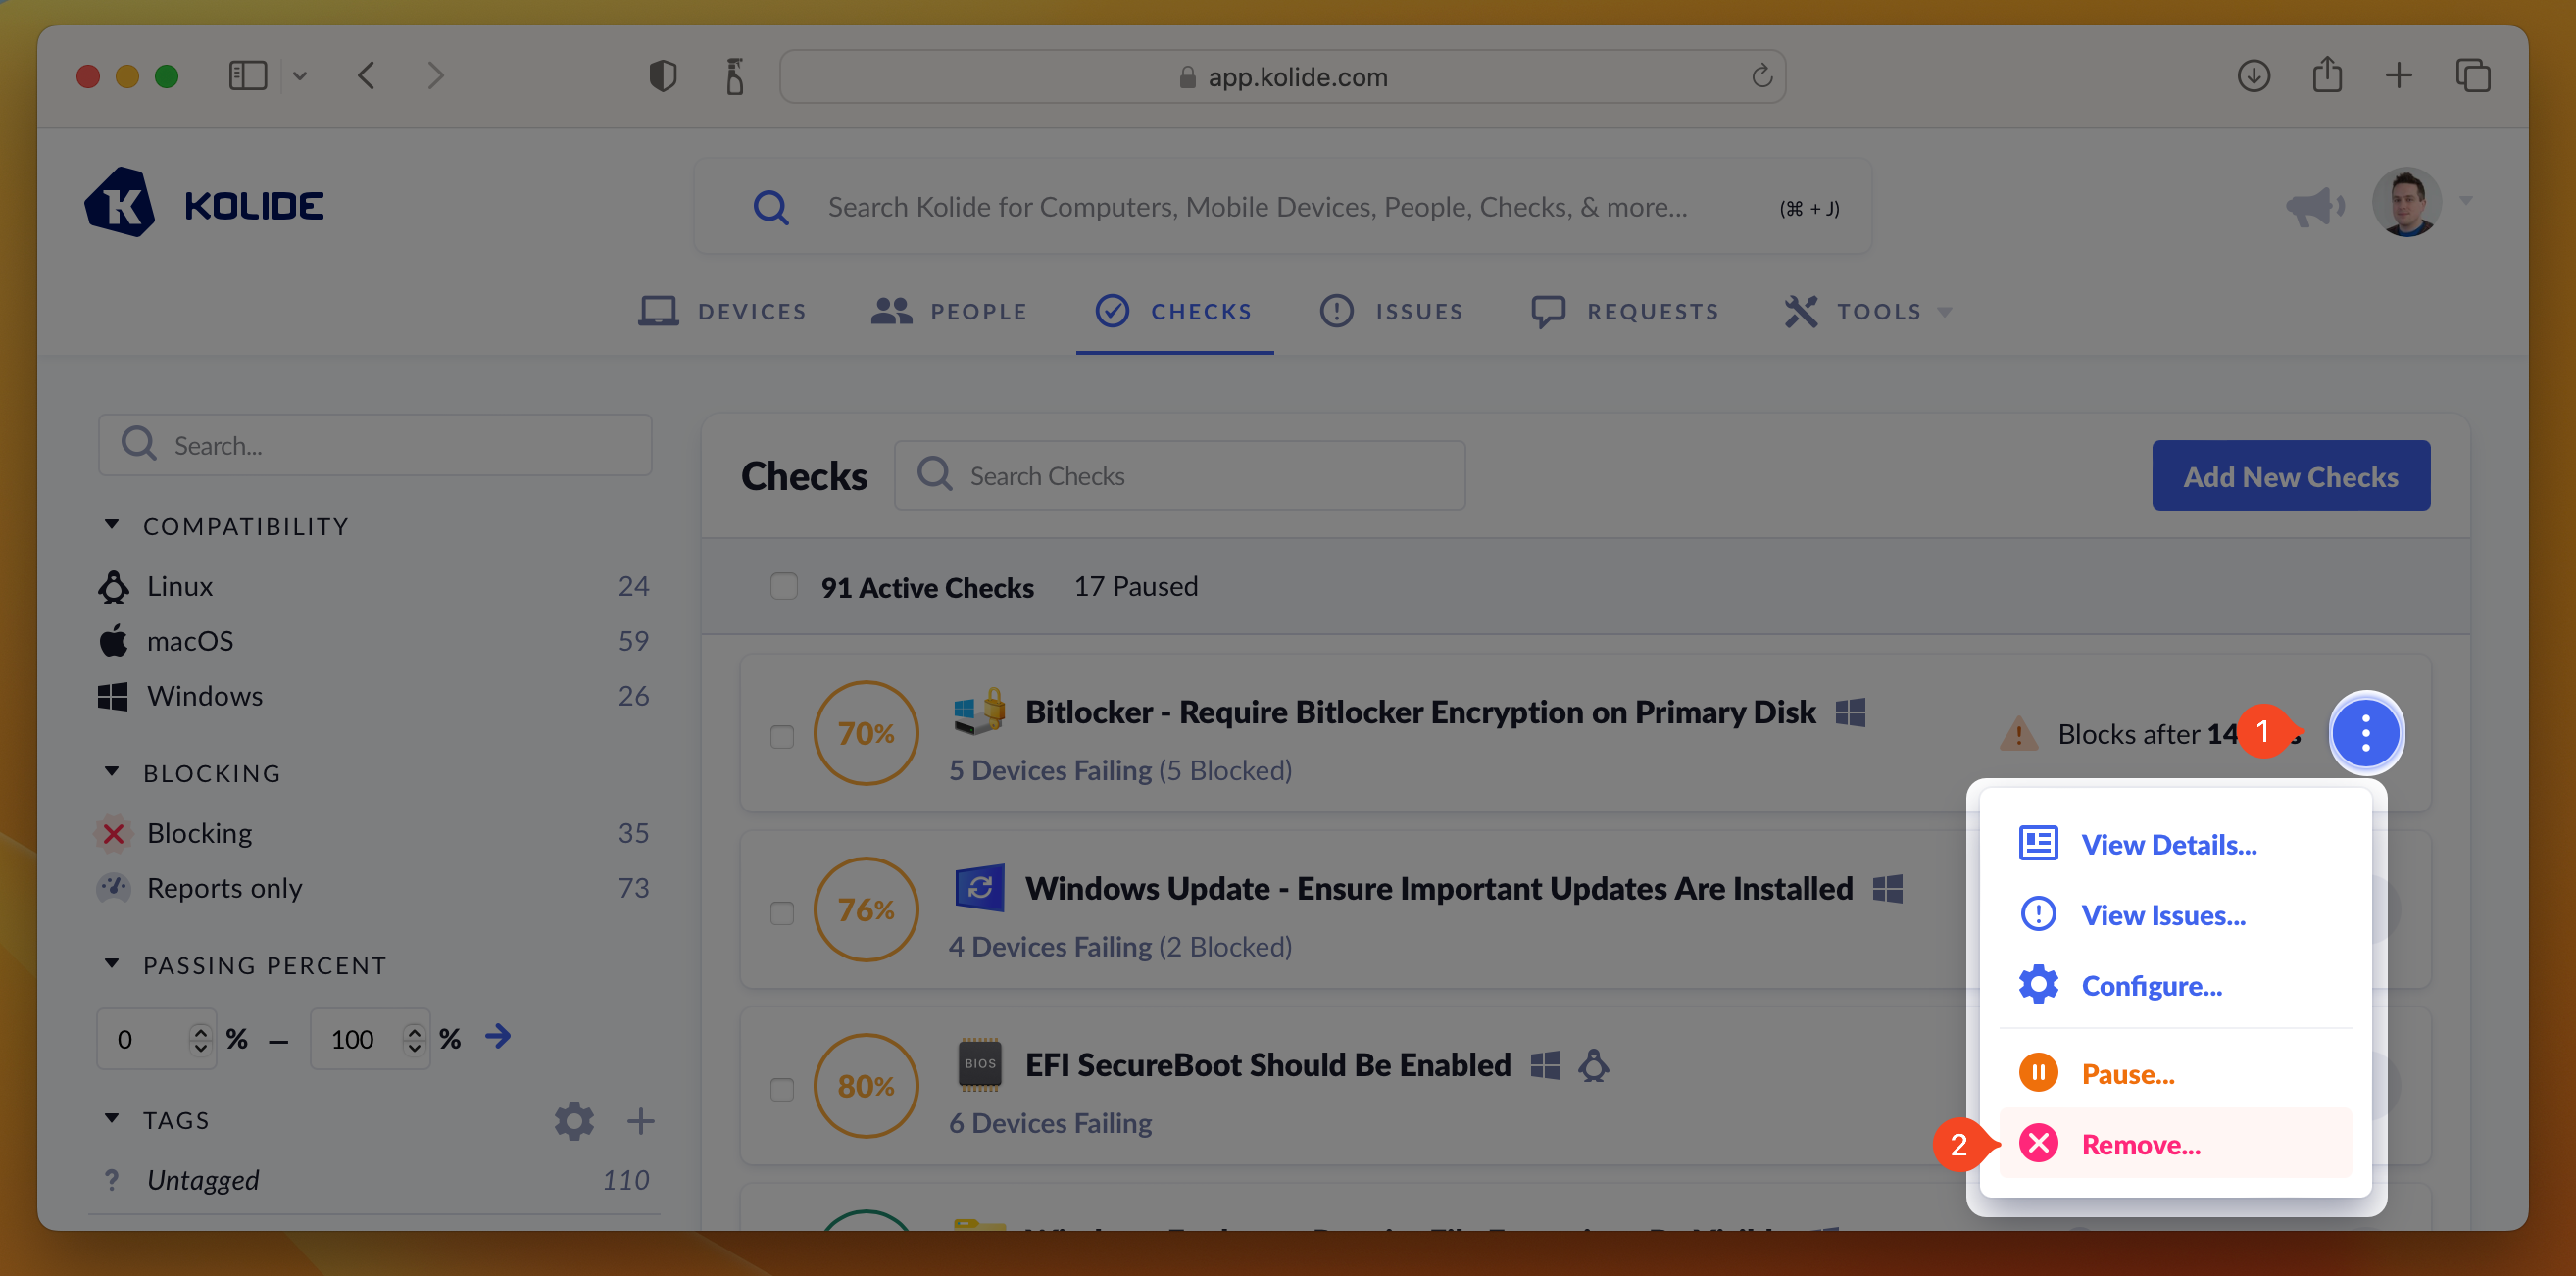
To pause a Check, simply press the ellipsis menu on the Check’s results card and choose Pause Check.
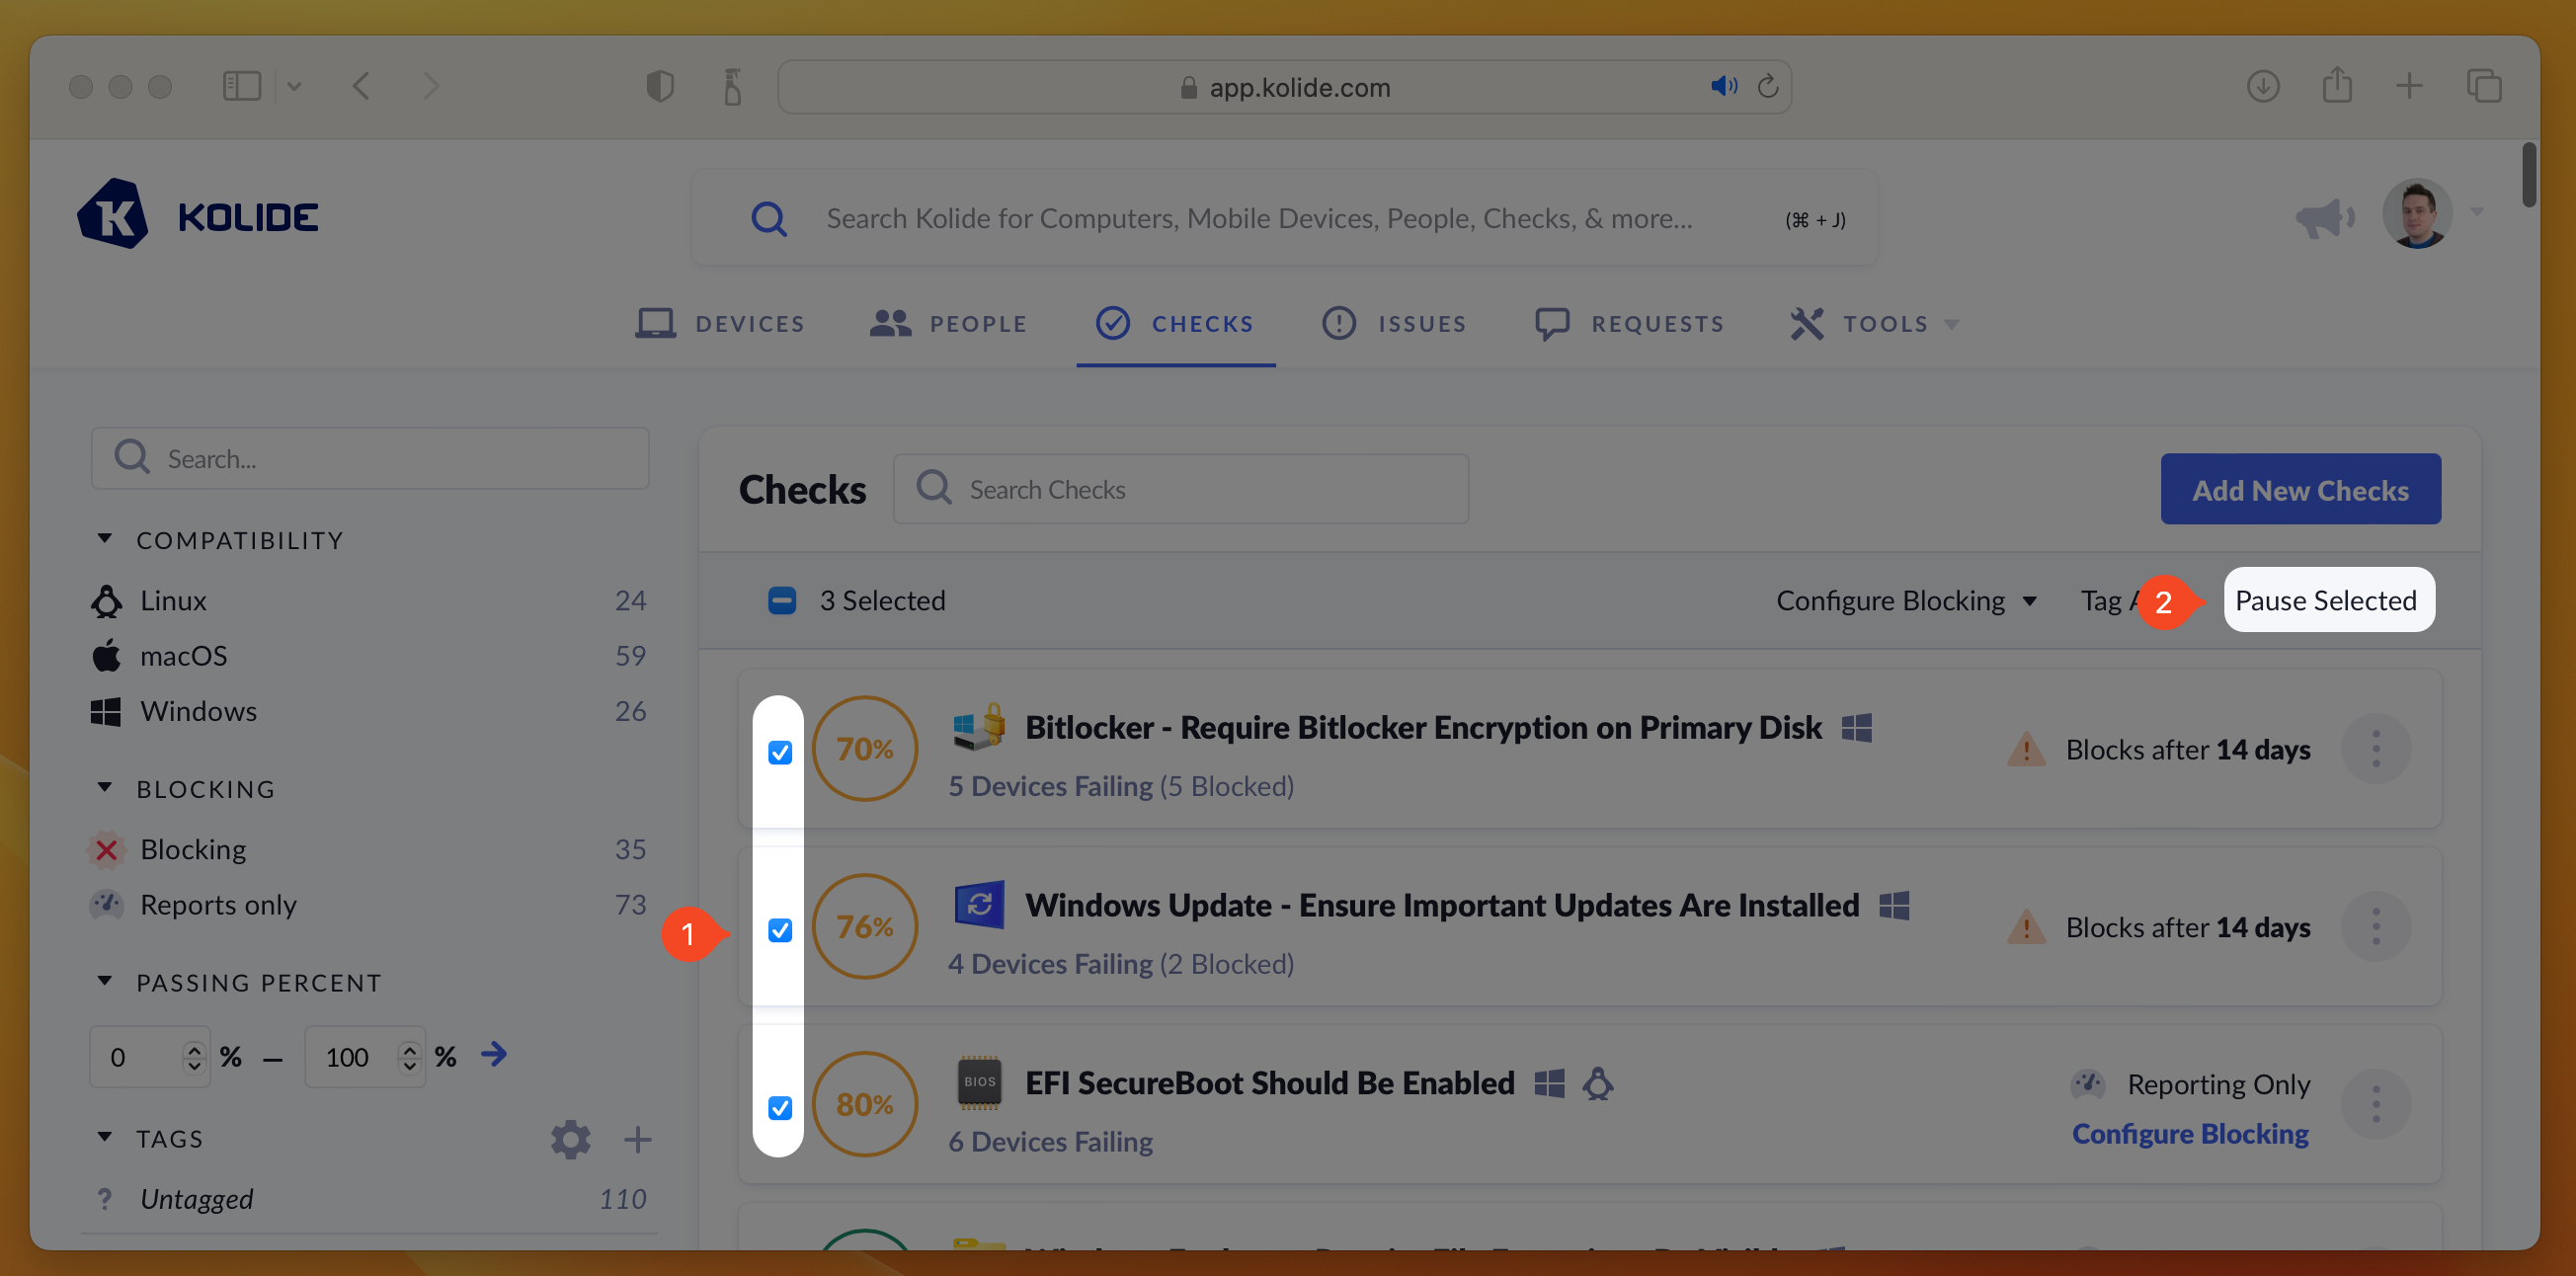
If you’d like pause multiple Checks at once, you can select their respective checkboxes, which will reveal the mass-action buttons. Then click Pause Selected.
Removing a Check
Unlike pausing, which temporarily suspends a Check and is easily reversed, removing a Check is a destructive action which deletes all associated Check results, issues, and configuration. Once a Check is removed, it is no longer visible in either the Active or Paused tabs and can only be re-added via the Check Catalog.
To remove a Check, press the ellipsis menu on the Check’s results card and choose Remove Check.
Measuring Compliance
When viewing your actively running Checks, they will be listed by their percentage of compliance (from least compliant to most compliant).
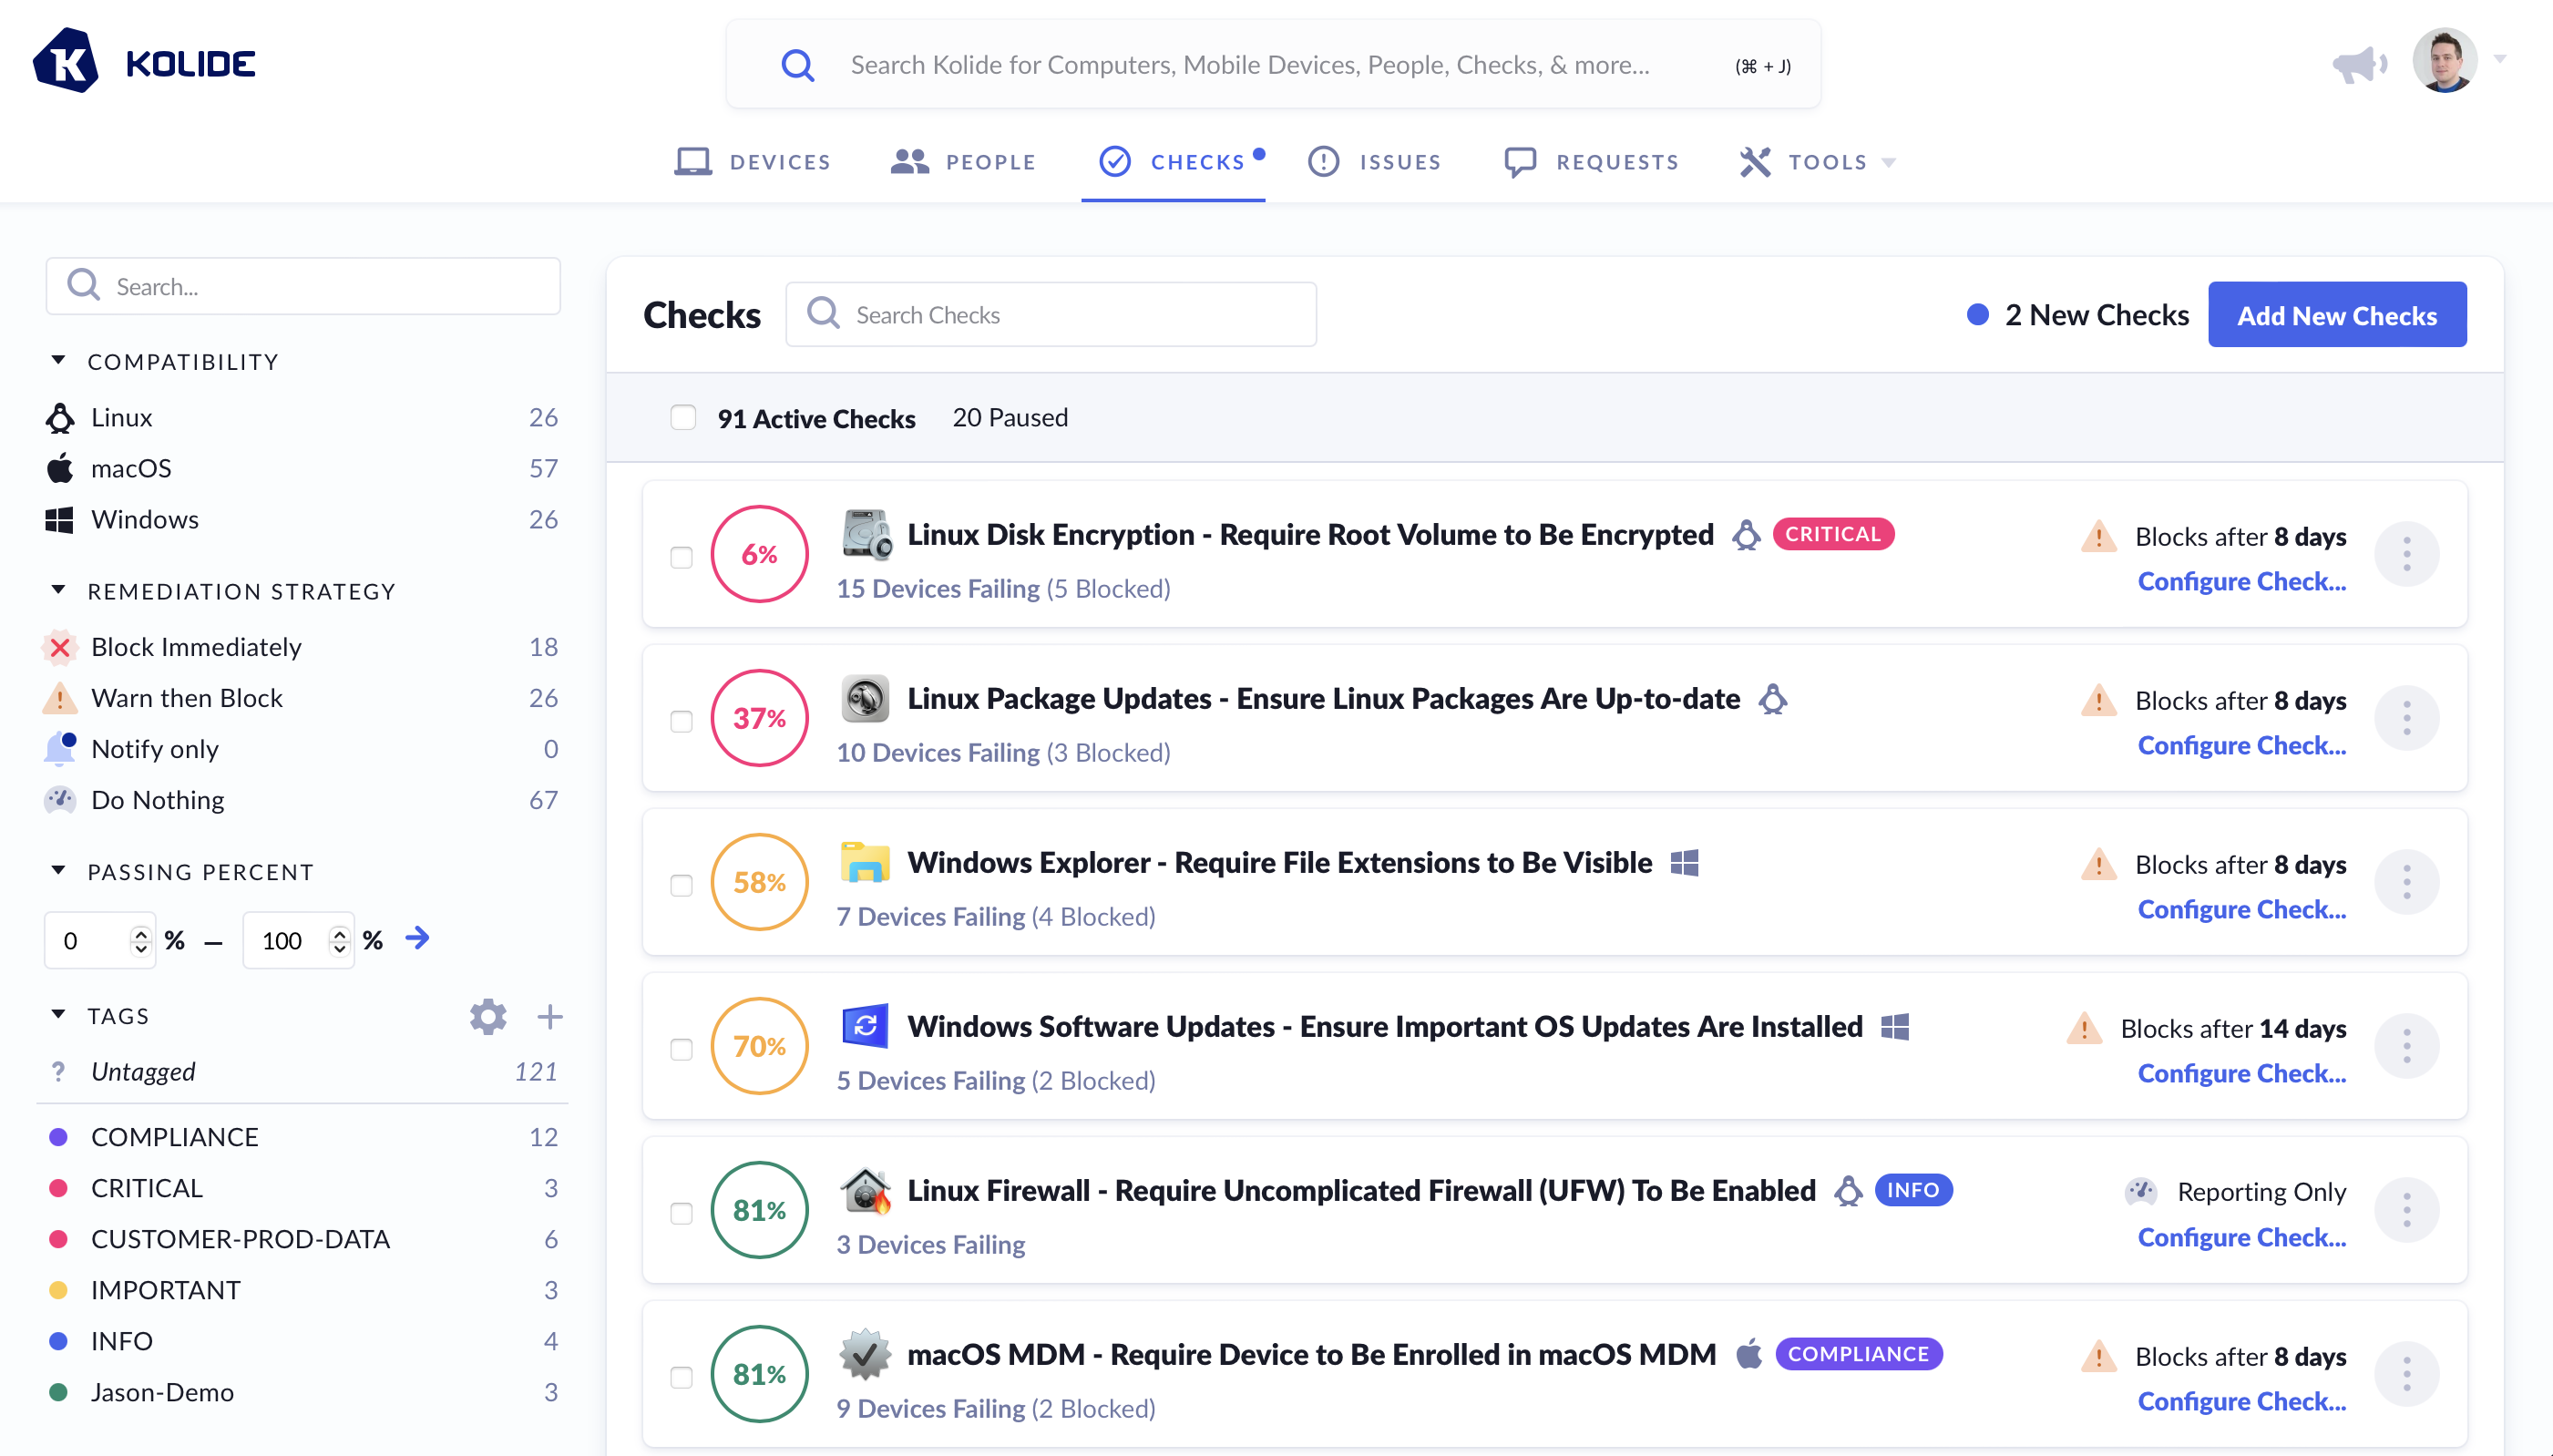
The color of the percentage is determined by the following rules:
- Perfect Compliance - Filled Green Circle
- > 80% Compliant - Green Circle
- > 50% Compliant - Yellow Circle
- > 1% Compliant - Red Circle
- Completely Non-Compliant - Filled Red Circle
Each Check’s passing percentage is calculated using the following formula:
- - Total number of Devices targeted by the Check
- - Number of failing targets
- - Number of passing targets, calculated as
Viewing an Individual Check’s Compliance
From the compliance dashboard, once you click on a Check, you will get a detailed view of the status of each targeted device in the Check Result tab.
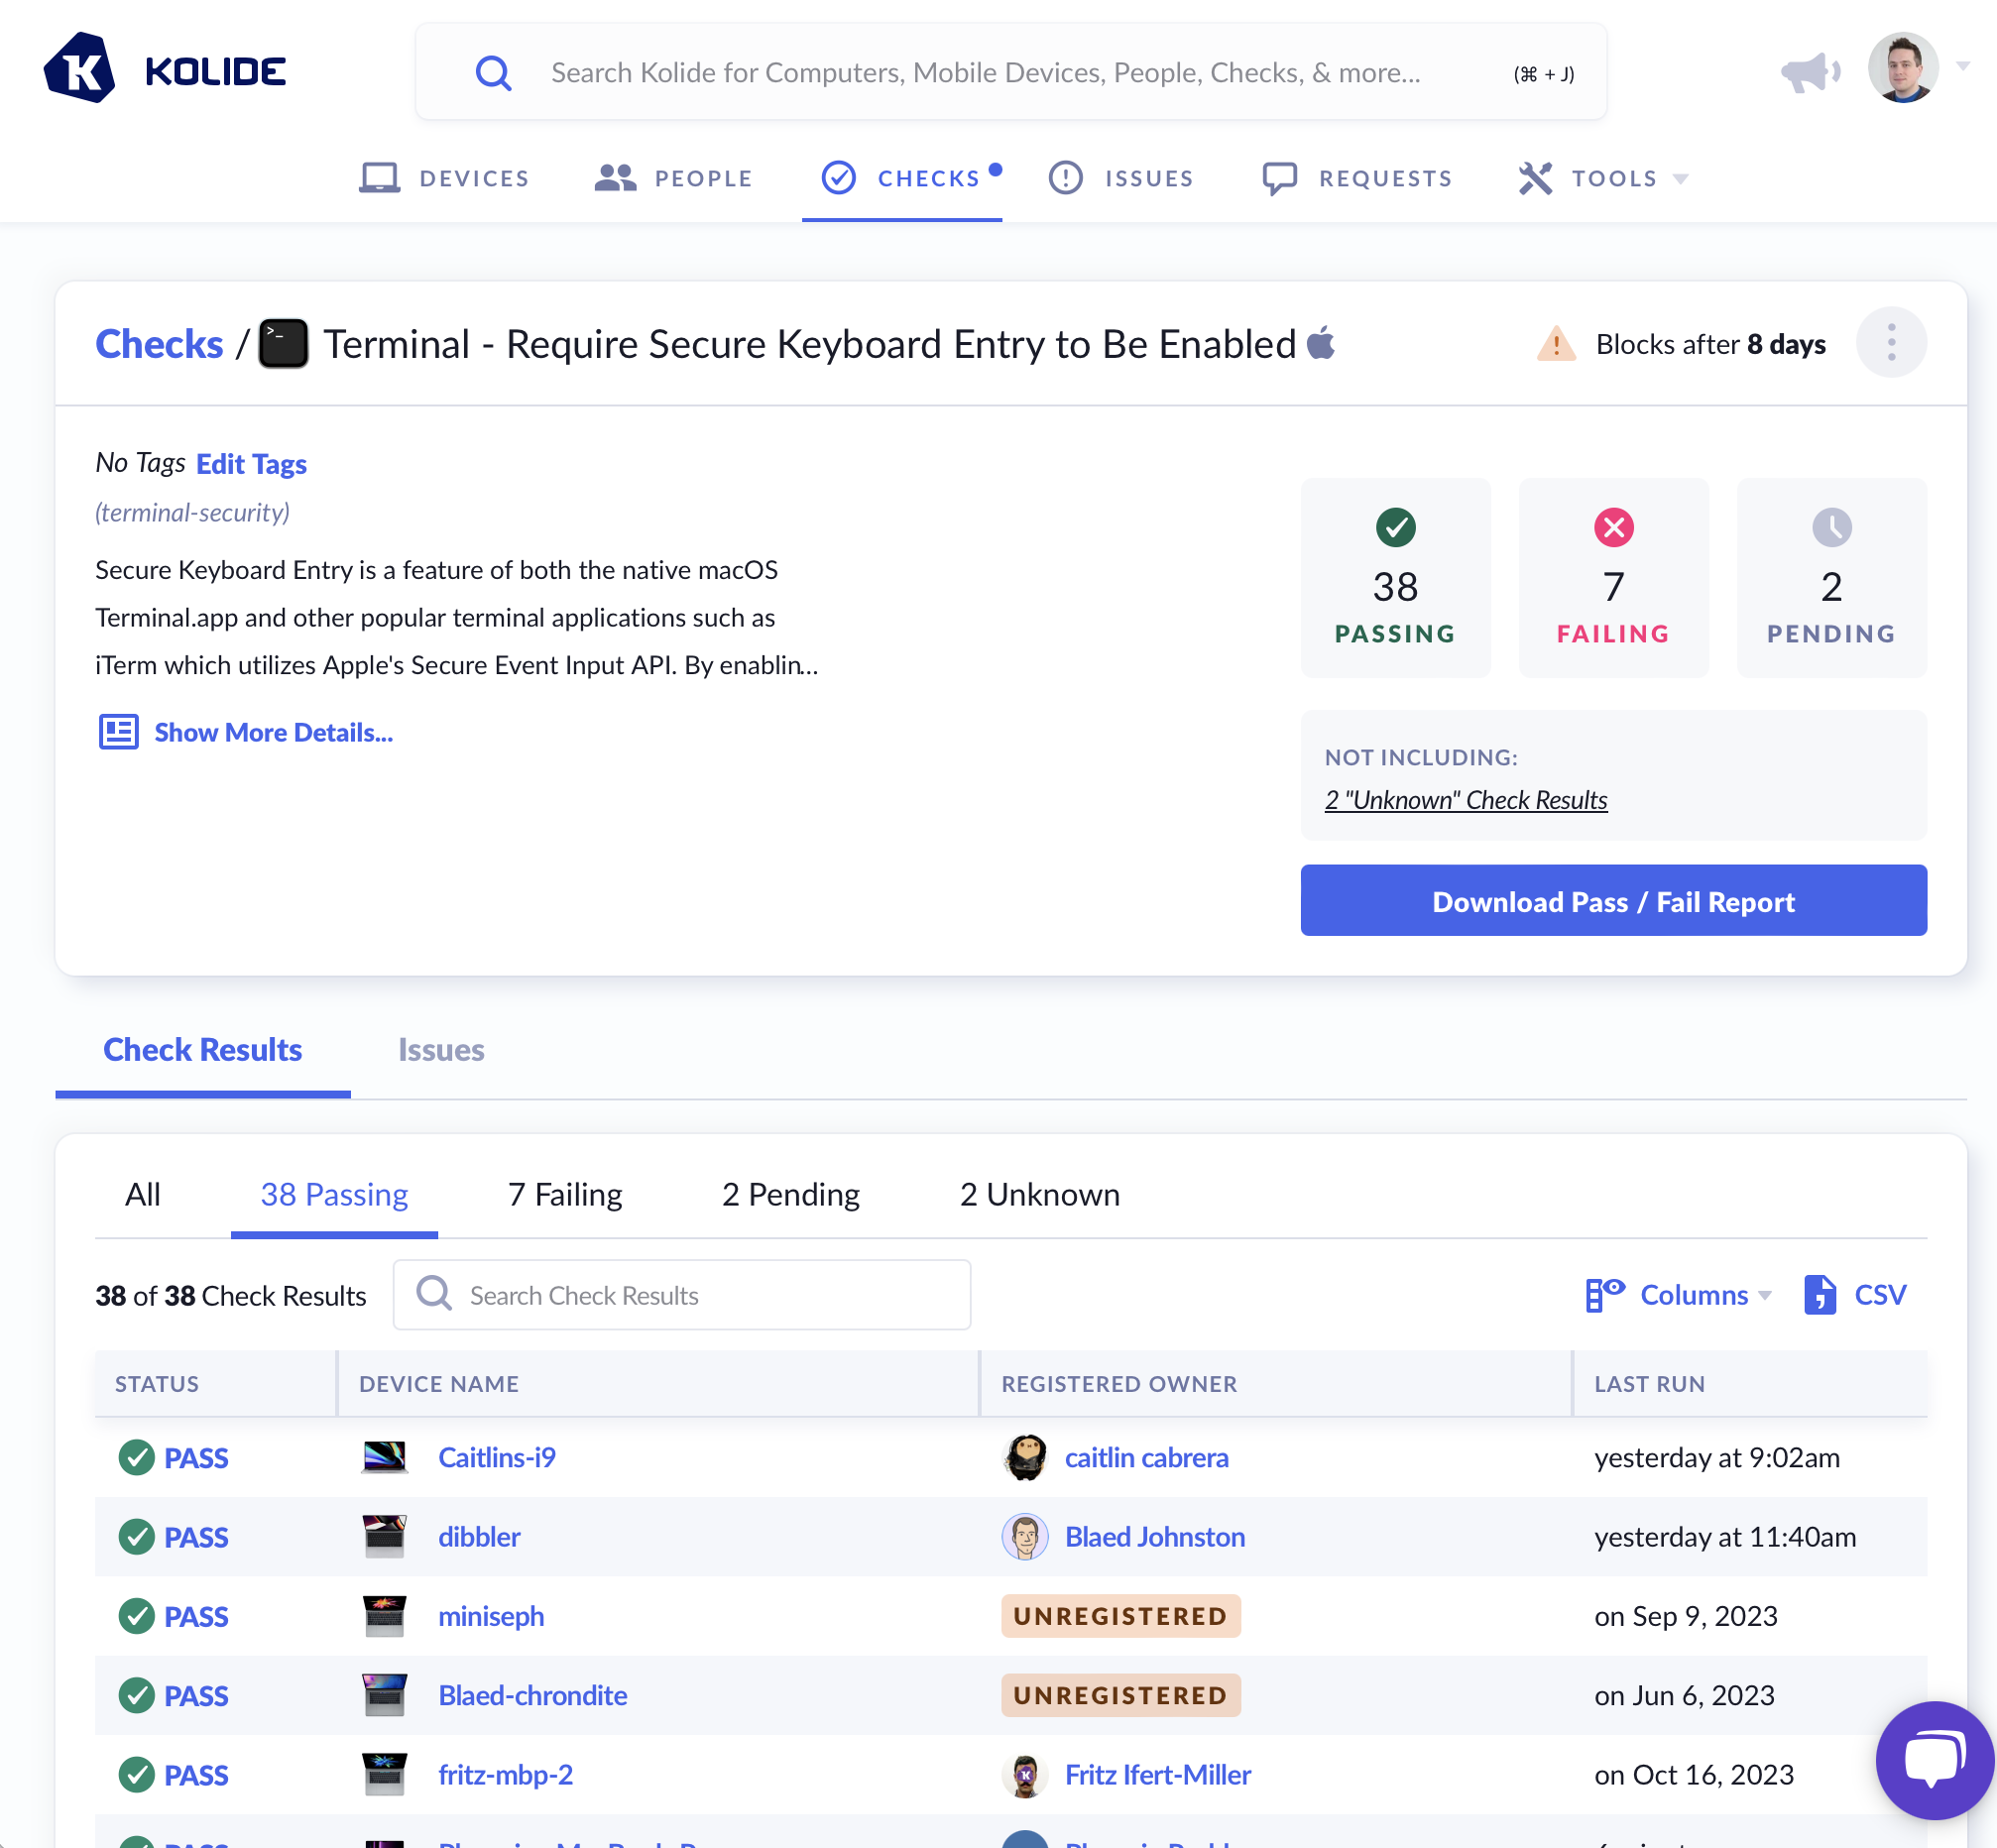
A Device is capable of being in one of the following statuses for each Check:
- (Pending) - The device has not yet run the Check for the first time.
- PASS - The device is passing the Check.
- FAIL - The device is failing the Check.
- UNKNOWN - The device is currently in a state where the passing/failing status of the Check cannot be determined (e.g., the system is online but locked, and the agent is unable to collect the needed information).
- N/A - What the Check is meant to verify does not apply to the current Device (e.g., looking for a security setting for an Intel-based CPU on one that is ARM-based).
- ERROR - The Kolide agent encountered an error when running this Check.
- STALE - The status is no longer relevant because the Check’s options have changed since the device last ran it.