How to configure SAML for Kolide
In this step, we will add Kolide as an Application to your Okta instance and configure single sign-on with SAML. (Enabling SAML affects all users who use Kolide.)
Supported Features
- SP-initiated SSO (Single Sign-On)
- IdP-initiated SSO (through Third-party Initiated Login)
Configuration Steps
If you haven’t already, sign into your Okta Administrative portal
https://${yourOktaDomain}-admin.okta.com. Once signed in, click
Applications in the left-hand sidebar, and then Browse App Catalog
near the top of the resulting page.
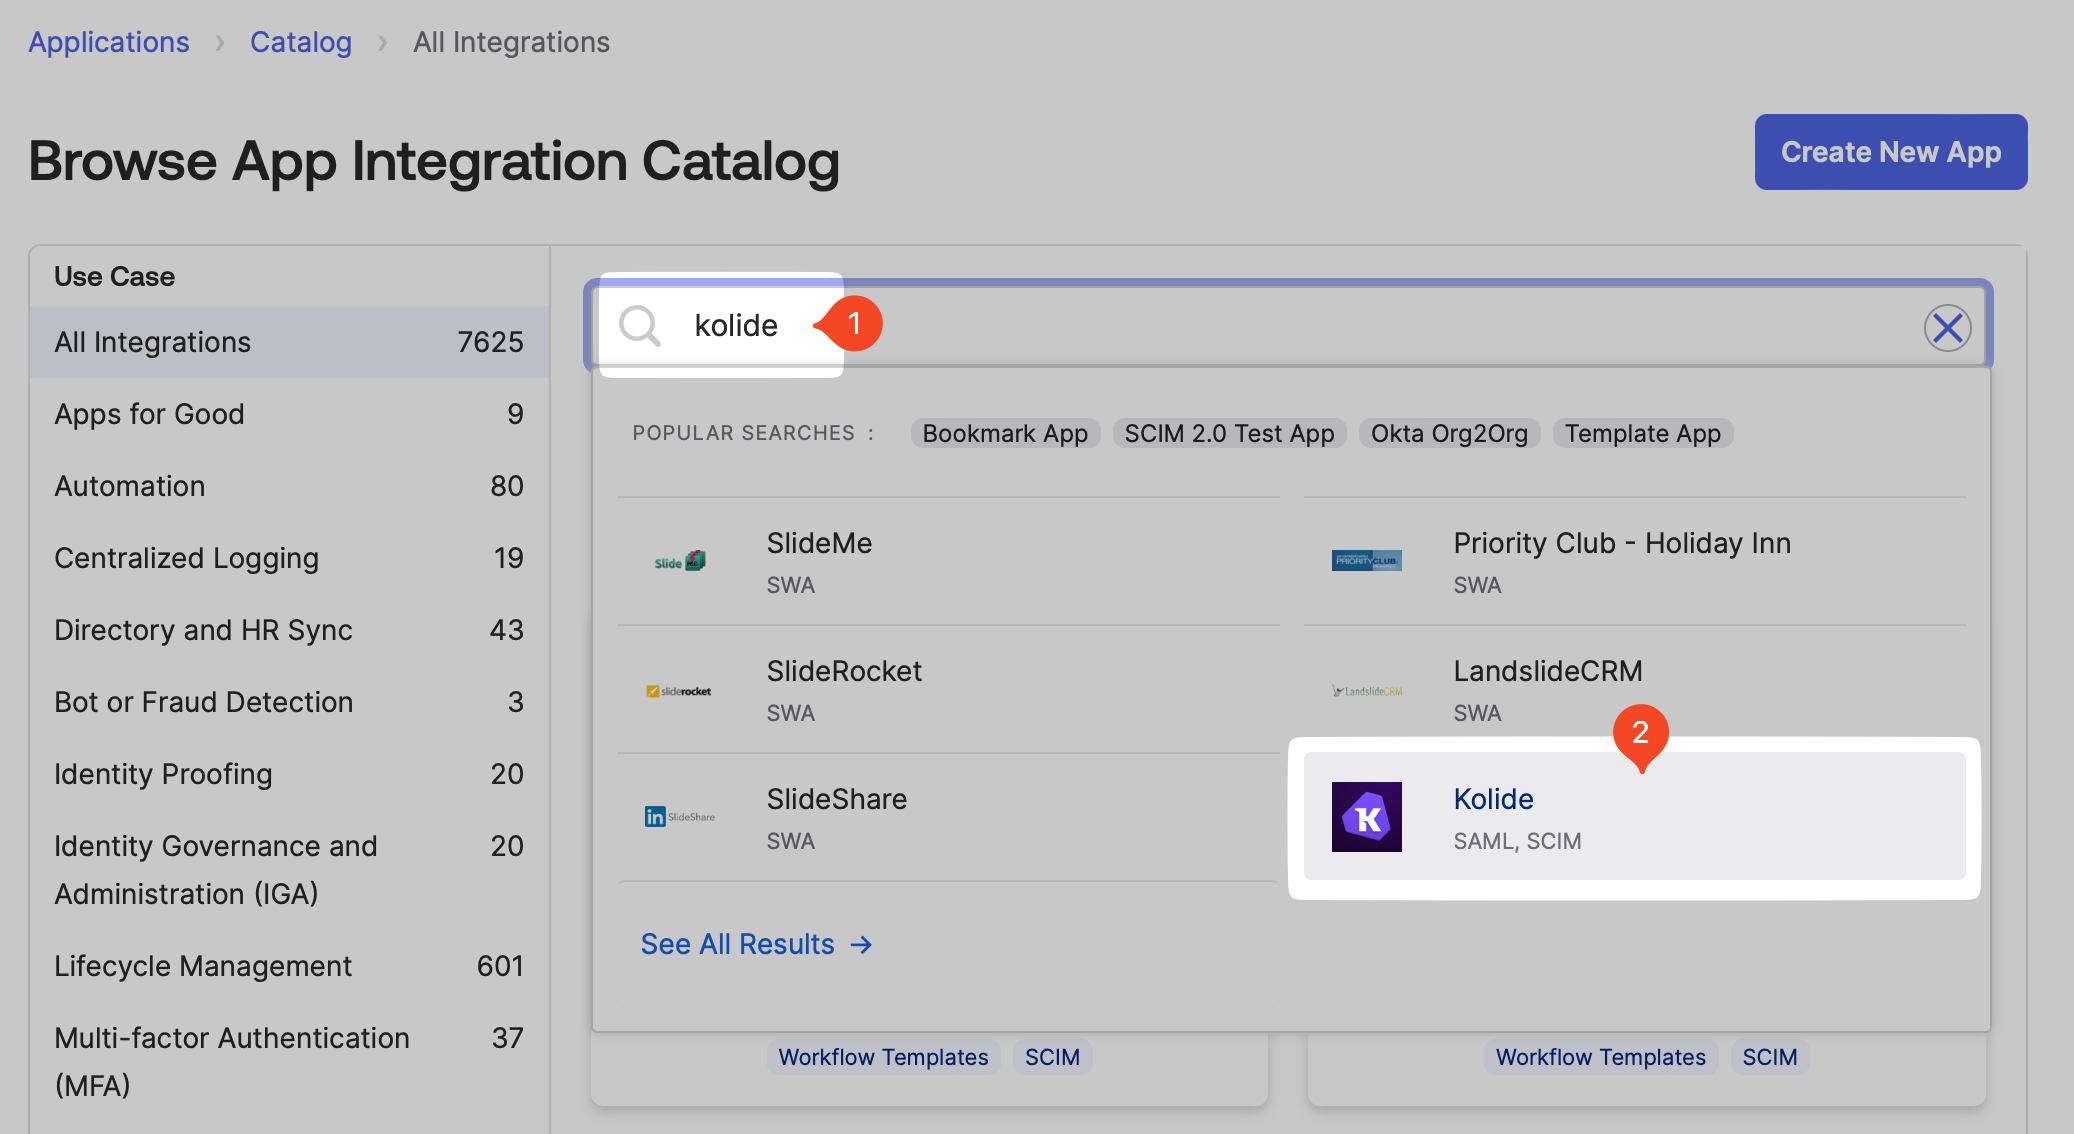
Search for “kolide” in the search bar, and then click the Kolide integration from the results.
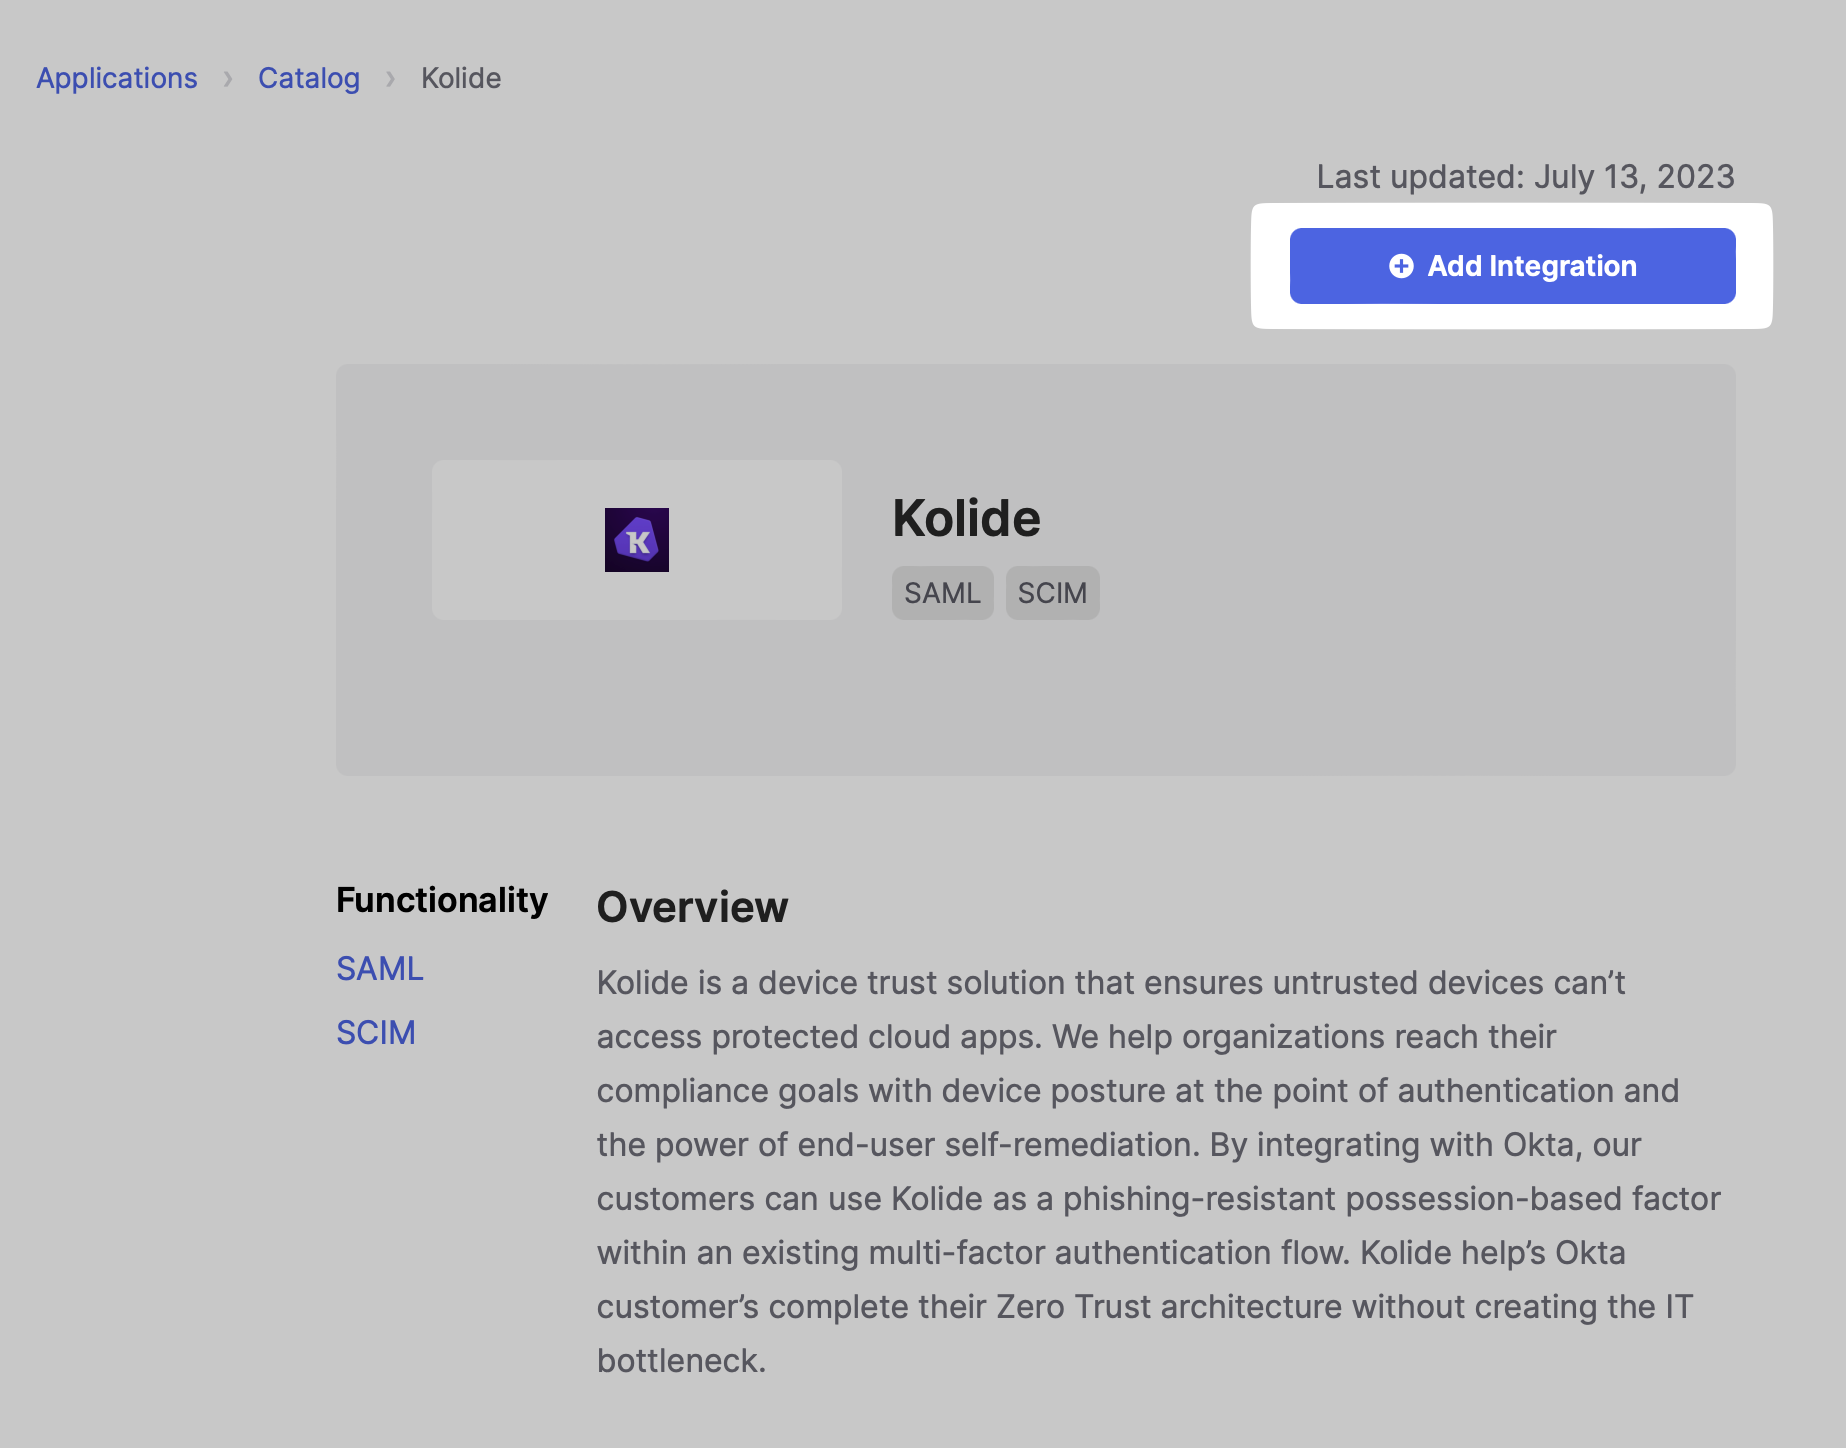
Click the Add Integration button to add the Kolide integration to your Okta instance.
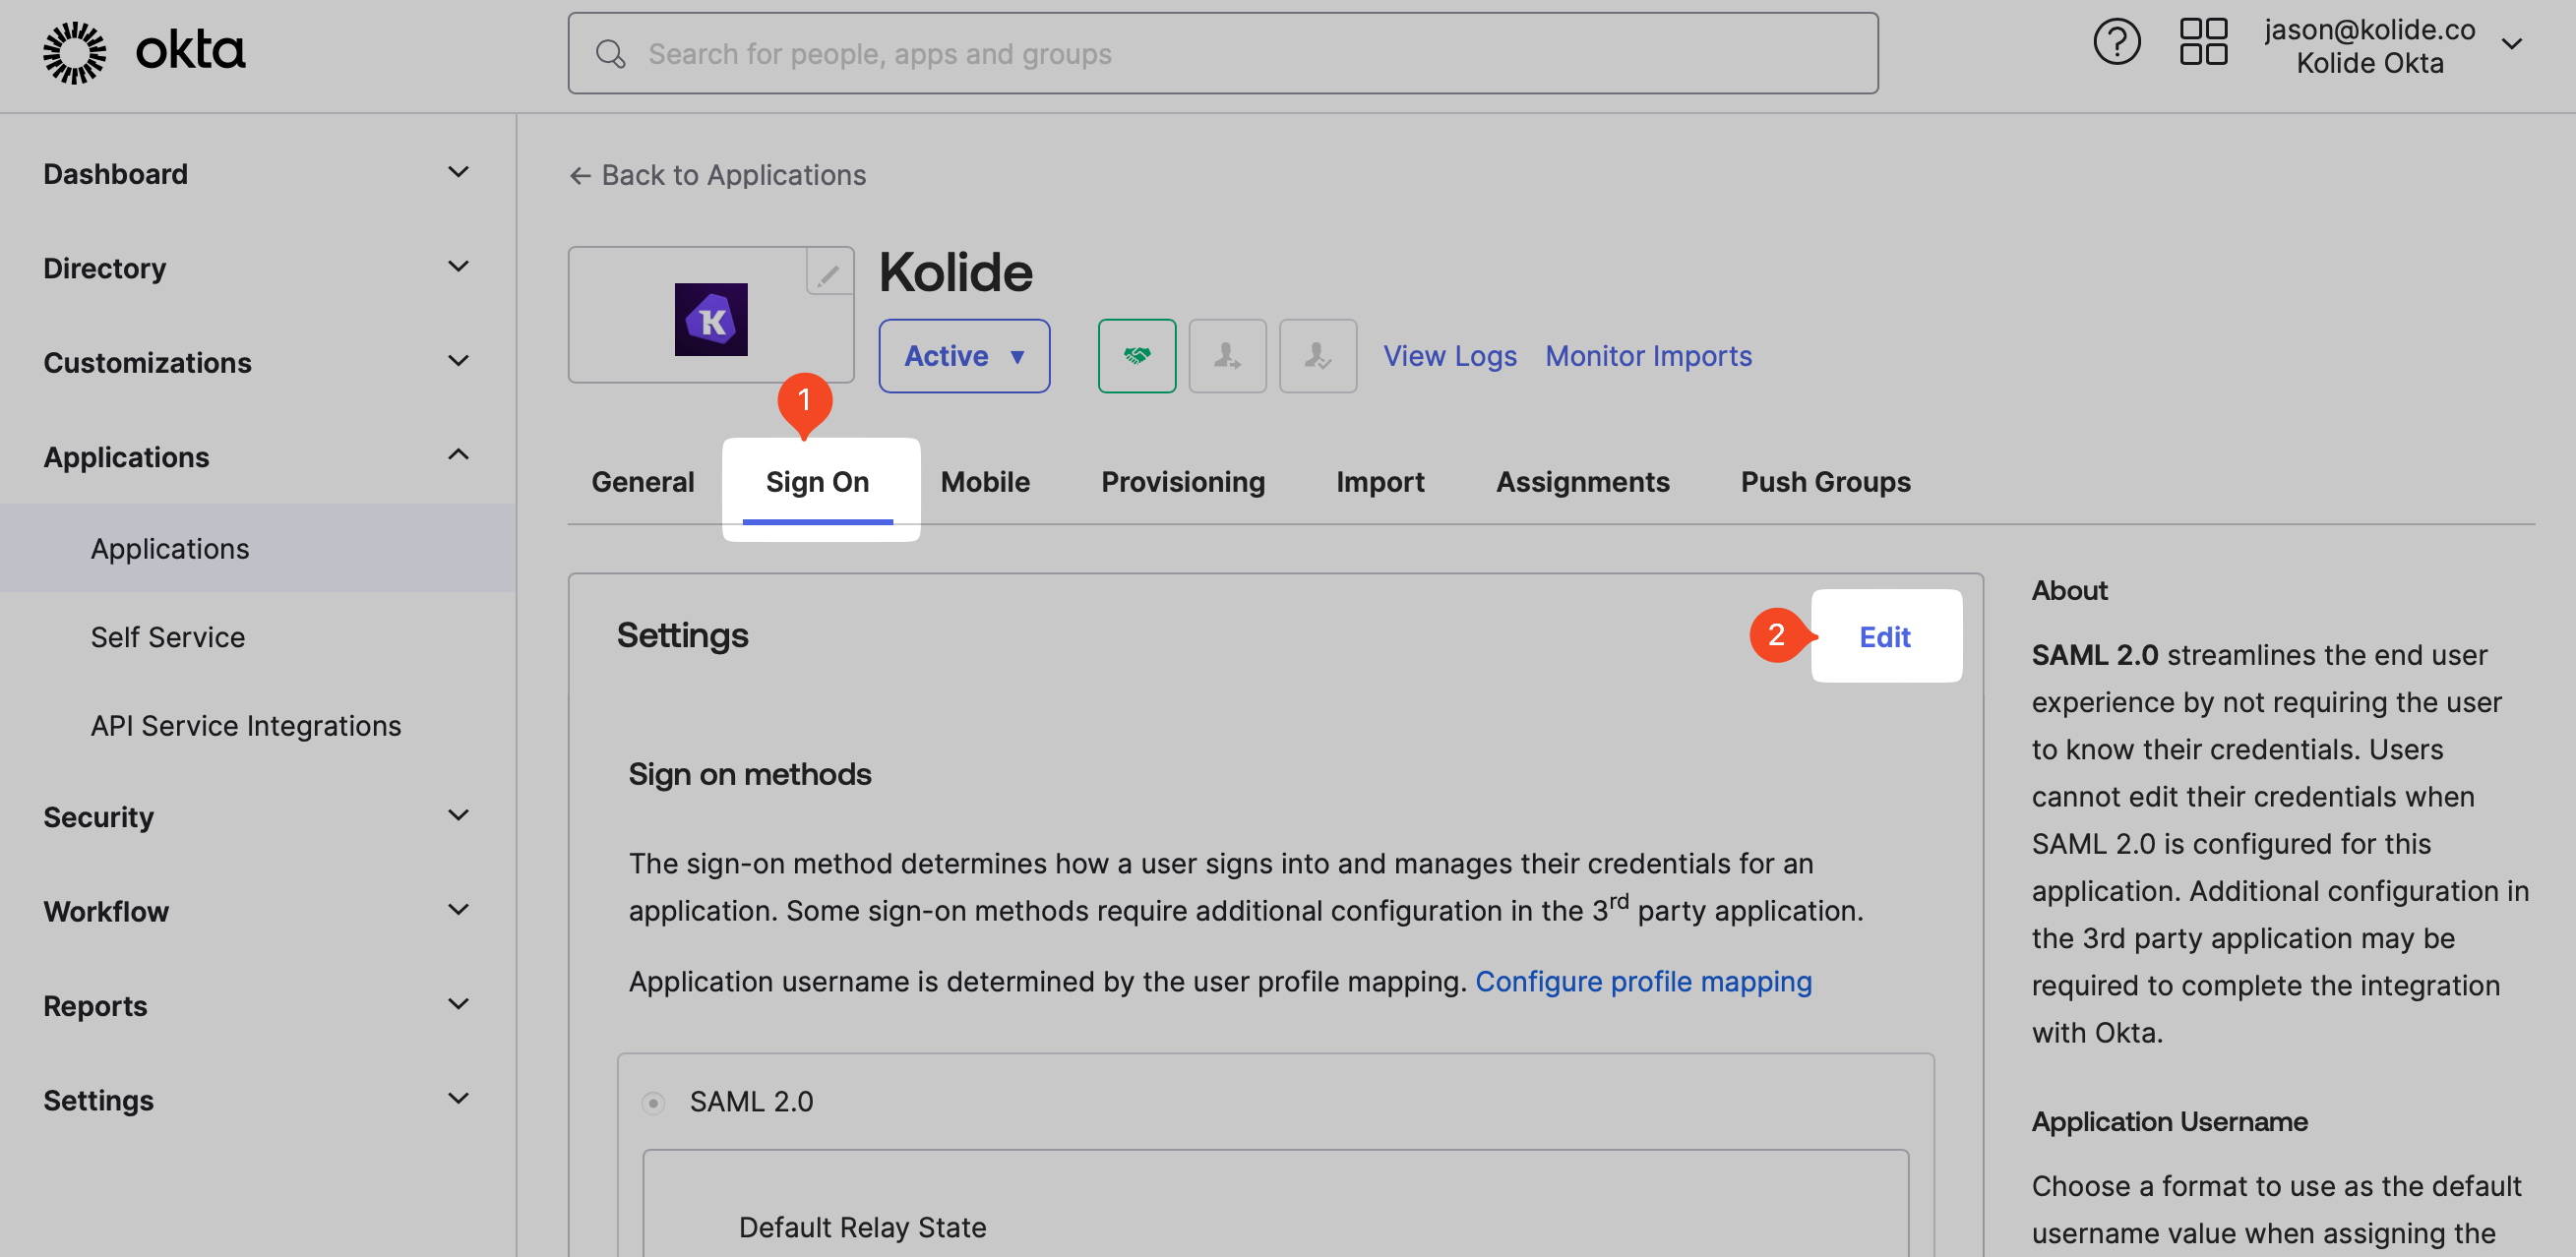
When the app integration is added to your Okta instance, you will be redirected to the applications assignments page. Click on the Sign On tab then click the Edit link.
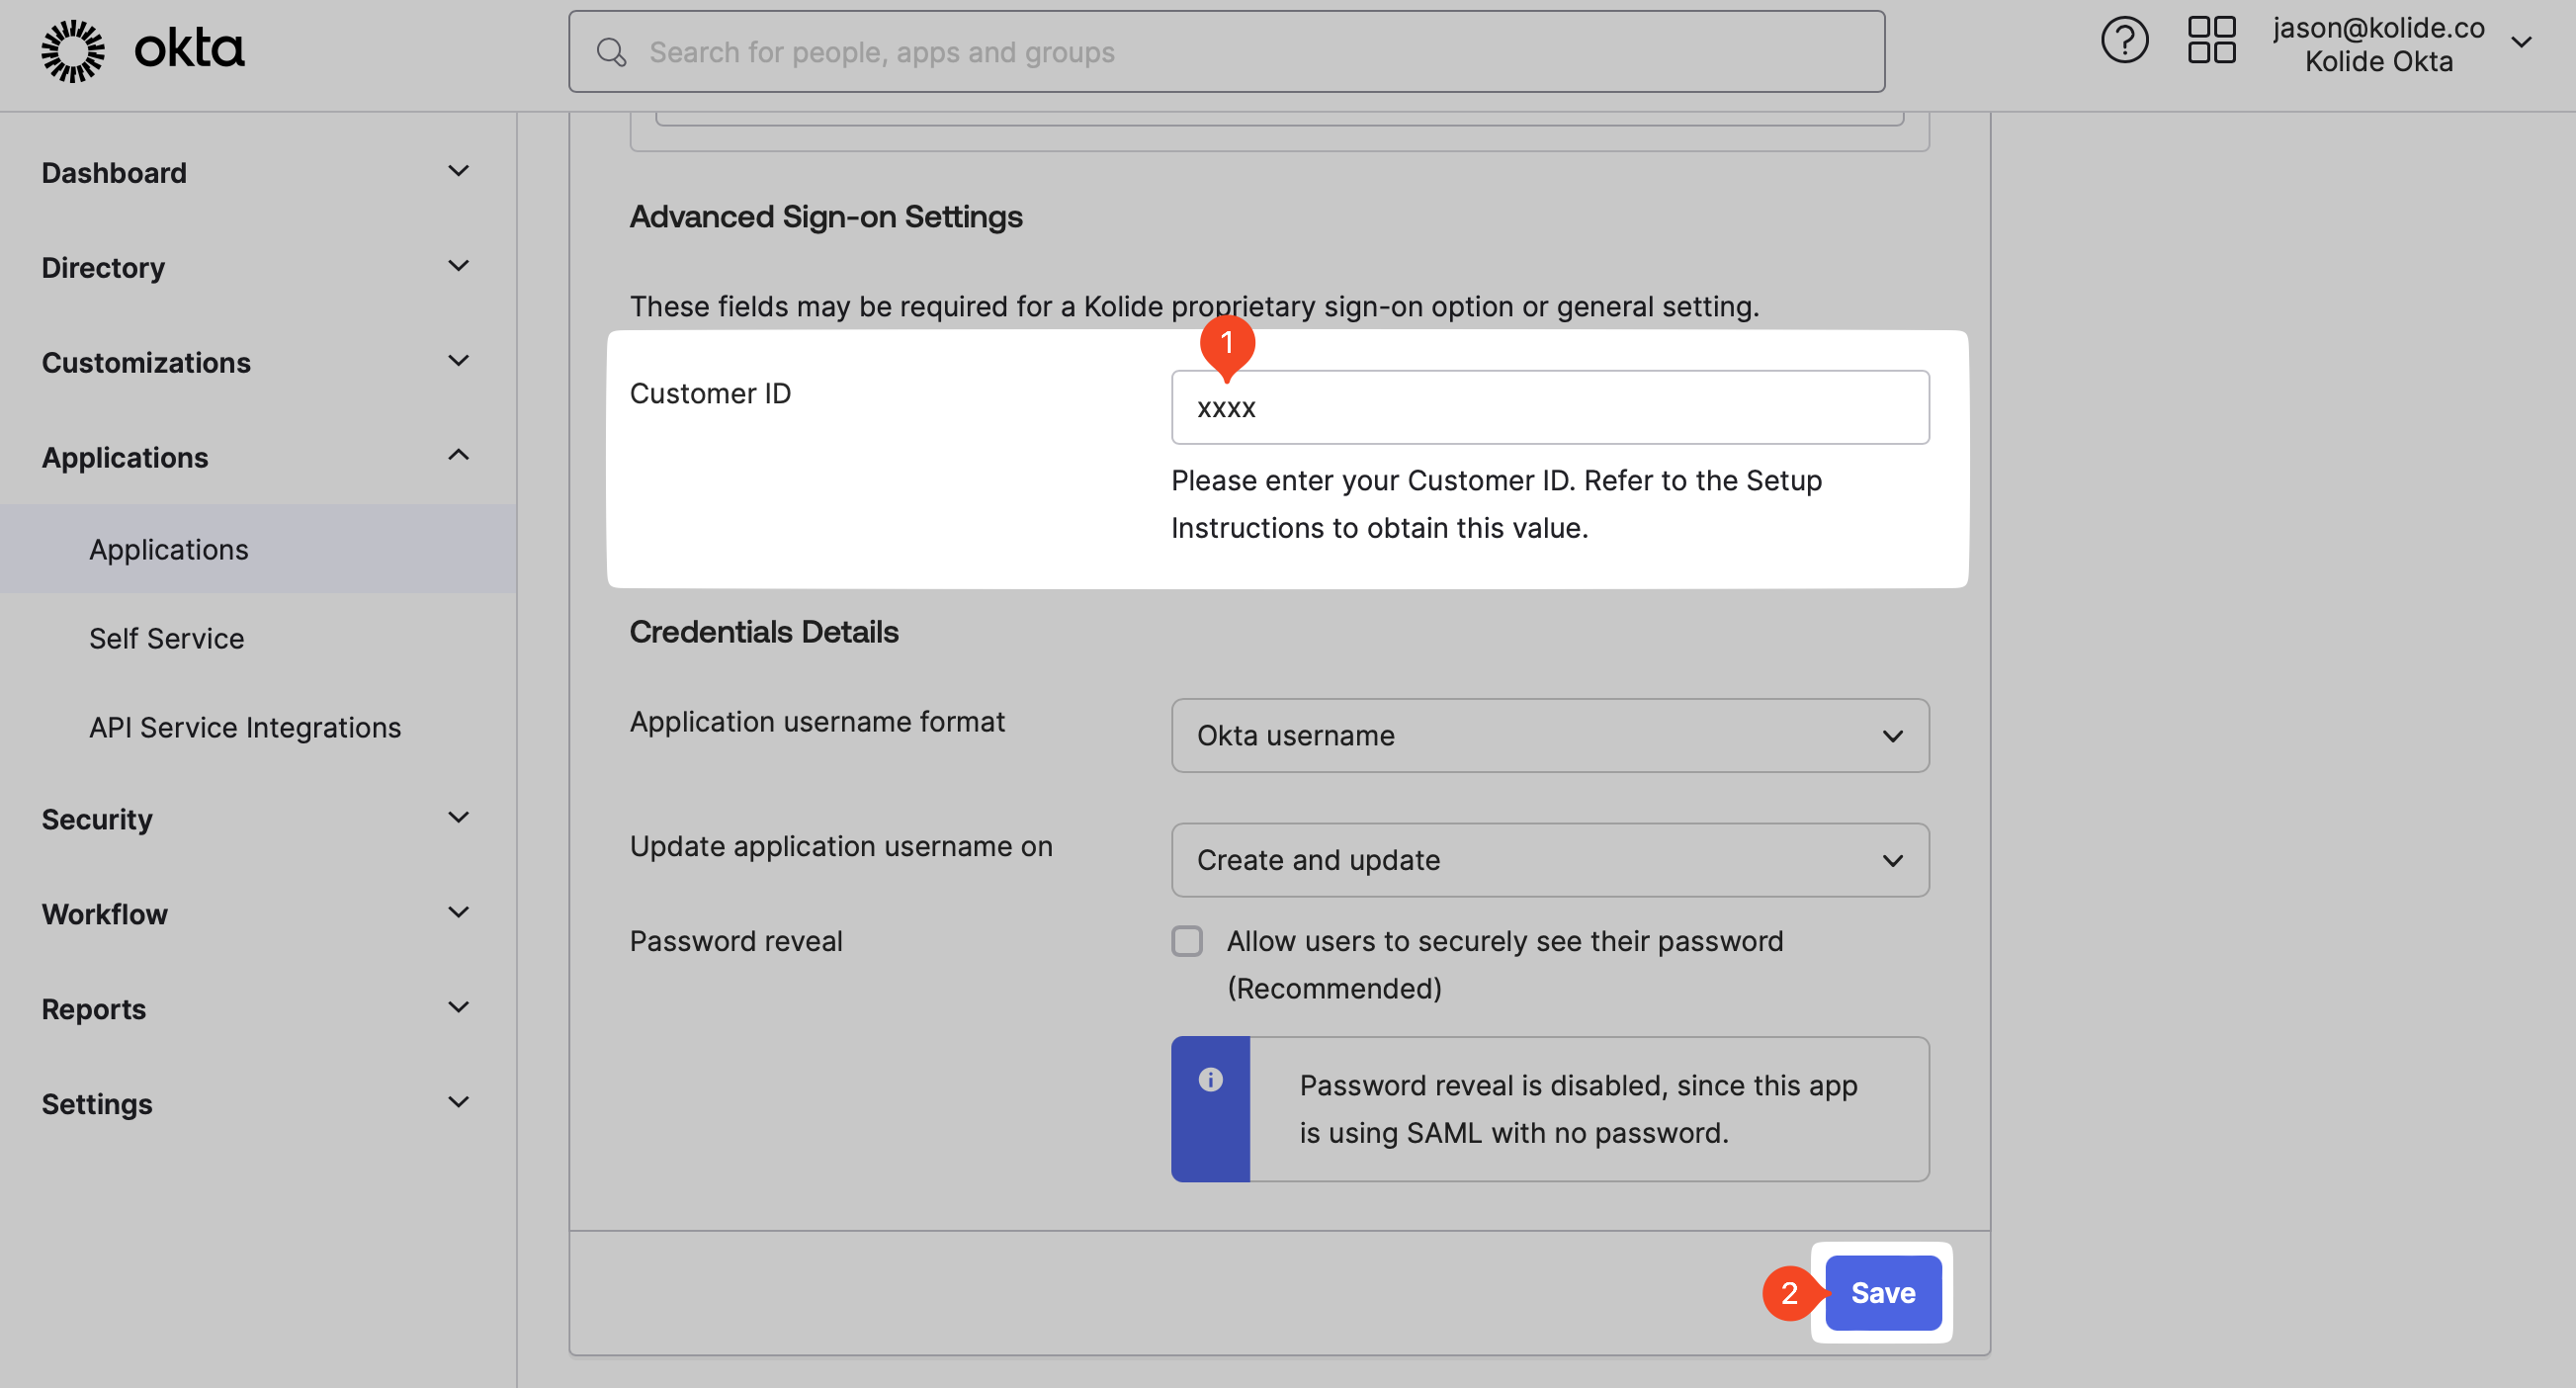
Scroll down to the Advanced Sign-on Settings section to the Customer ID field. Enter your Kolide Customer ID, and click the Save button.
Your Kolide Customer ID may be found in the Step 1 - App Setup section of the Authentication & Provisioning settings page.
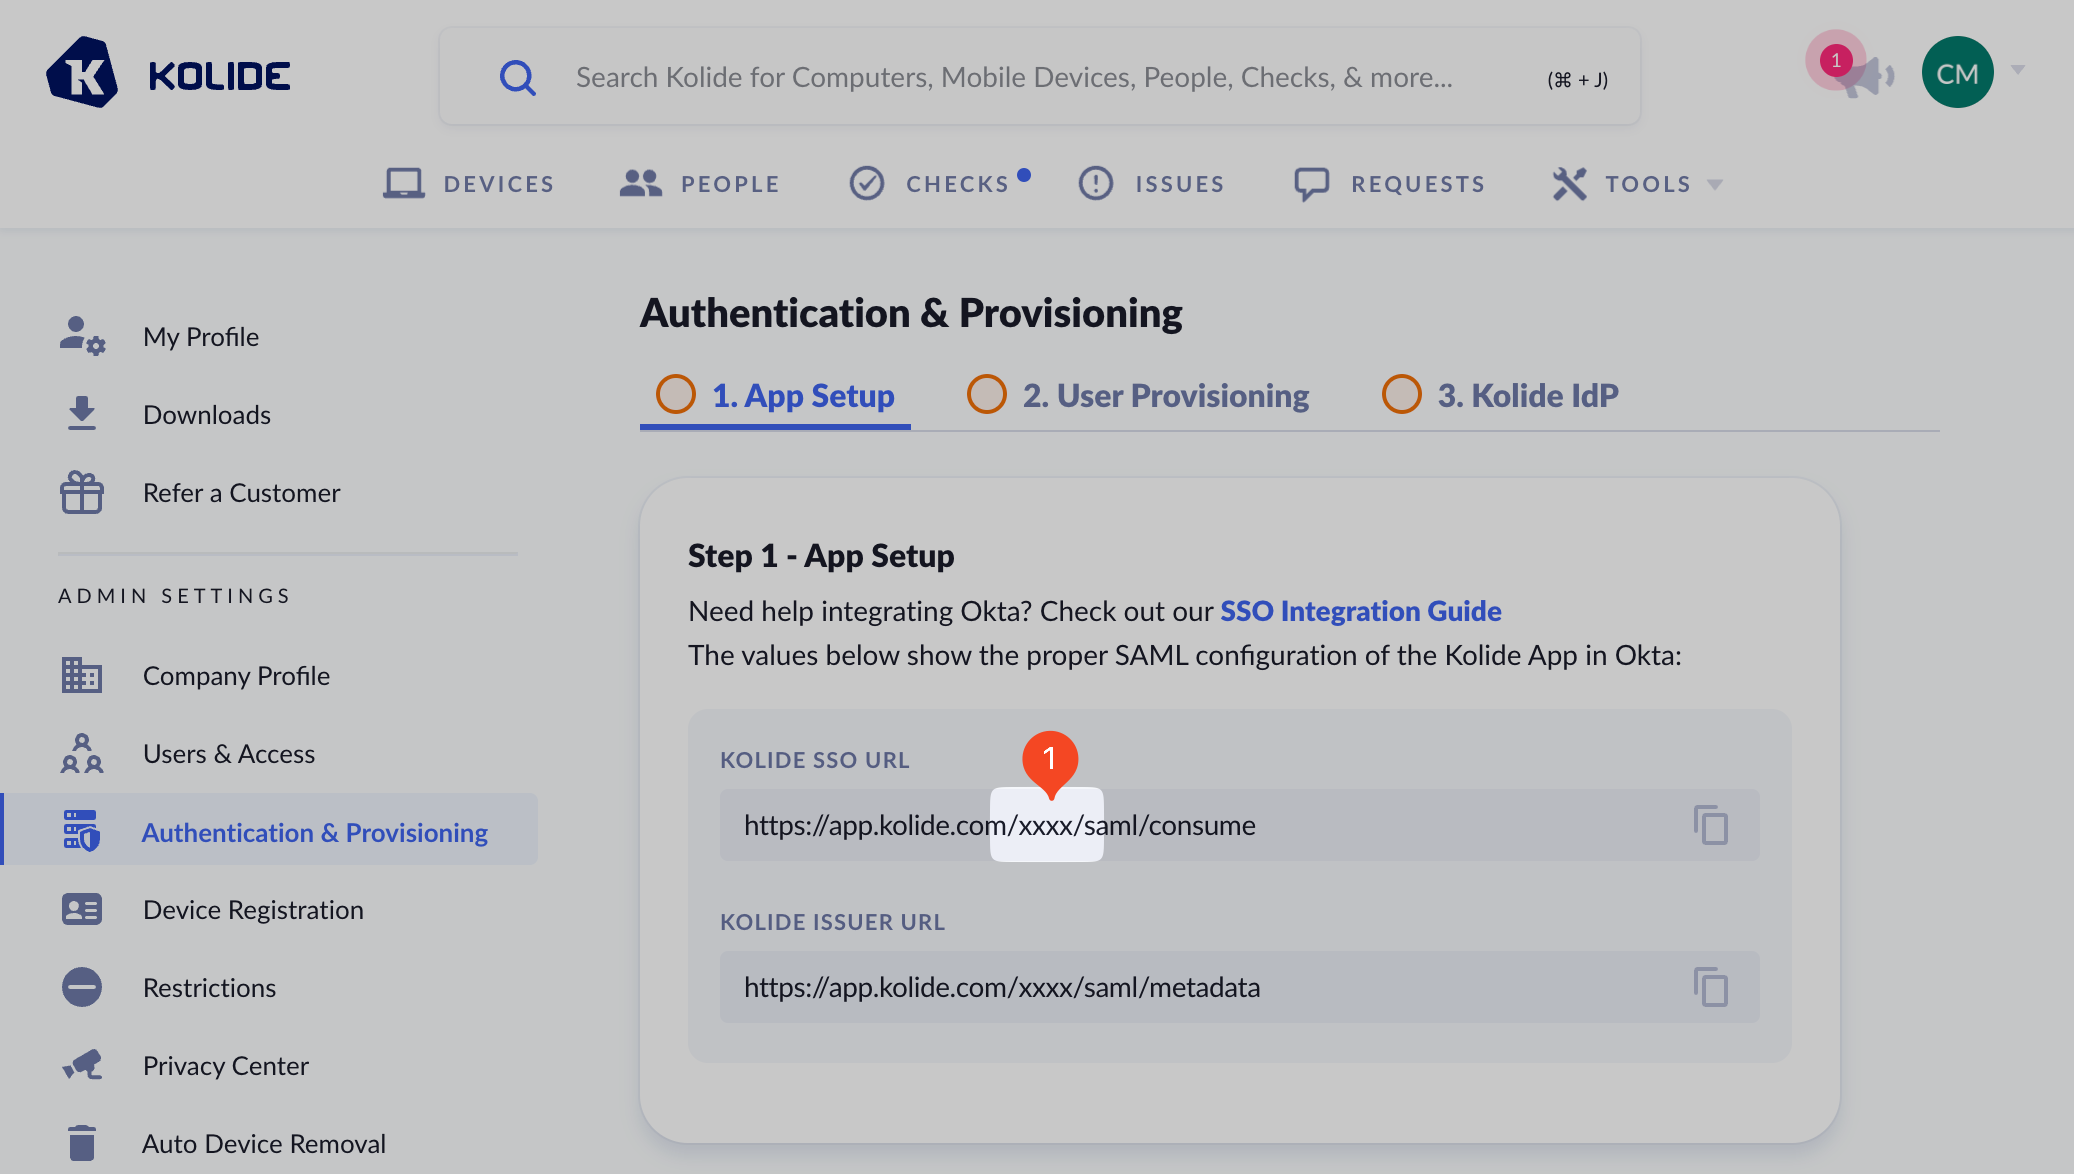
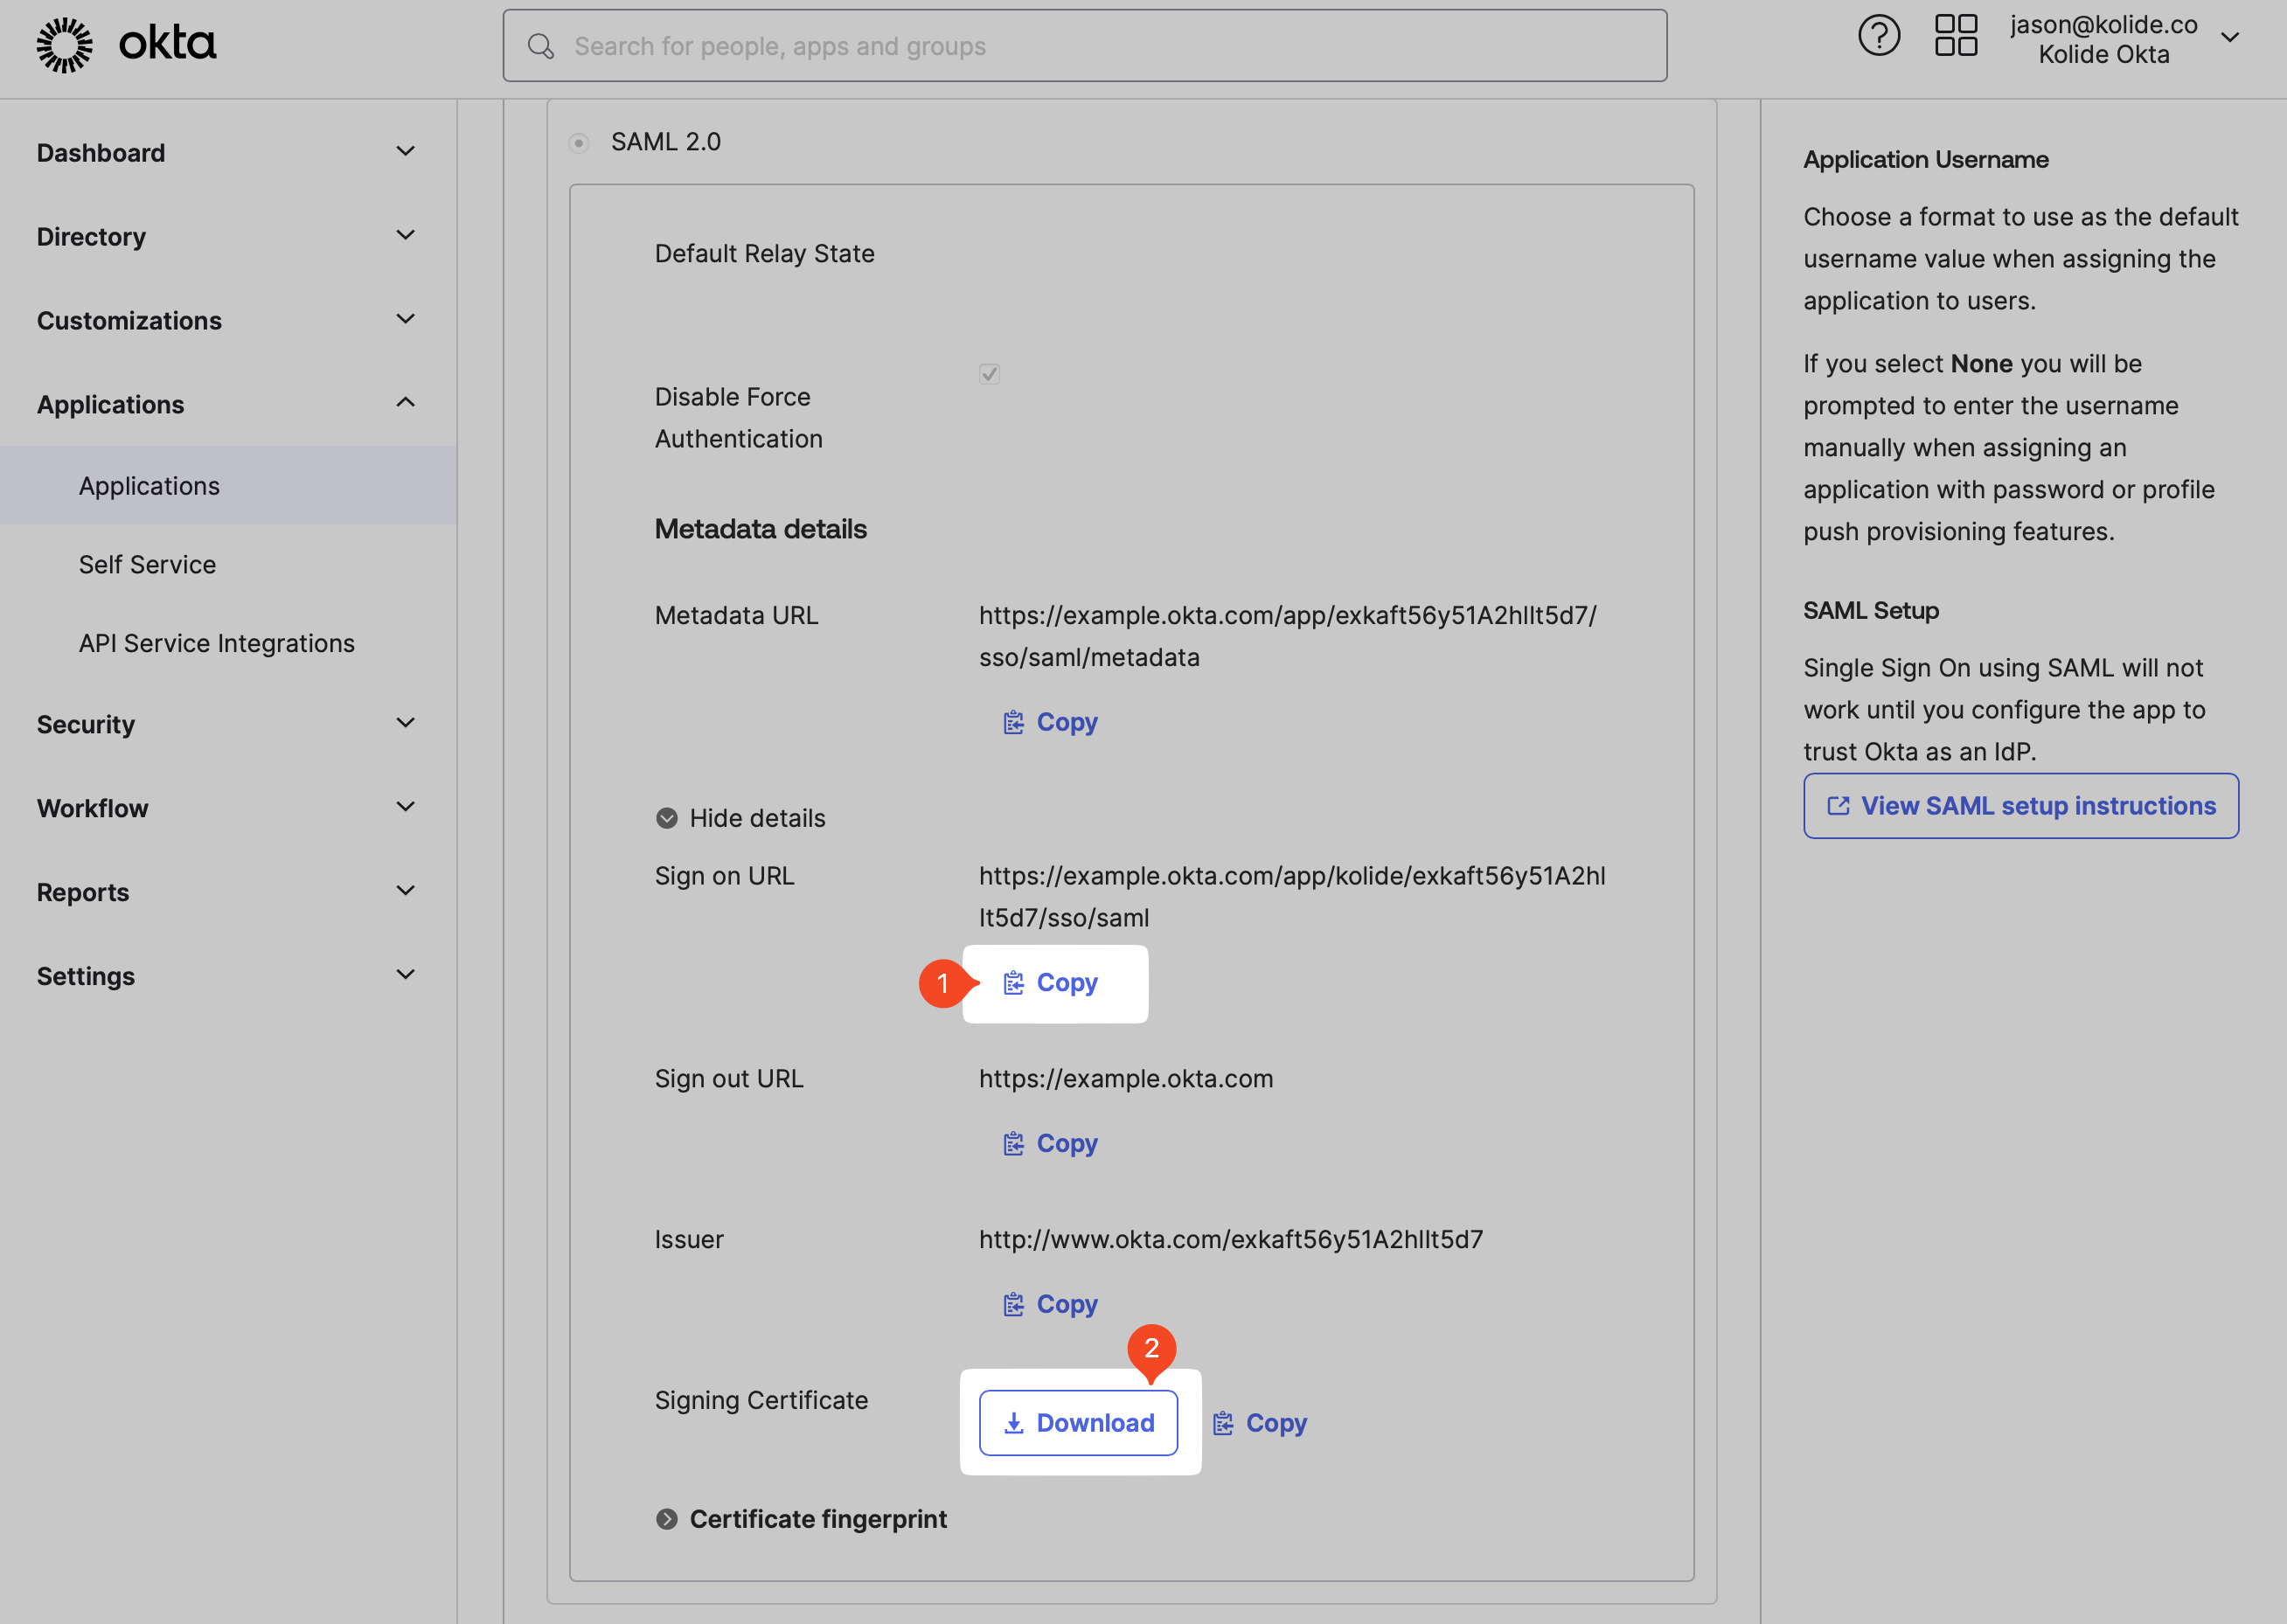
After updating the Customer ID, ensure you are still on the Sign On tab then click the More details disclosure under the SAML 2.0 Metadata details section.

From the now revealed section, copy the Sign on URL and download the Okta Signing Certificate to your computer.
Then in Kolide, paste Sign On URL value into the field labeled IDP SSO Target URL. Finally, upload the downloaded certificate by drag-and-dropping it into the X.509 Certificate field (don’t forget to delete it from your device once uploaded).
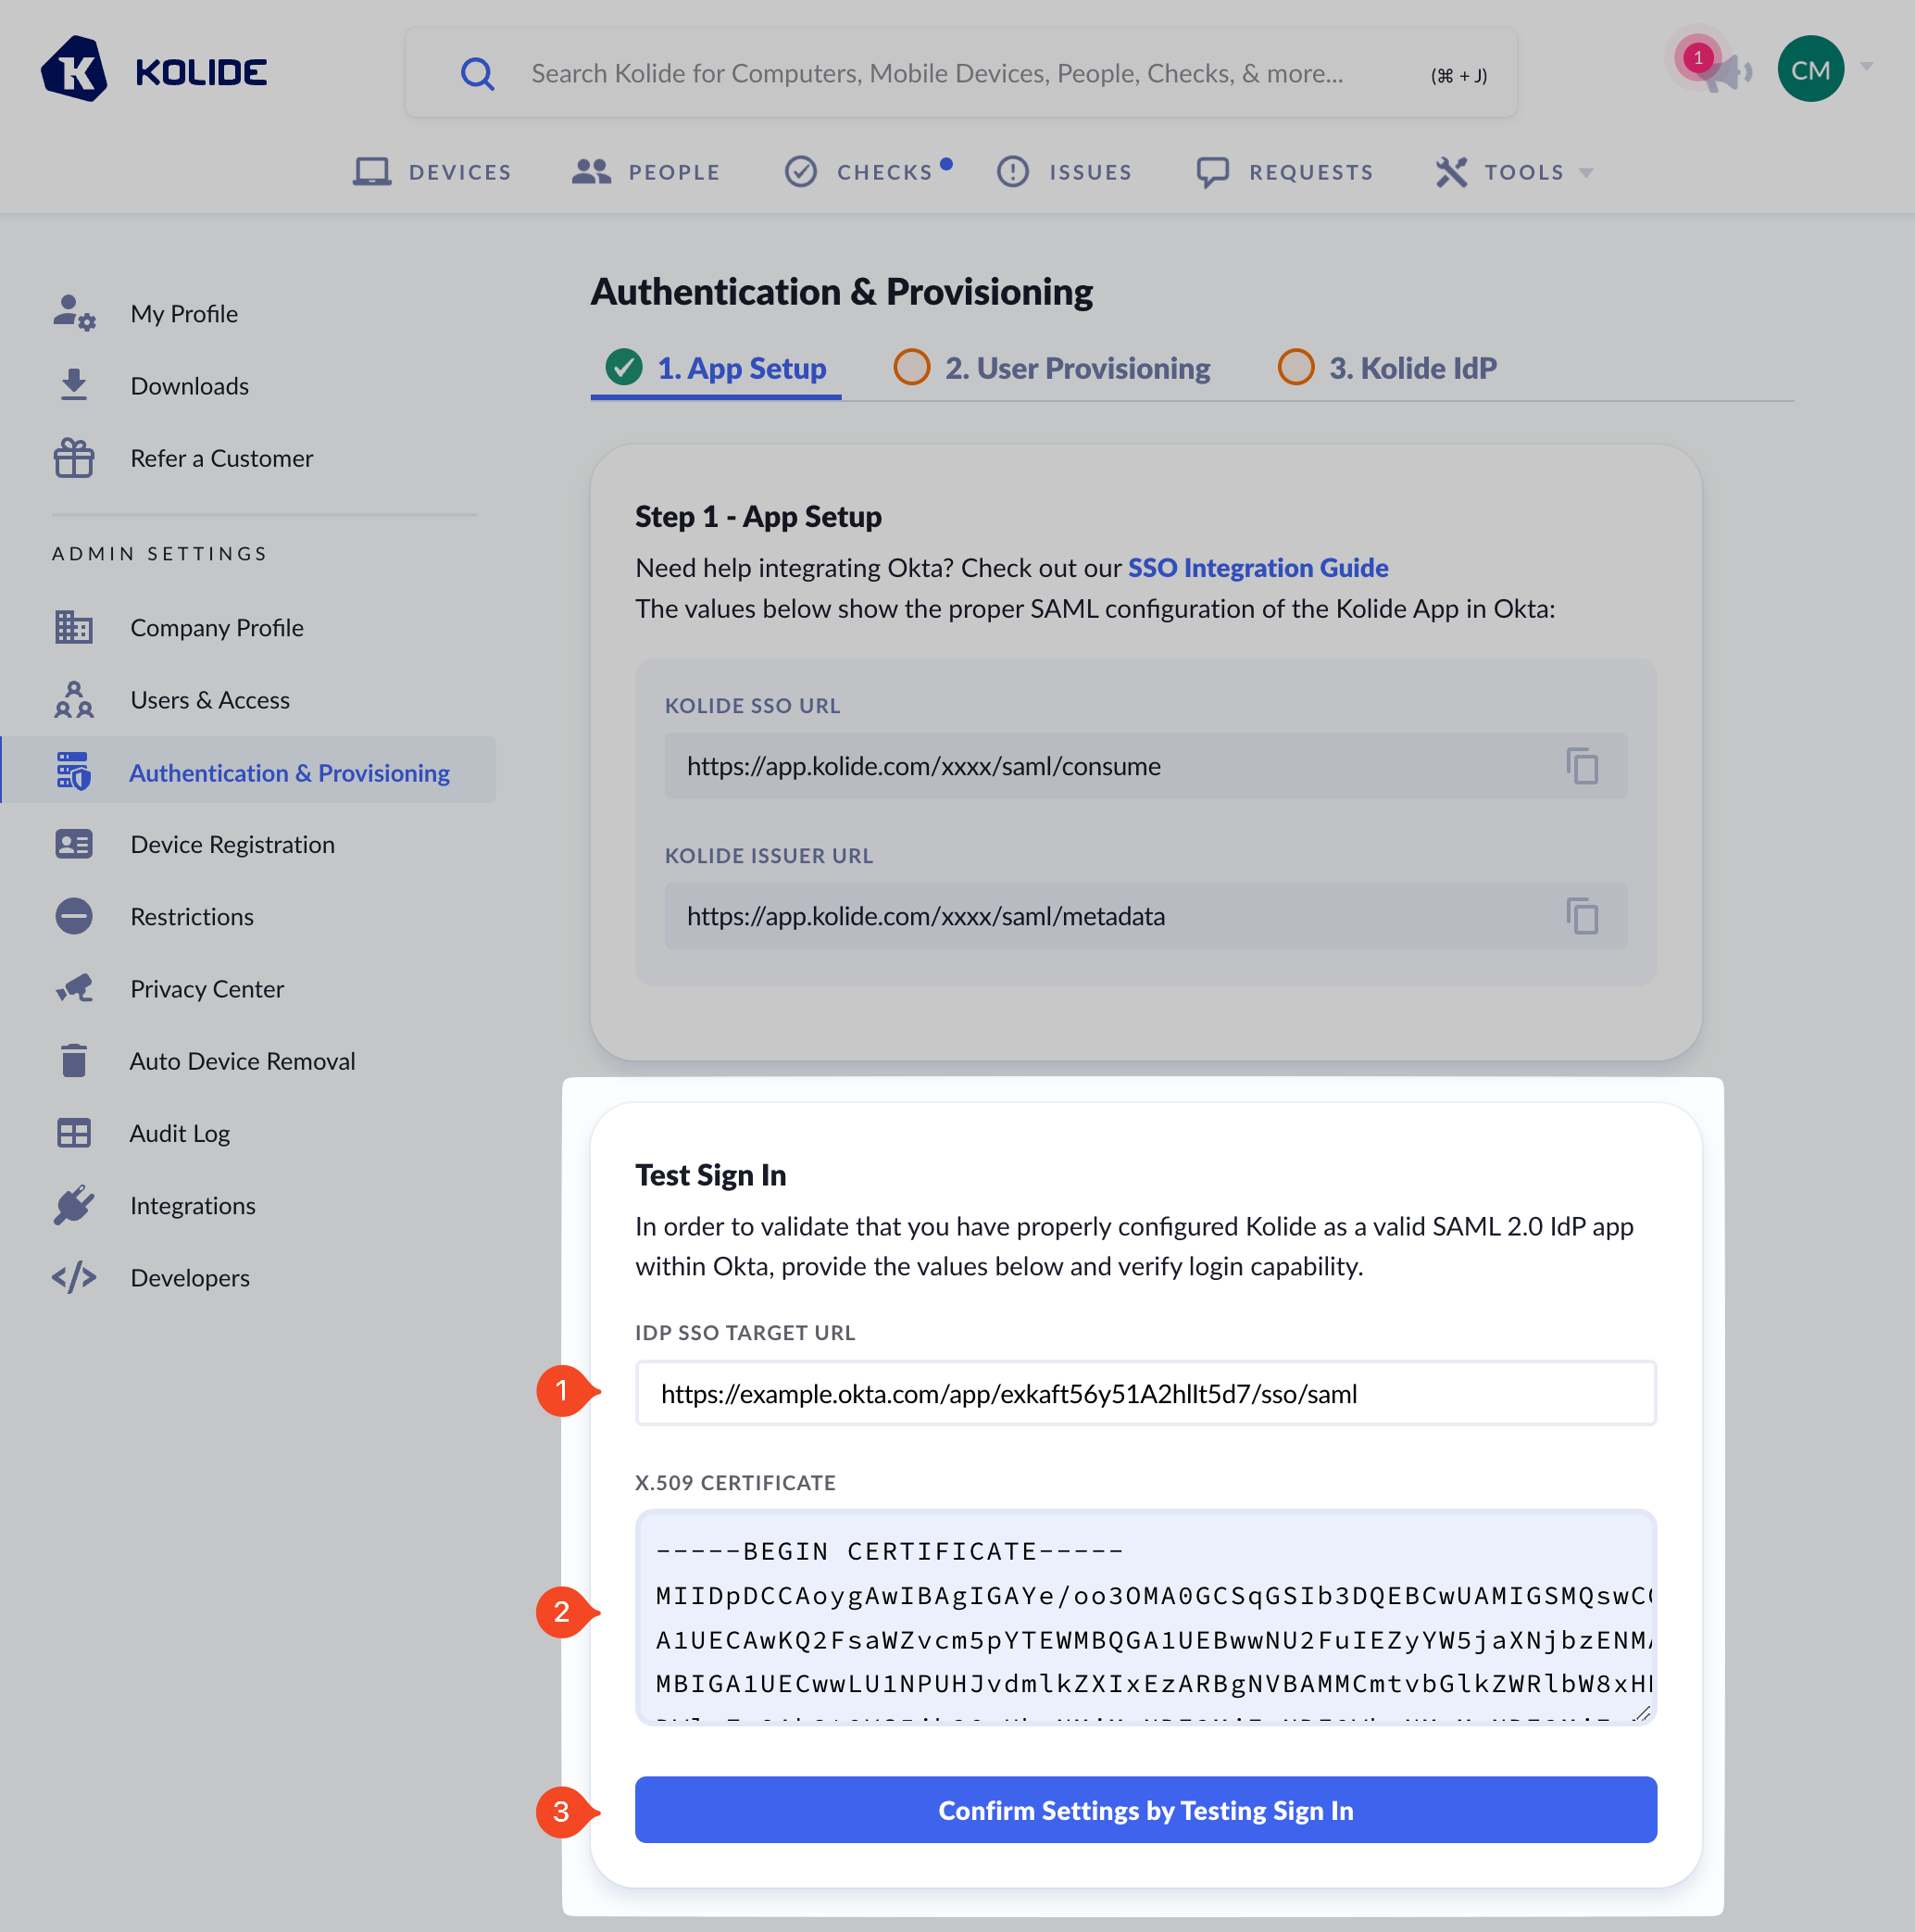
Next, click Confirm Settings by Testing Sign In and complete the authentication process to complete this step.