

People
The “People” section of the app gives Kolide administrators a complete view of all the end-users who are in-scope for Kolide’s authentication.
What is a Person?
A “Person” in Kolide is meant to be a representation of a single human. When you use Kolide correctly, you should never have multiple person records that refer to the same underlying person in real life.
Once a Person is listed, they can register their devices, and authenticate via Kolide device trust through any allowed devices.
Provisioning People
People are provisioned (and deprovisioned) automatically through an Okta SCIM integration. Kolide administrators can set up SCIM by following the steps outlined in the Okta Setup Guide.
Okta Identities
In practice, a single Person may have multiple Okta identities that they use at their organization. For example, it’s common for organizations to create two Okta accounts for any employee that is also an Okta administrator (e.g., jappleseed@example.com and jappleseed-admin@example.com). To support this, Kolide supports associating more than one Okta Identity to a single Person in Kolide.
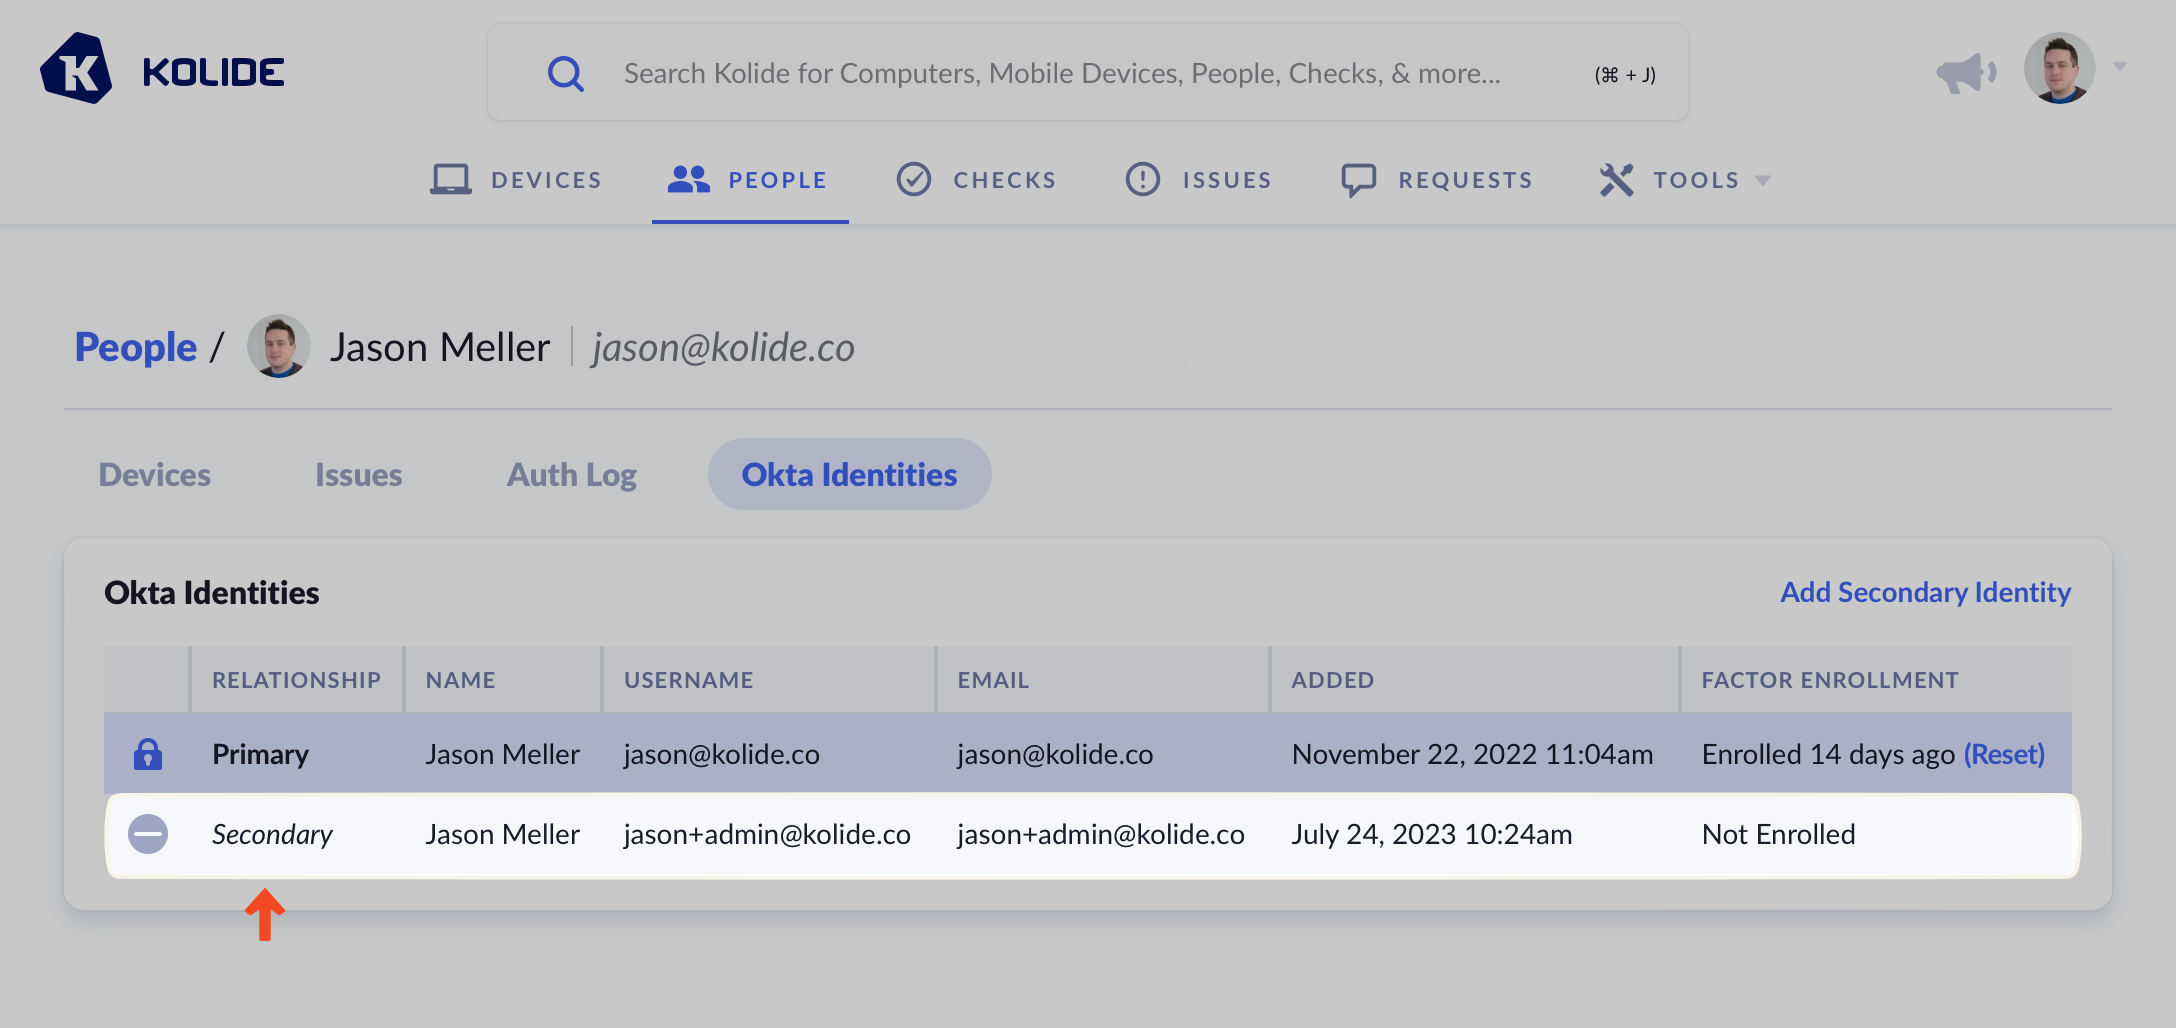
Viewing Okta Identities
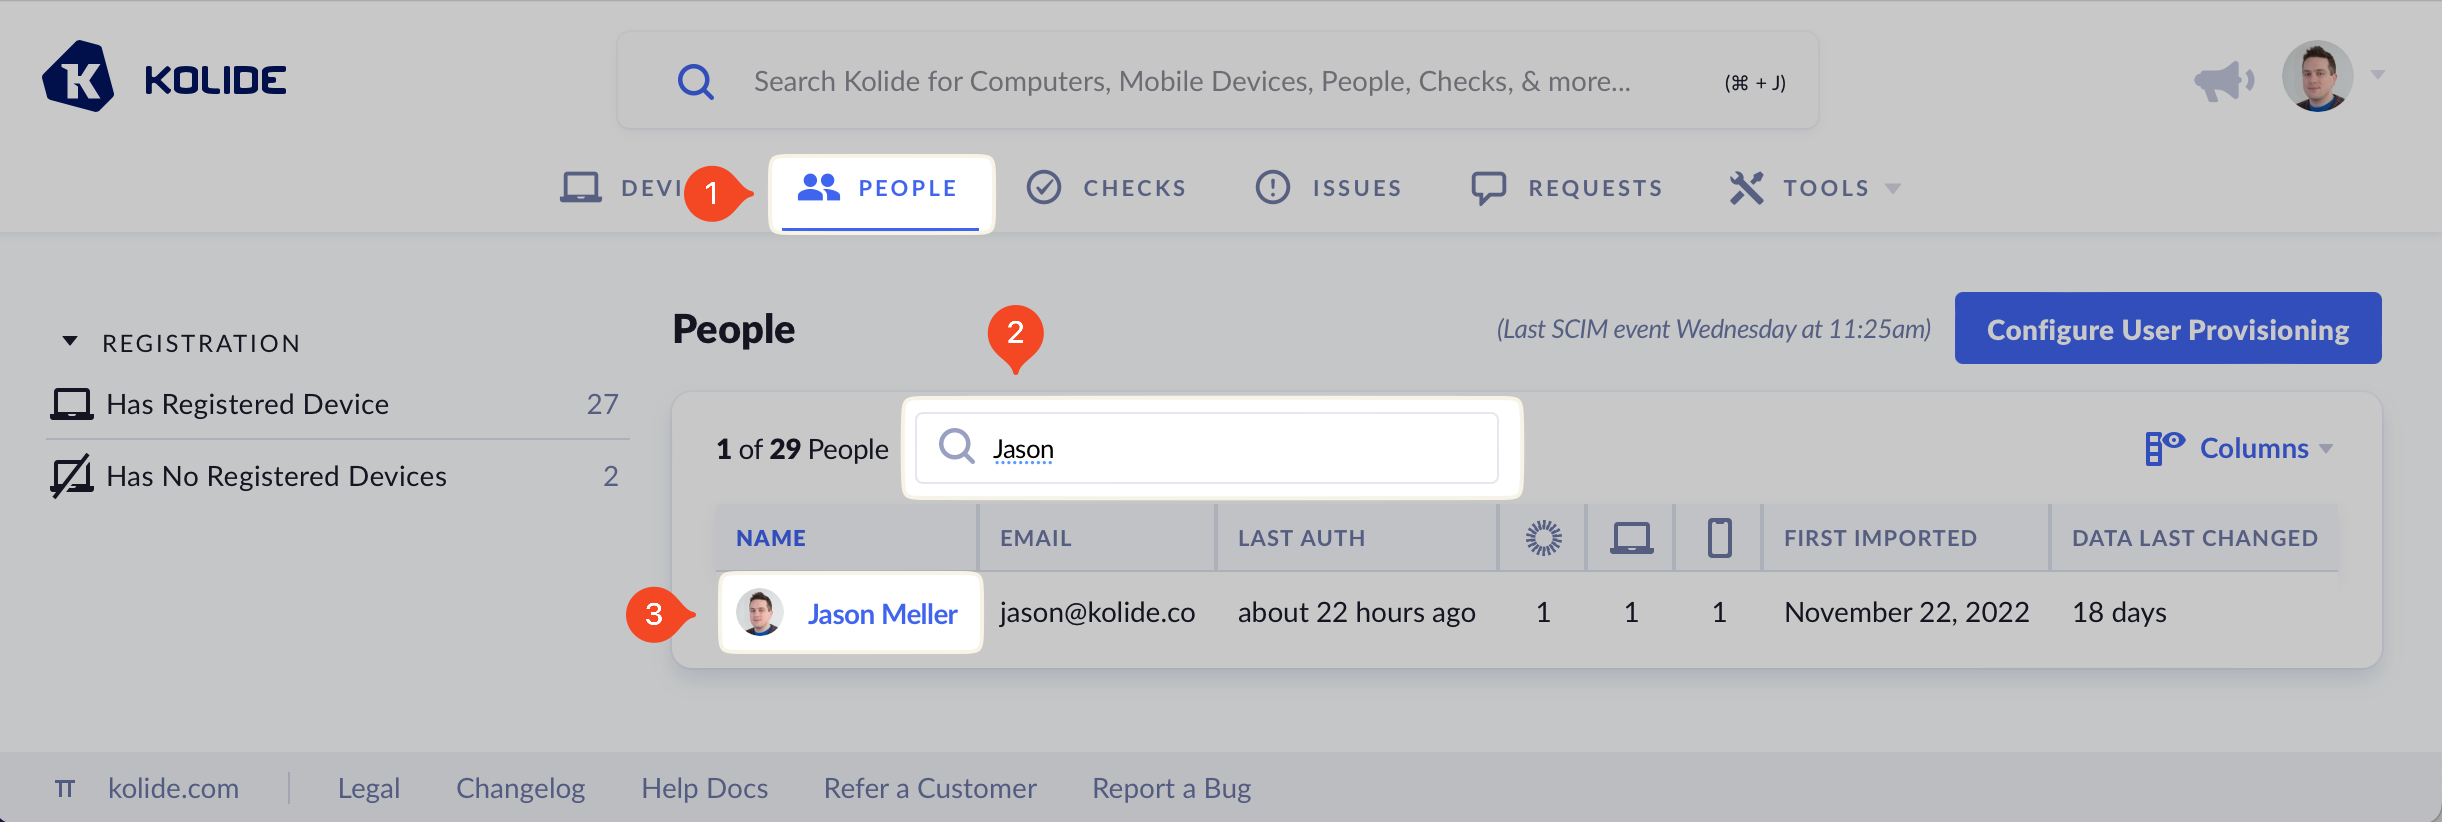
To view the Okta Identities currently associated with a person:
- Click People in the top menu.
- Locate the person you are looking for by entering their name or email in the search.
Click their name in the table.
Click Okta Identities.
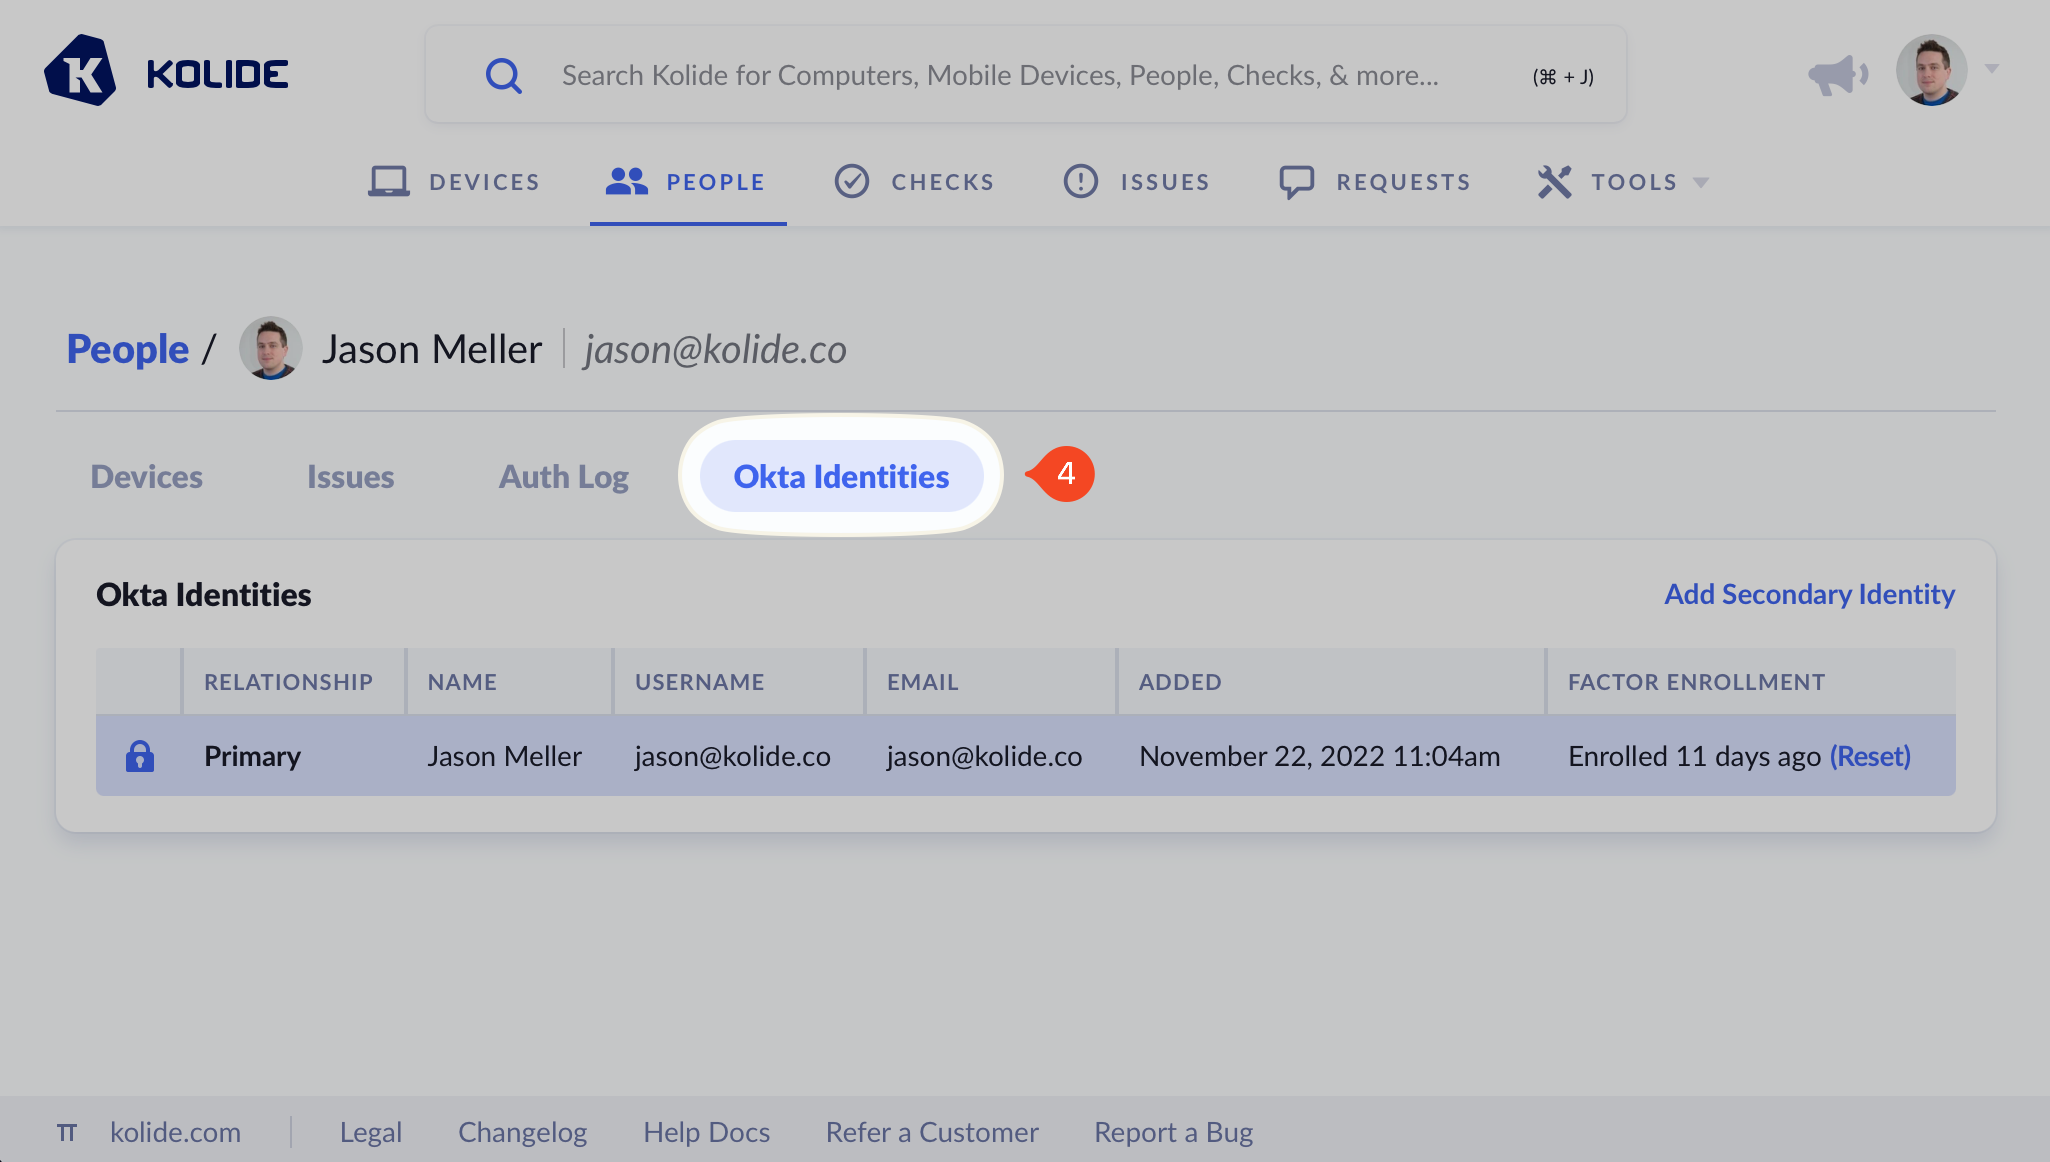
If the Person has more than one Okta Identity, you will see it listed here. The Primary identity is always the first Okta user provisioned via SCIM that has the Person’s email address. It currently has no impact on how Kolide operates, so don’t worry about ensuring a specific identity is set as the primary.
Automatically Adding Secondary Identities
In Okta, it is possible to create multiple users, each with their own unique username, but all that have the same primary email address. When these users are provisioned to Kolide via SCIM, Kolide will automatically associate these identities to the same Person in Kolide.
Manually Adding Secondary Identities
In some cases, a single Person in Kolide may regularly use multiple Okta accounts each with different emails. In these cases, Kolide cannot automatically associate the Okta Identity with the Person in Kolide, but a Kolide administrator can manually add them.
To perform this process, follow these steps:
Visit the Okta Identities page by following these steps.
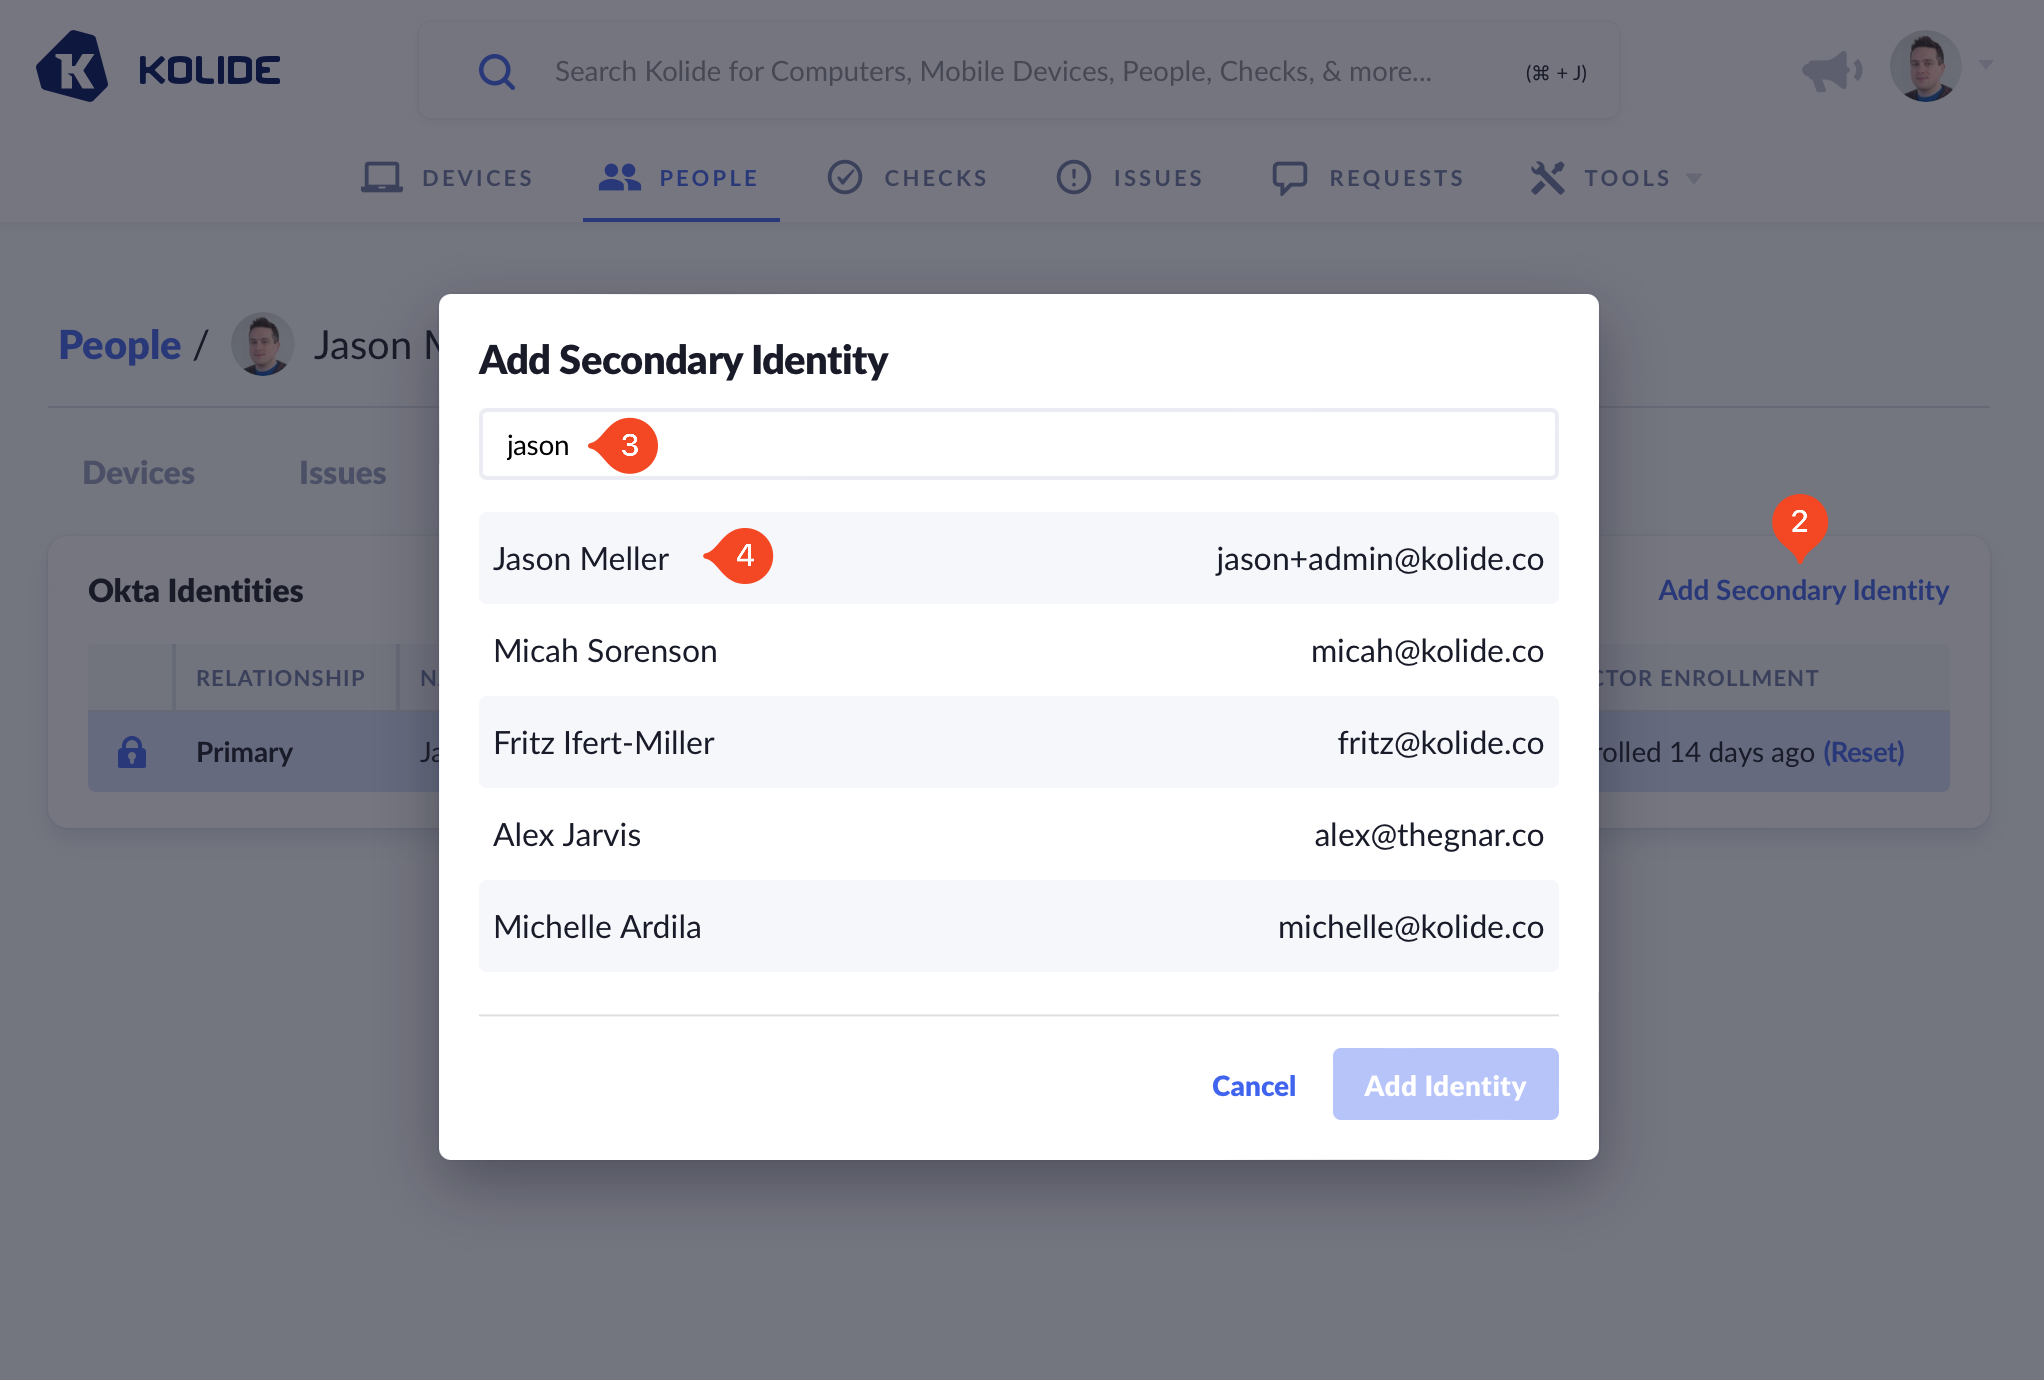
Next, click Add Secondary Identity.
In the modal that appears, search for the new identity by entering its matching username.
Click the name of the identity you wish to add.
Review any warnings and then click Add Identity in the bottom-right of the modal window.
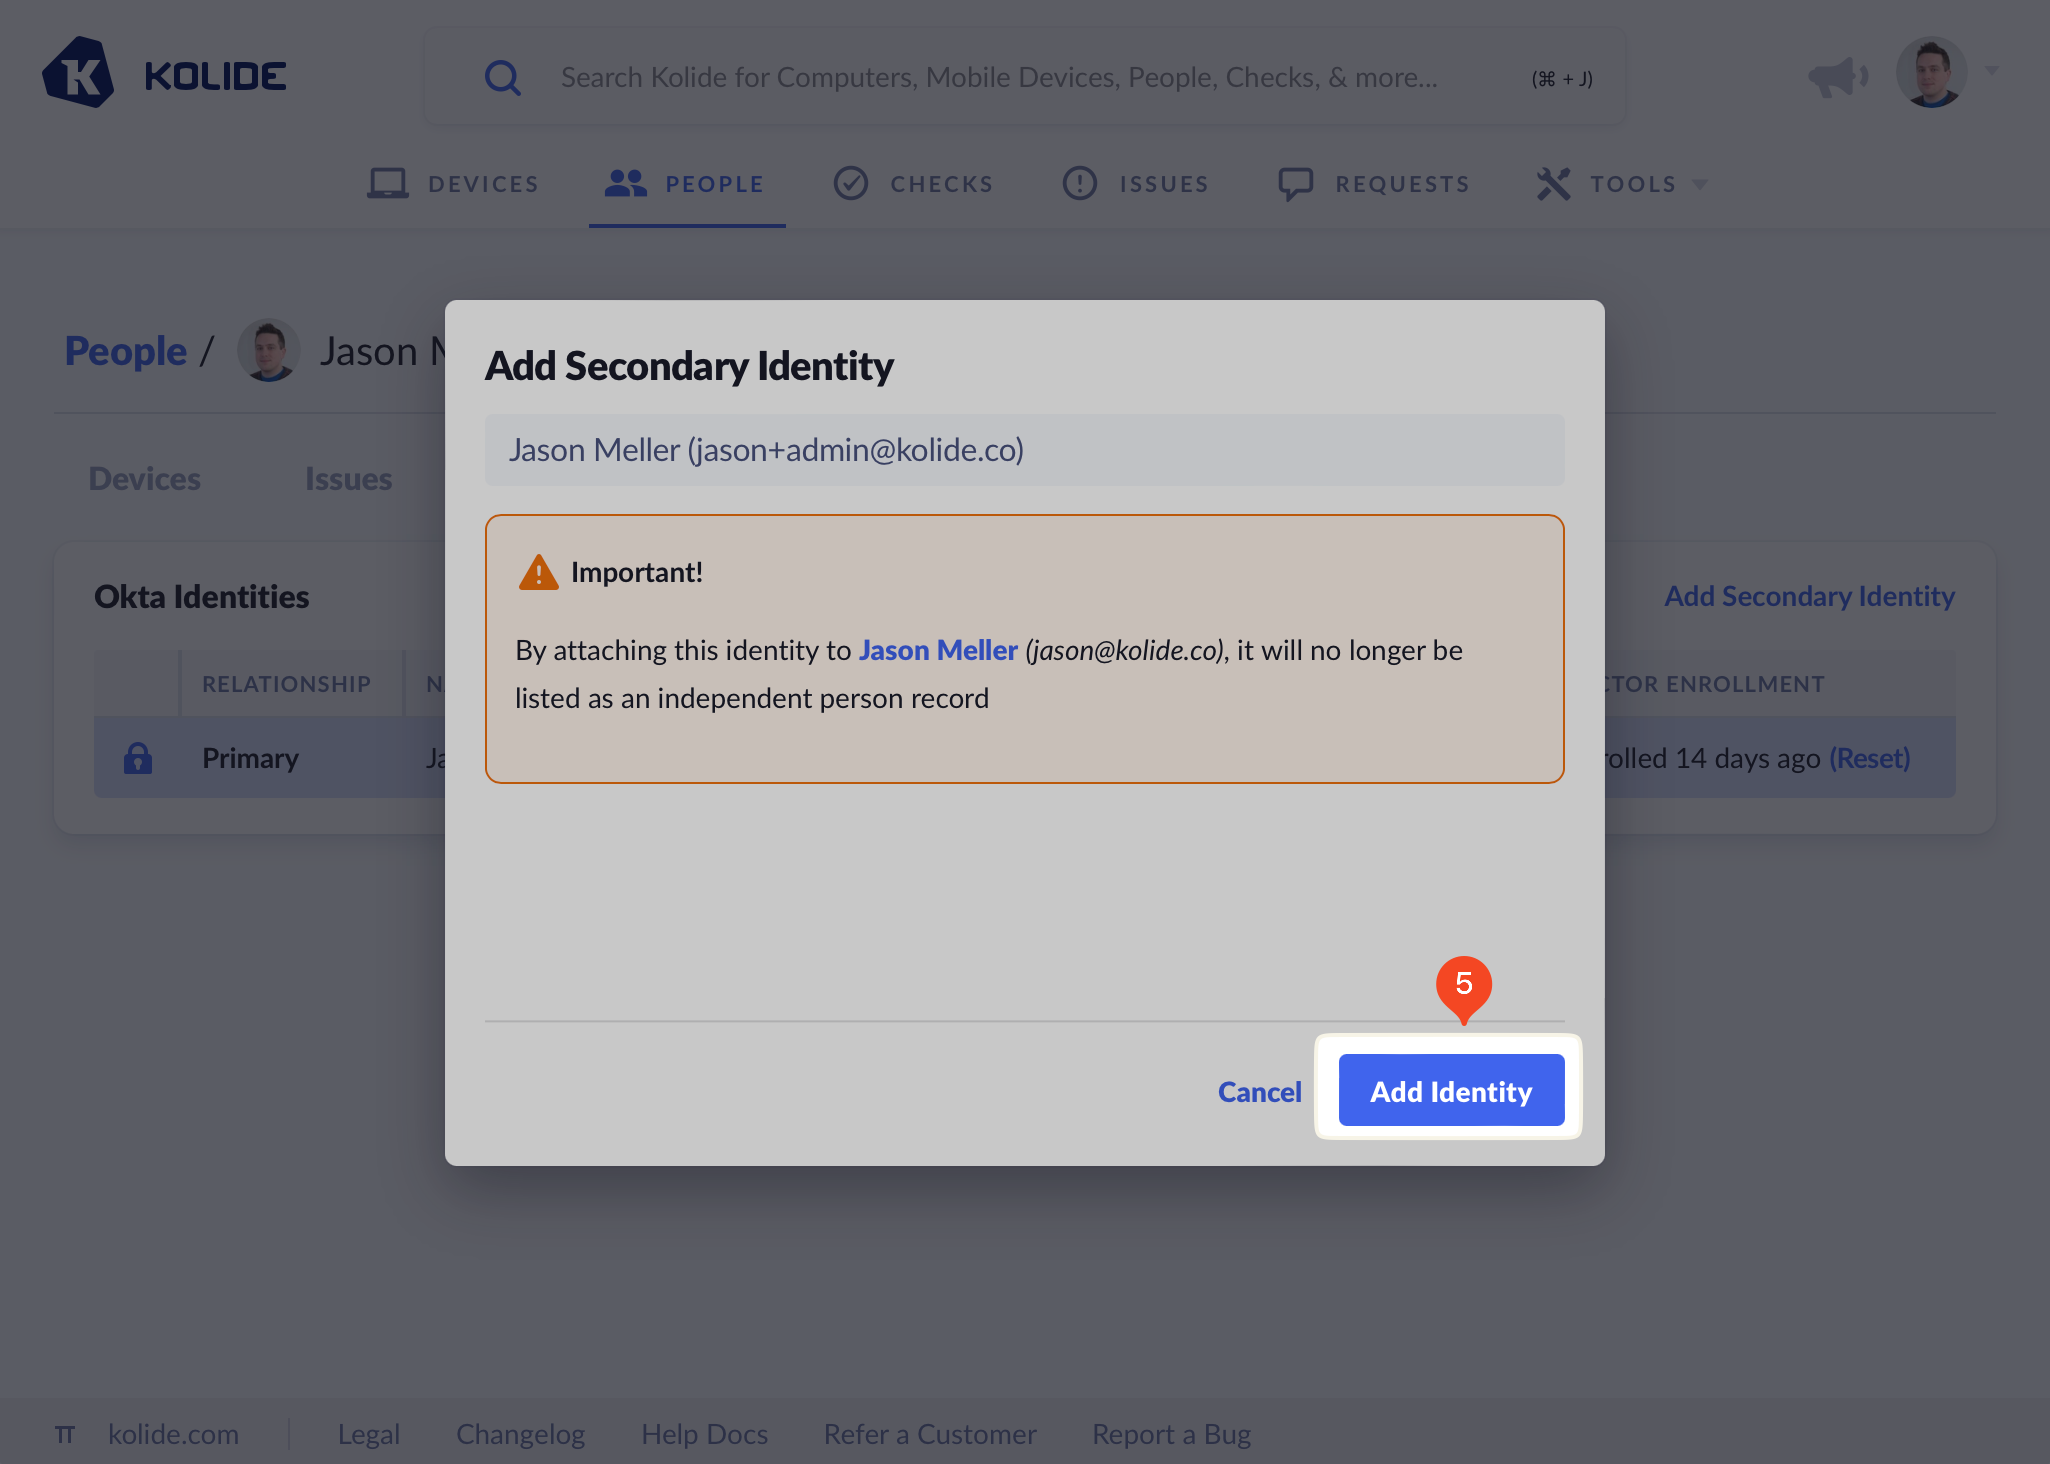
After a few seconds, the page will refresh and the new identity will be listed as the Secondary identity as shown below.
Now that this identity was successfully added, both Okta accounts can be used to sign into any registered devices associated with this Person.
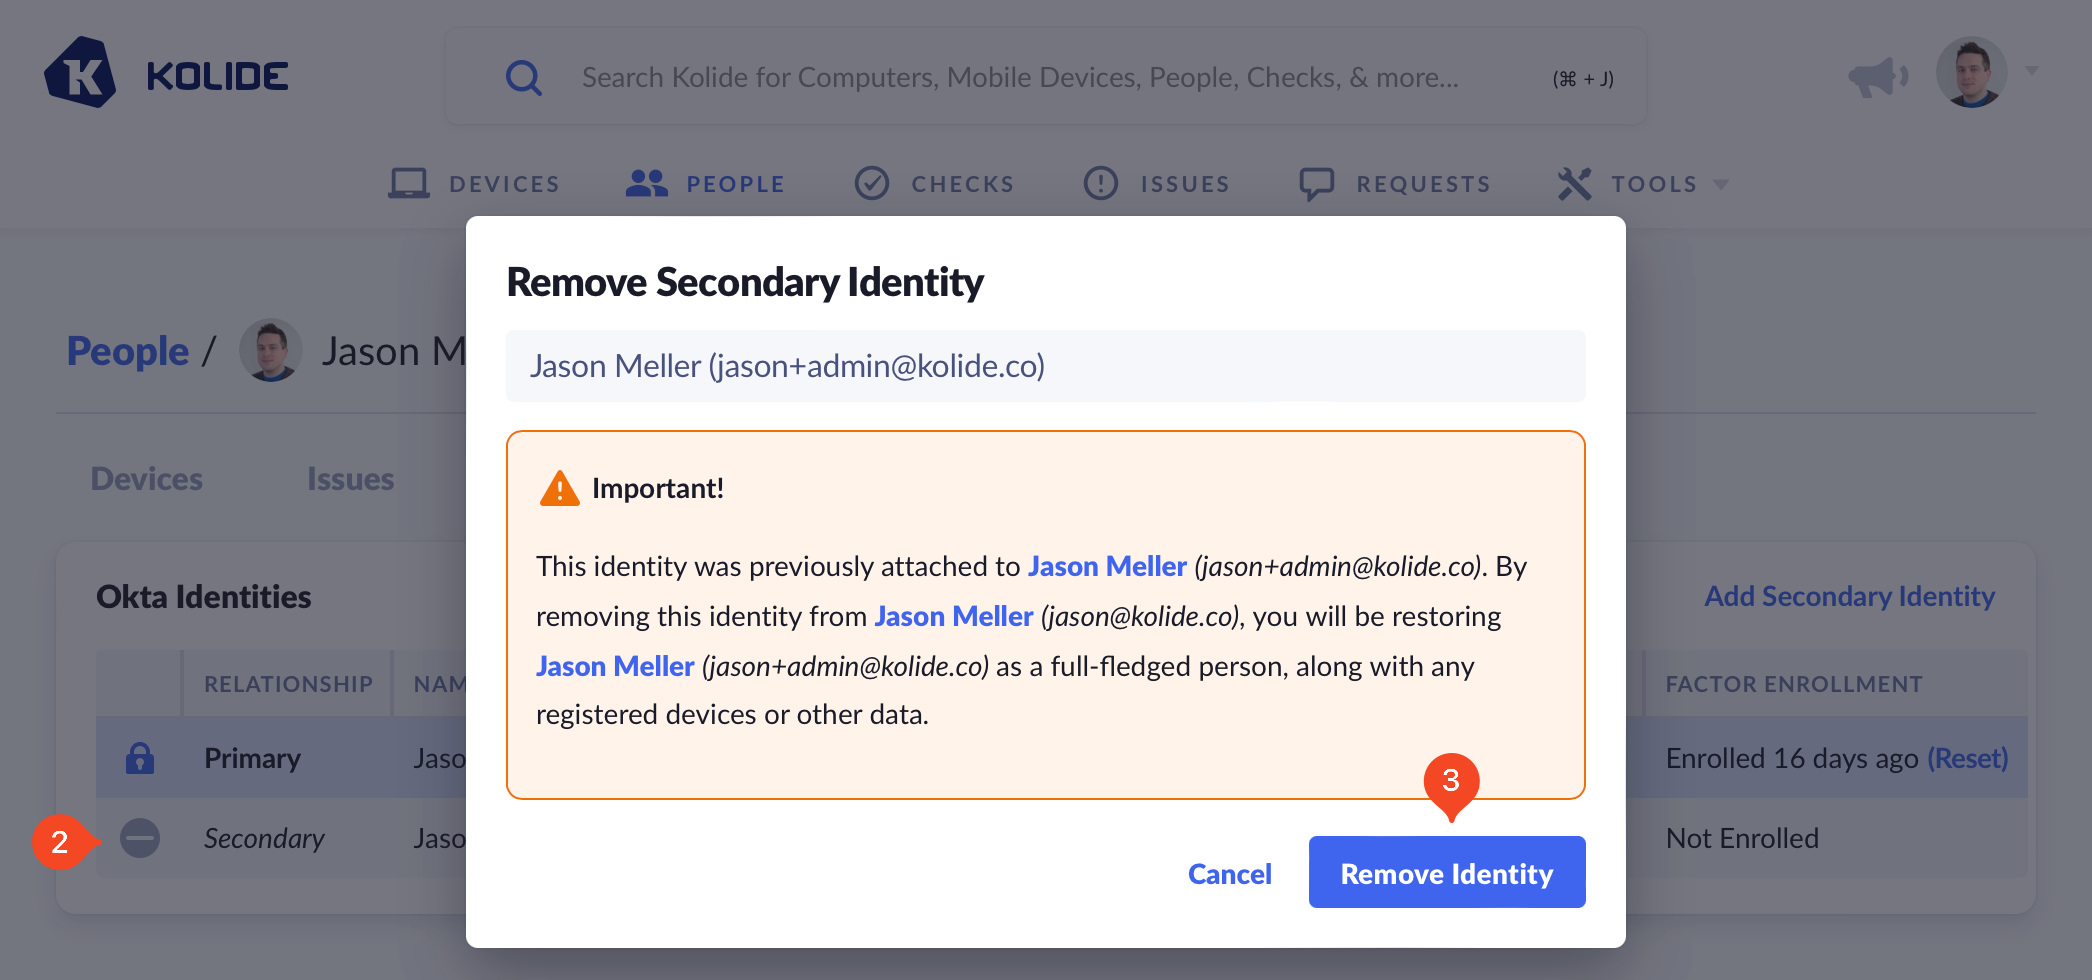
Manually Removing Secondary Identities
If you wish to manually remove a secondary Okta Identity you’ve previously added, the process is very simple.
Visit the Okta Identities page by following these steps.
Locate the identity you wish to remove and click the minus symbol at the start of the row.
Review the confirmation modal and click Remove Identity.
Okta Push Groups
Kolide can display information about Okta Groups that you choose to push to the Kolide service (known as Okta Push Groups).
How To Add A Group
Before you begin, please ensure that Kolide is already connected to your Okta instance using the steps outlined in the Getting Started: Connect Kolide to Okta article.
To set up push groups, follow these steps:
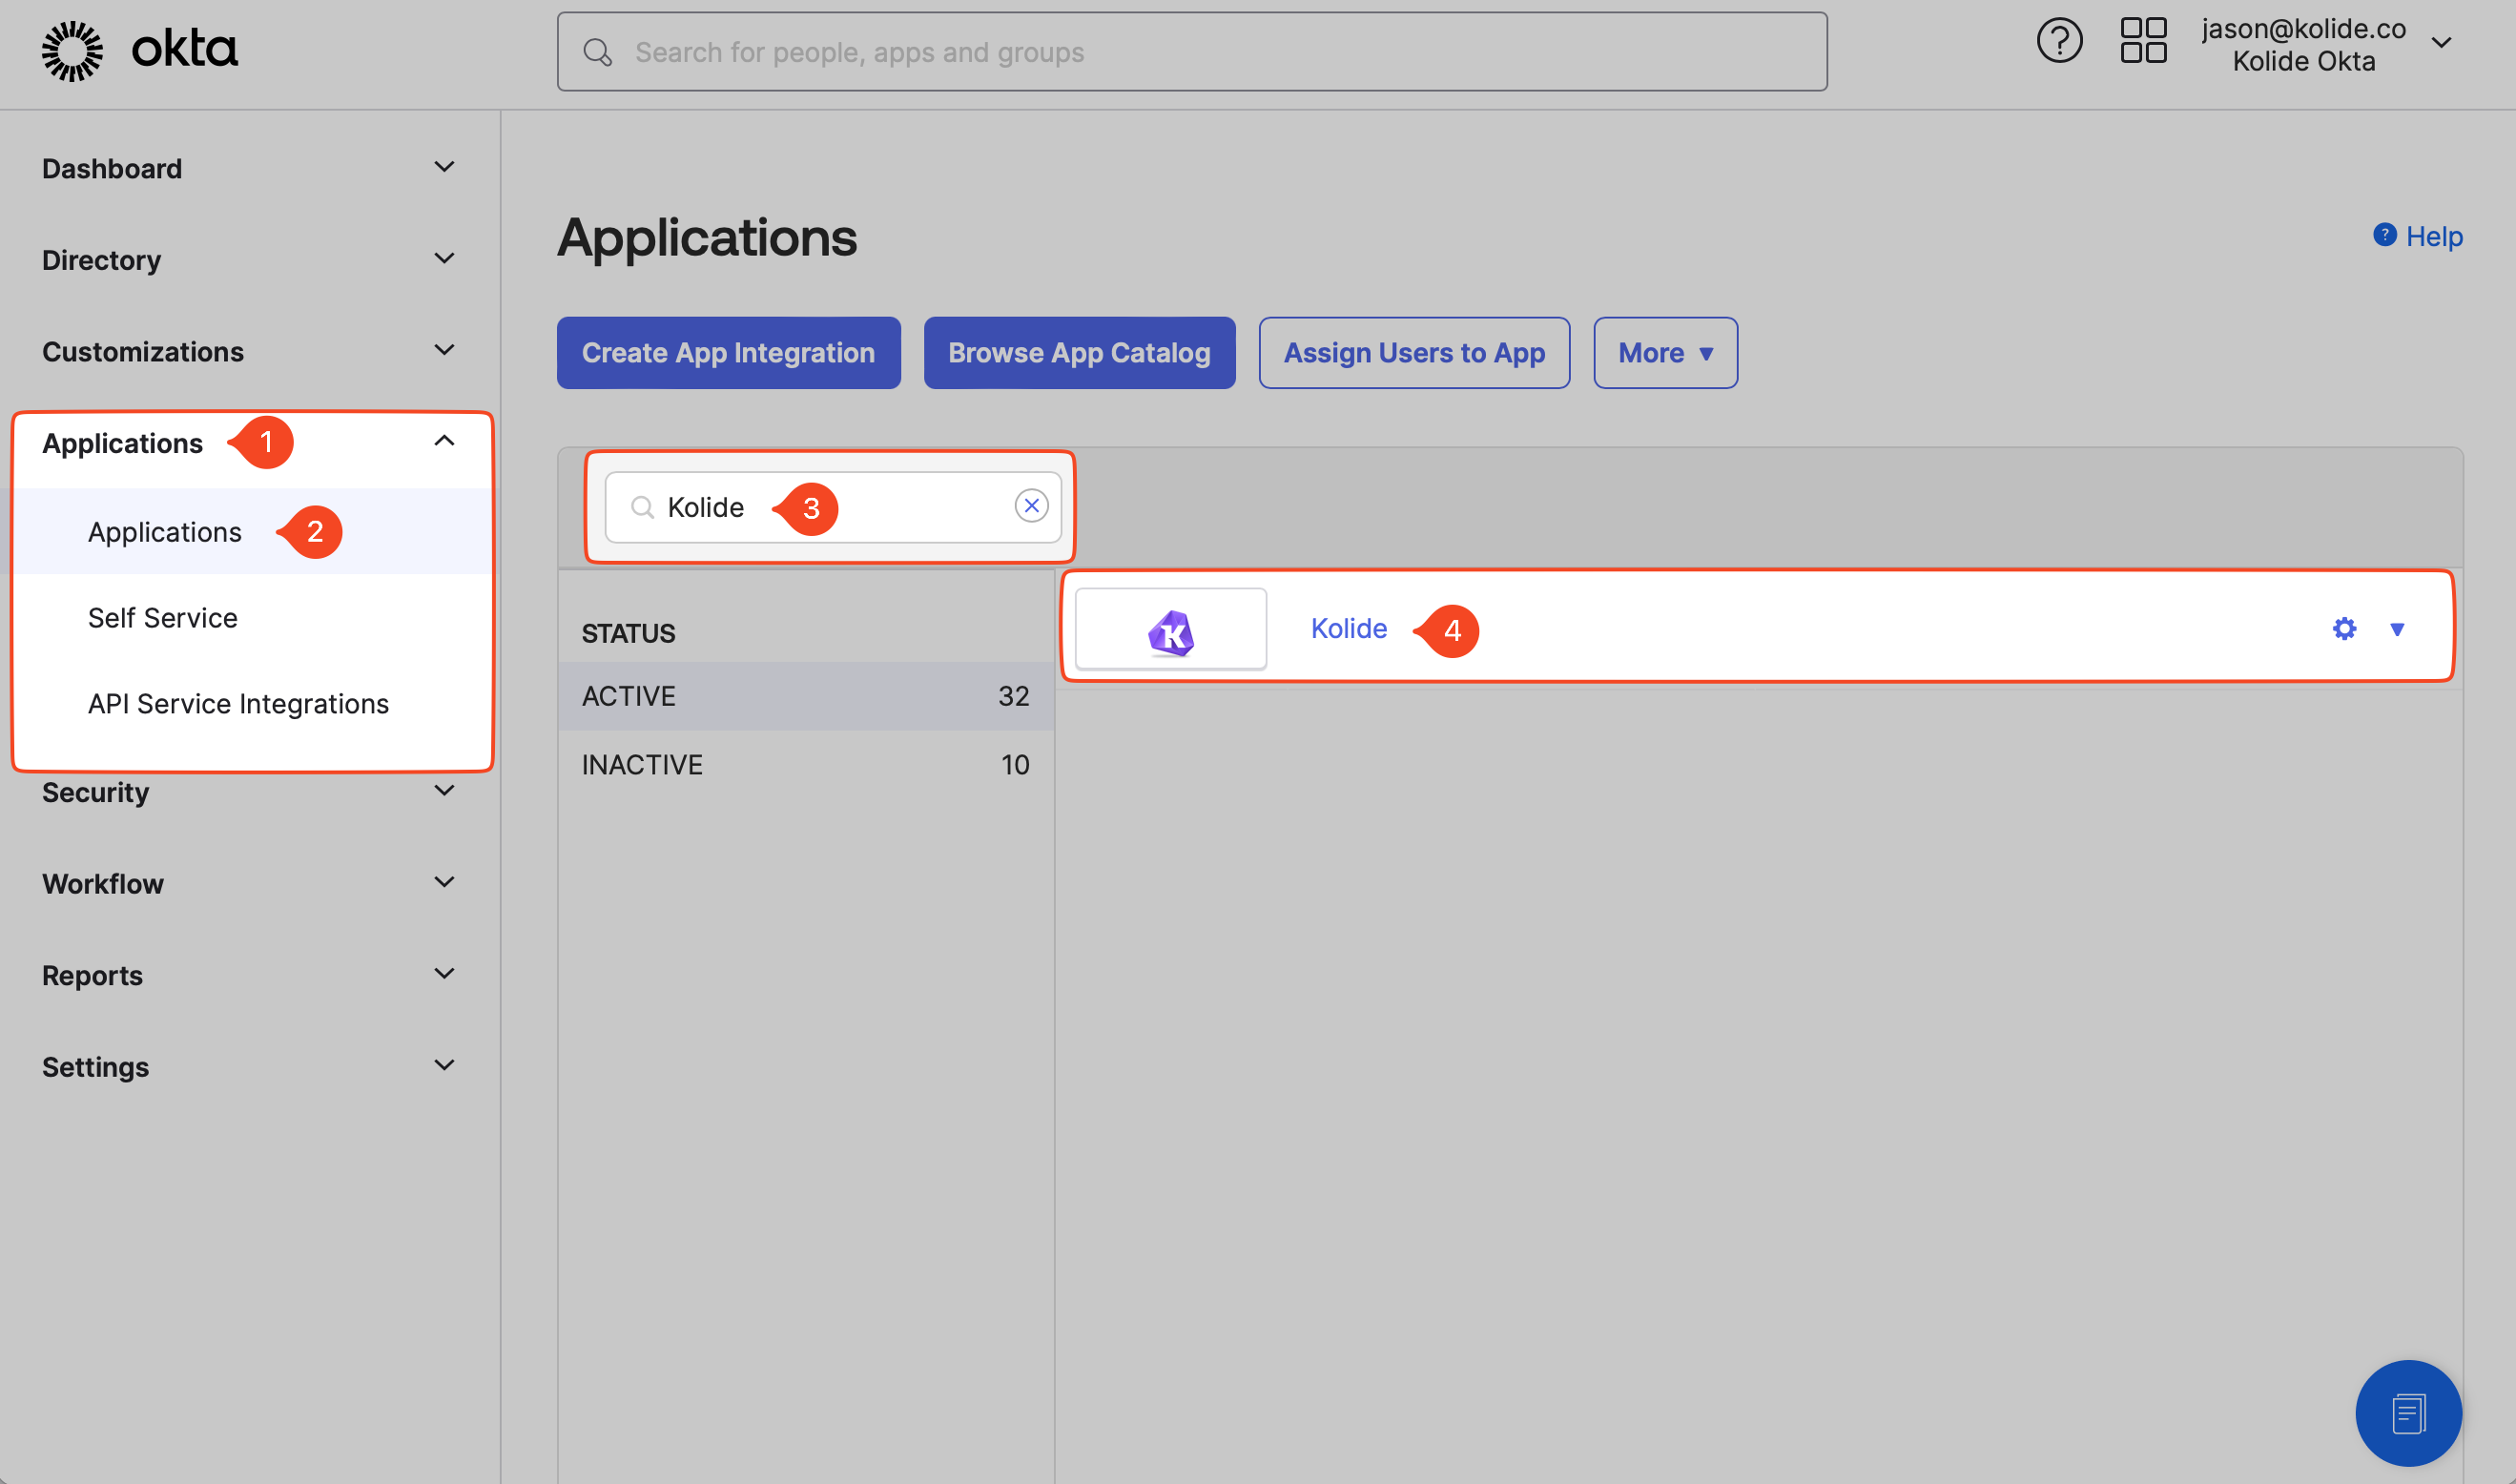
Sign into your Okta Admin Portal
https://${yourOktaDomain}-admin.okta.comIn the navigation menu, select Applications > Applications. Locate the Kolide application and click it to view its configuration.
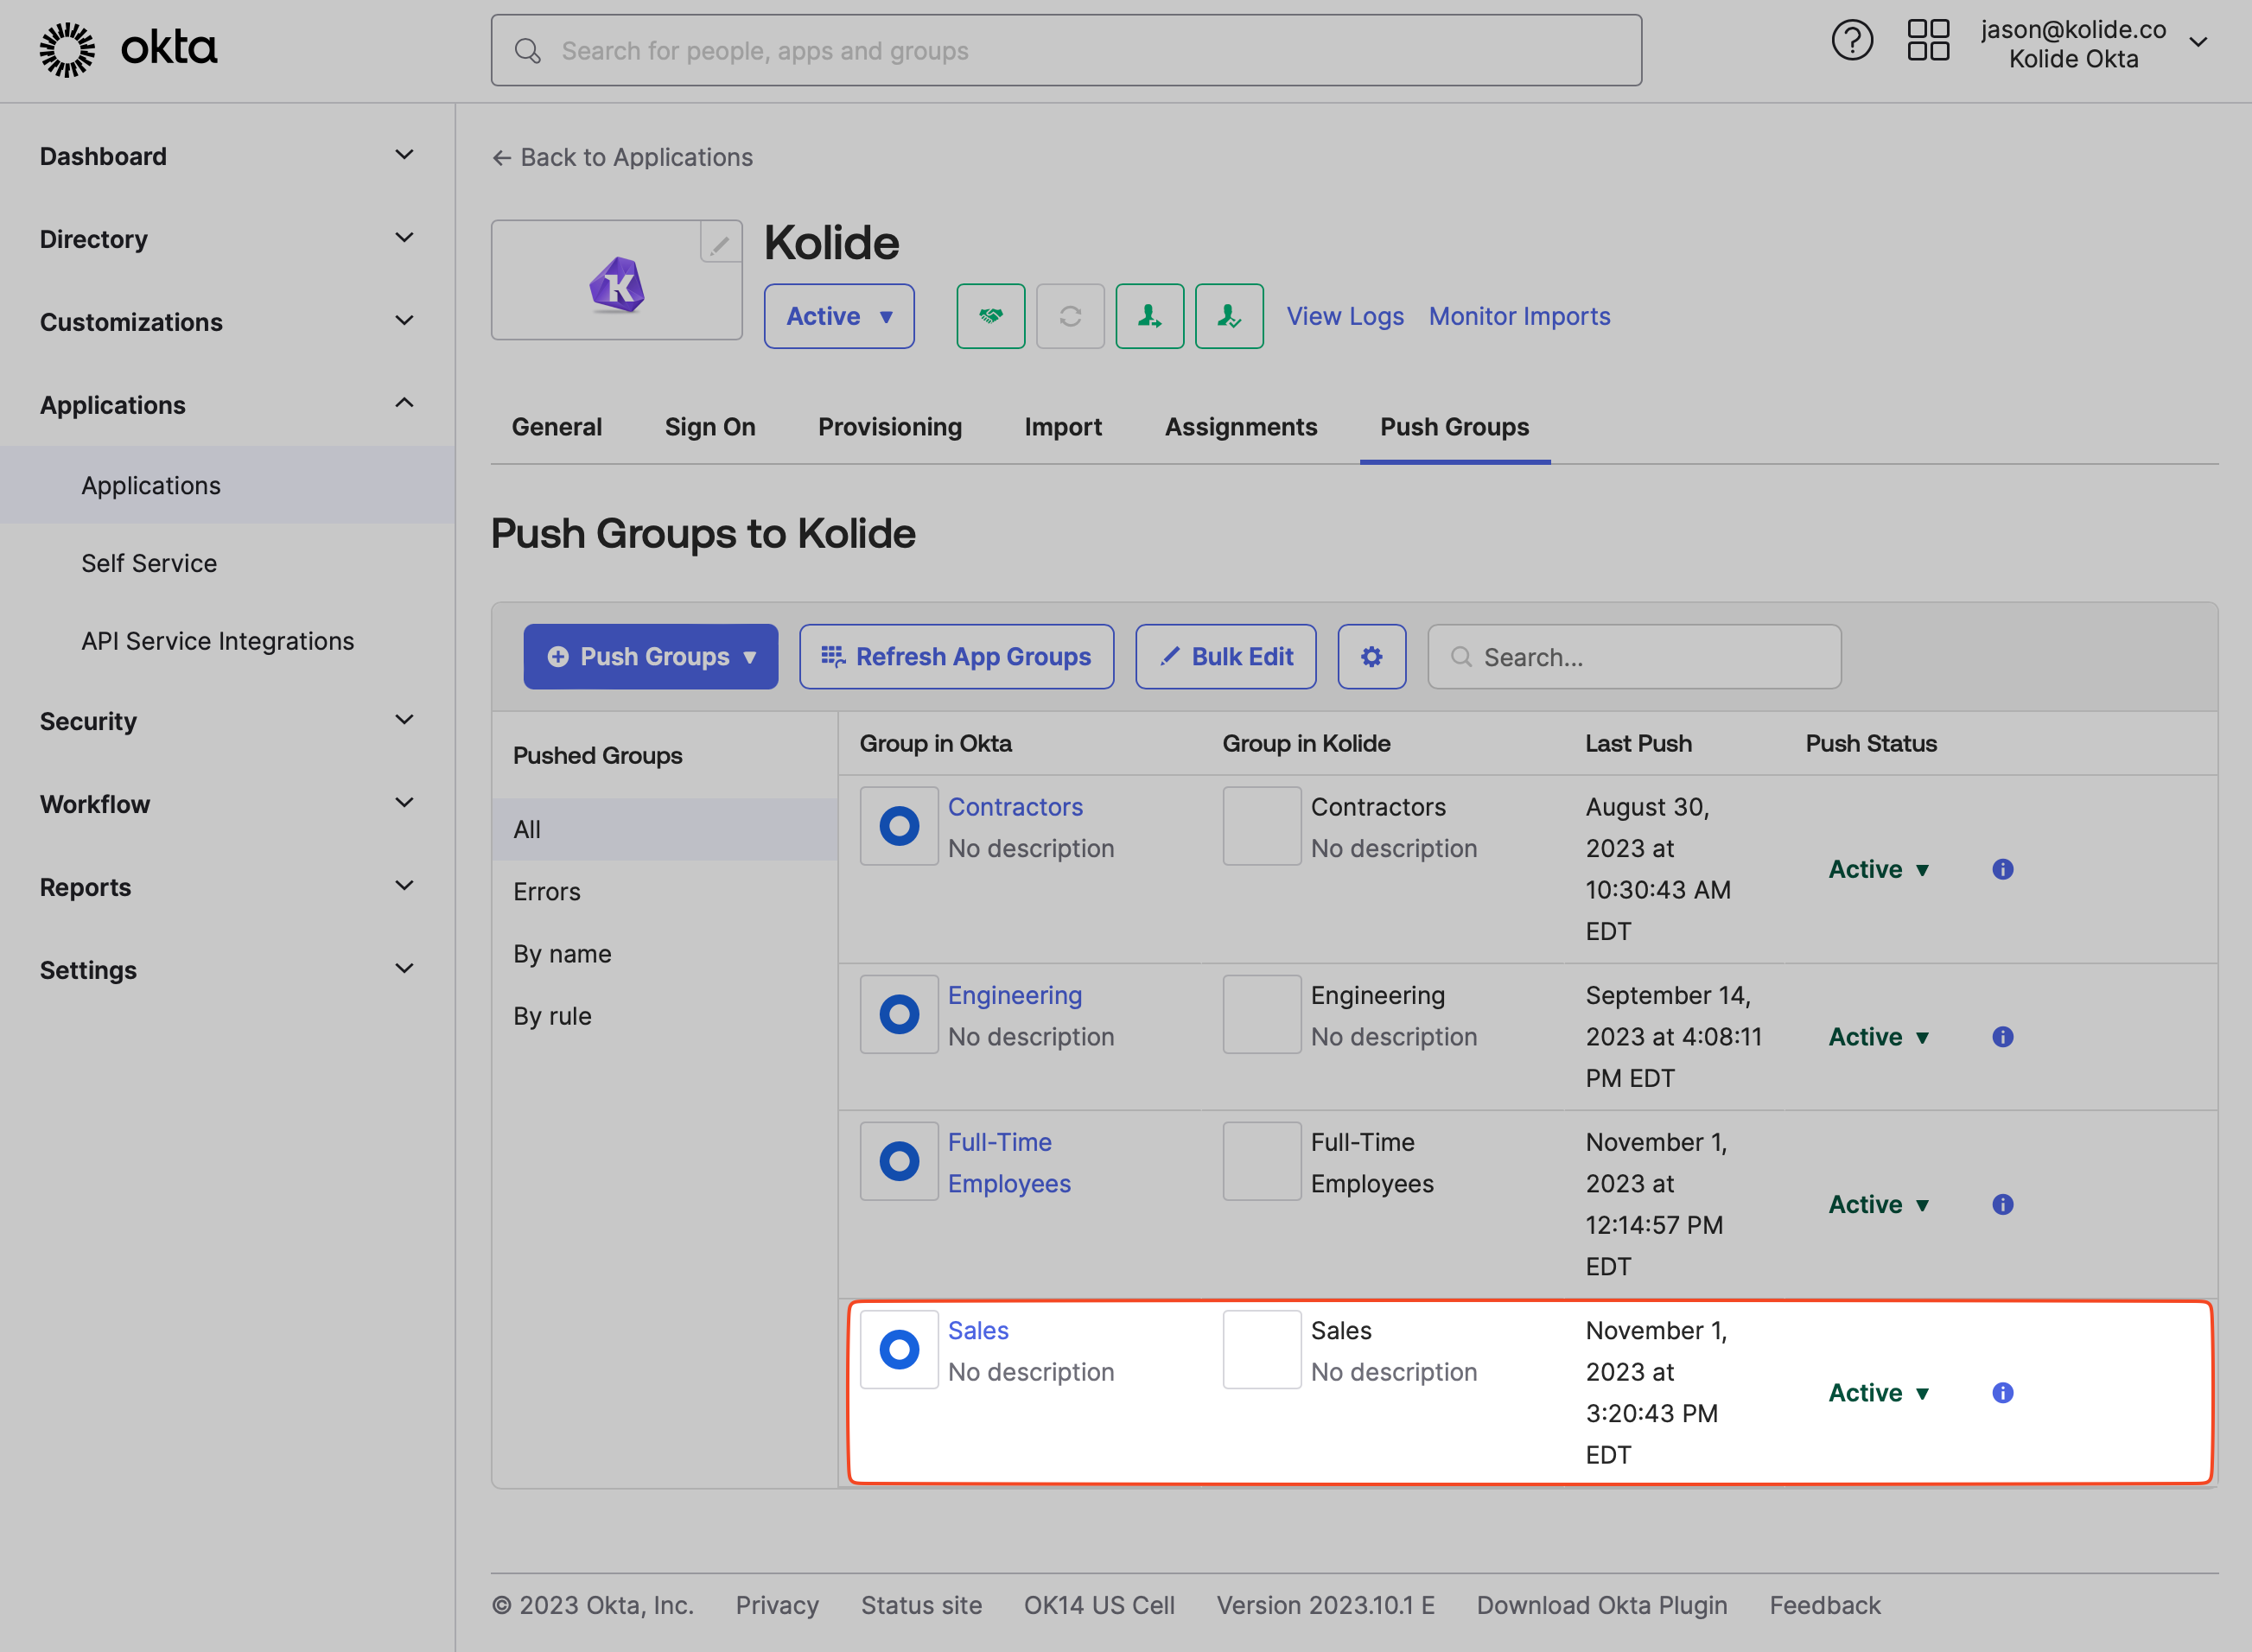
In the tabbed navigation, select Push Groups and then click the + Push Groups menu and select Find groups by name.
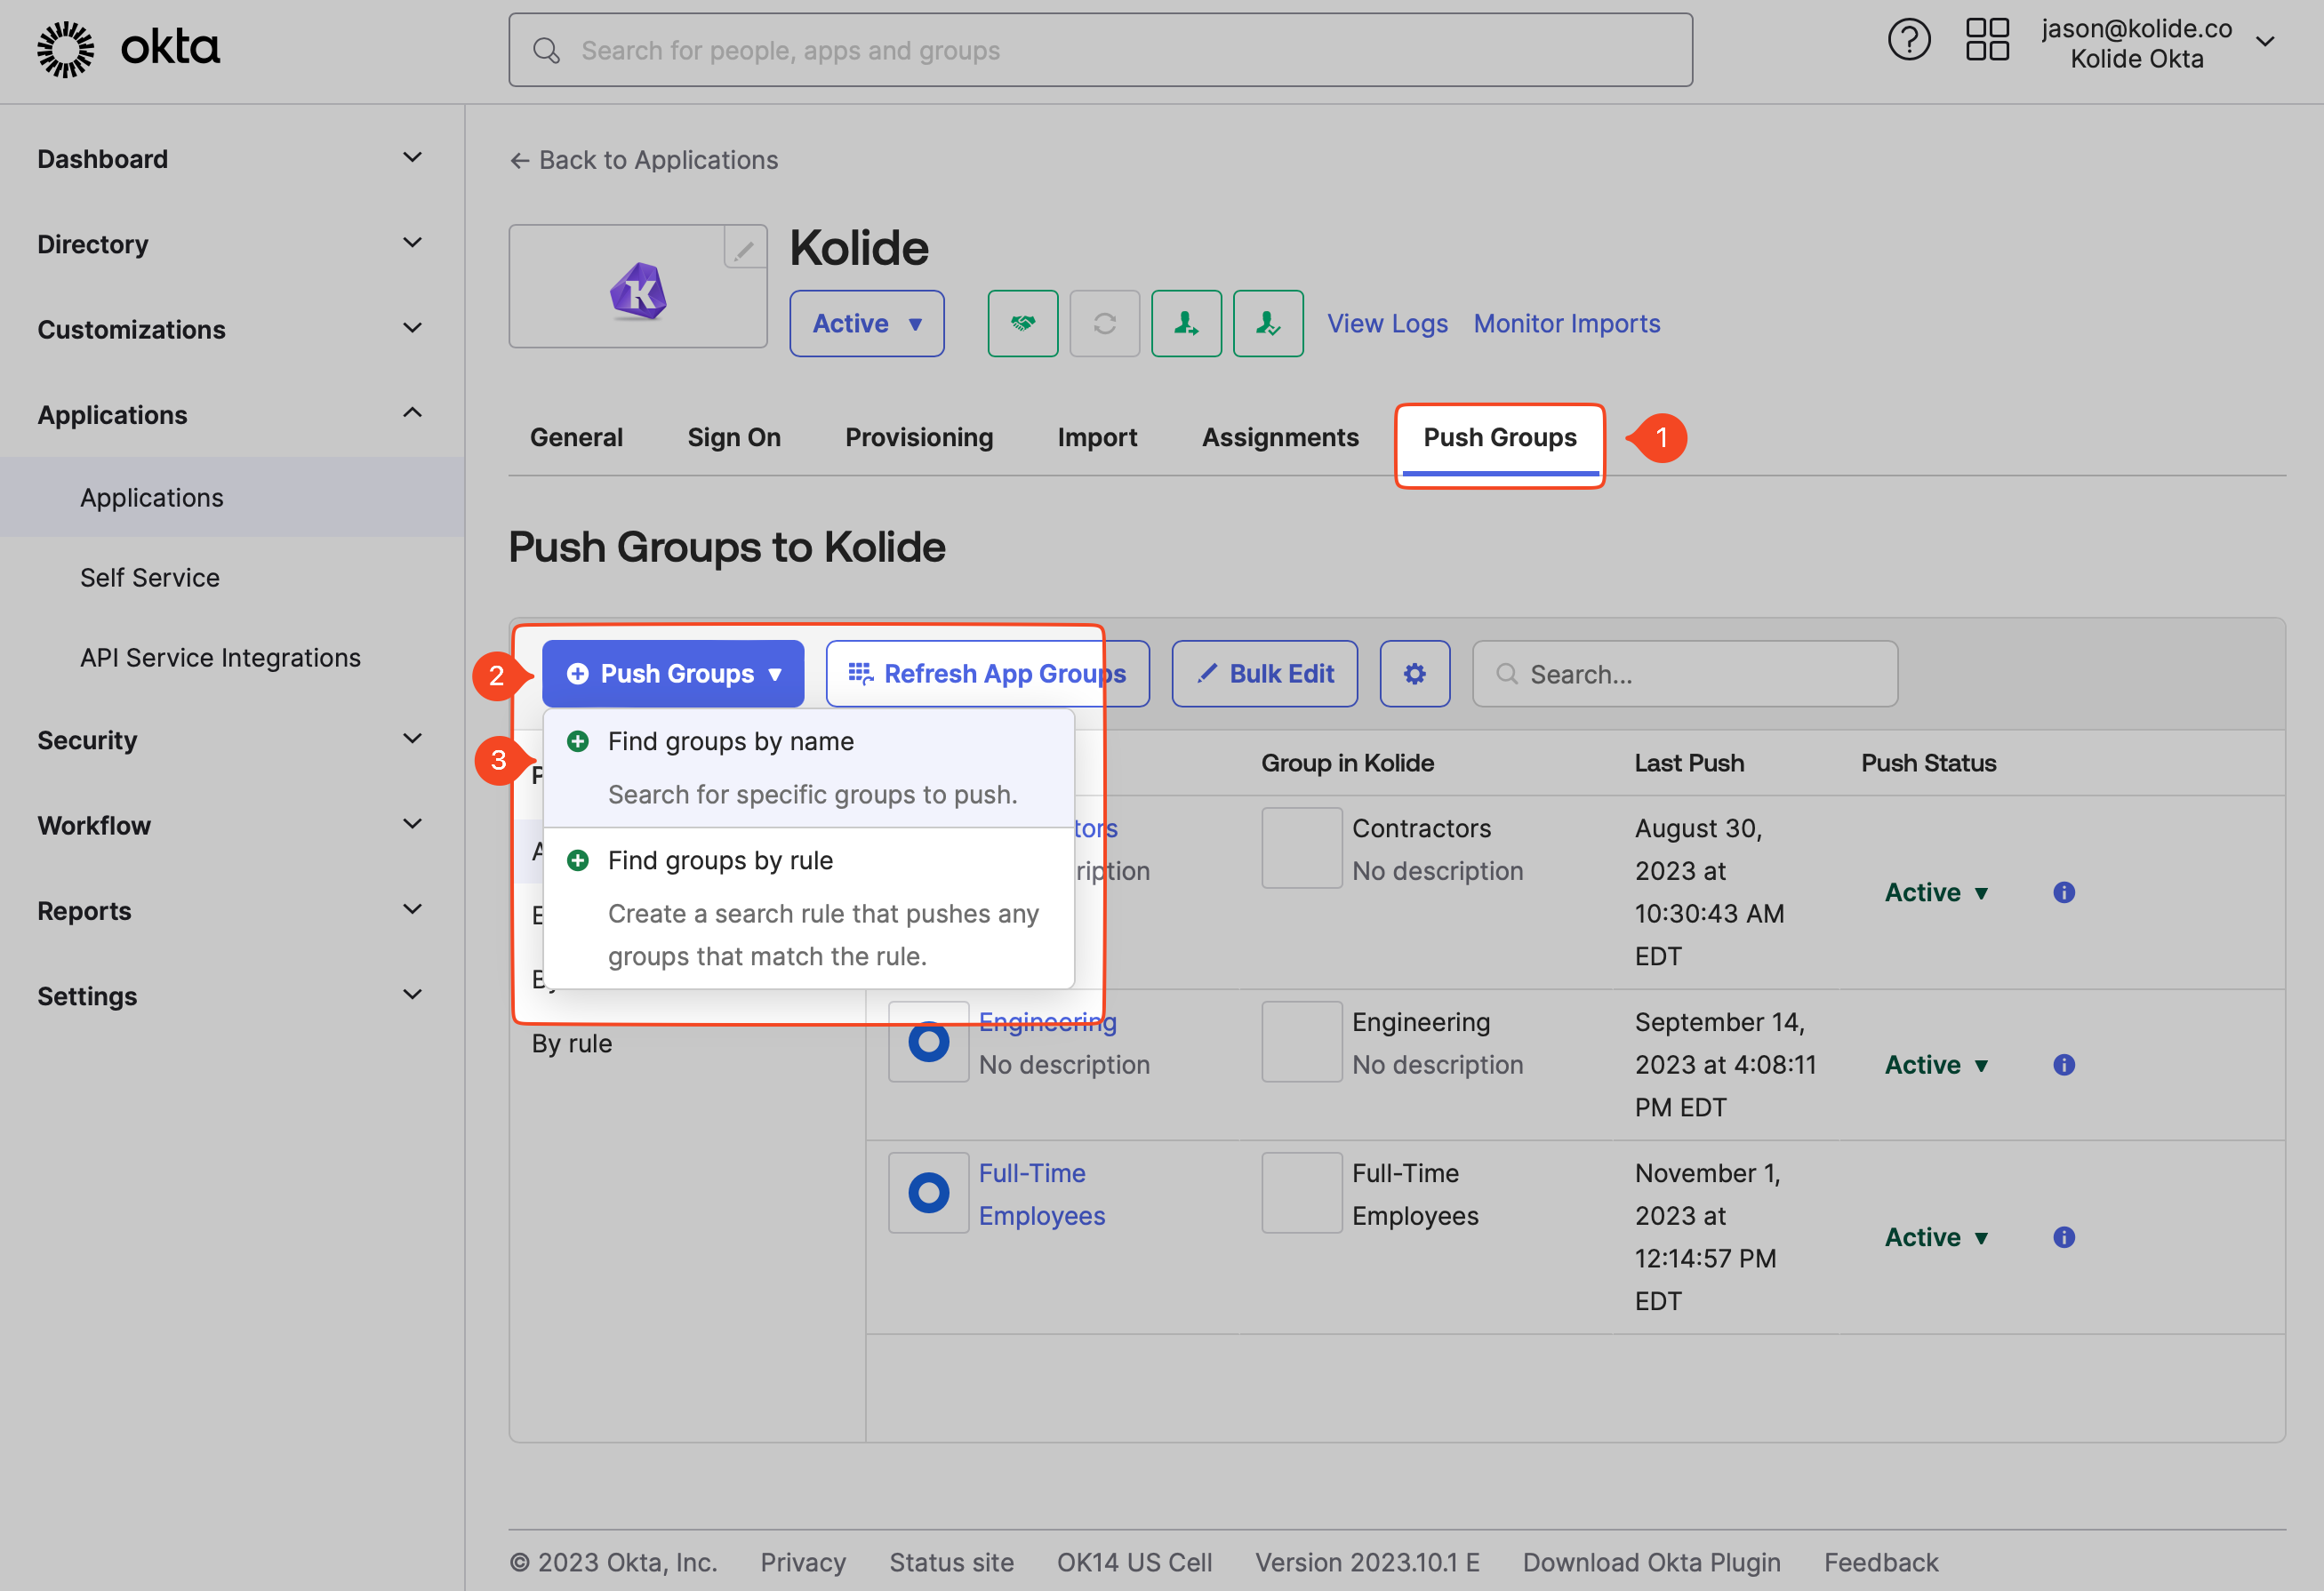
Enter the name of the Okta Group you’d like to add in the search box and select it when it appears in the autocomplete dropdown. Ensure that Create Group is the selected Push Action. Click Save.
You should now see the new group listed under the Push Groups section. At first, the status will read Pending and should then transition to Active once the synchronization process is completed. This could take a few minutes depending on the number of members in the Group.
Once the synchronization is complete, refresh the People page in Kolide and filter the list by the new group.

How To Remove A Group
To remove an Okta Group from Kolide, you must do so from the Okta Admin Portal by following these steps:
Sign into your Okta Admin Portal
https://${yourOktaDomain}-admin.okta.comIn the navigation menu, select Applications > Applications. Locate the Kolide application and click it to view its configuration.
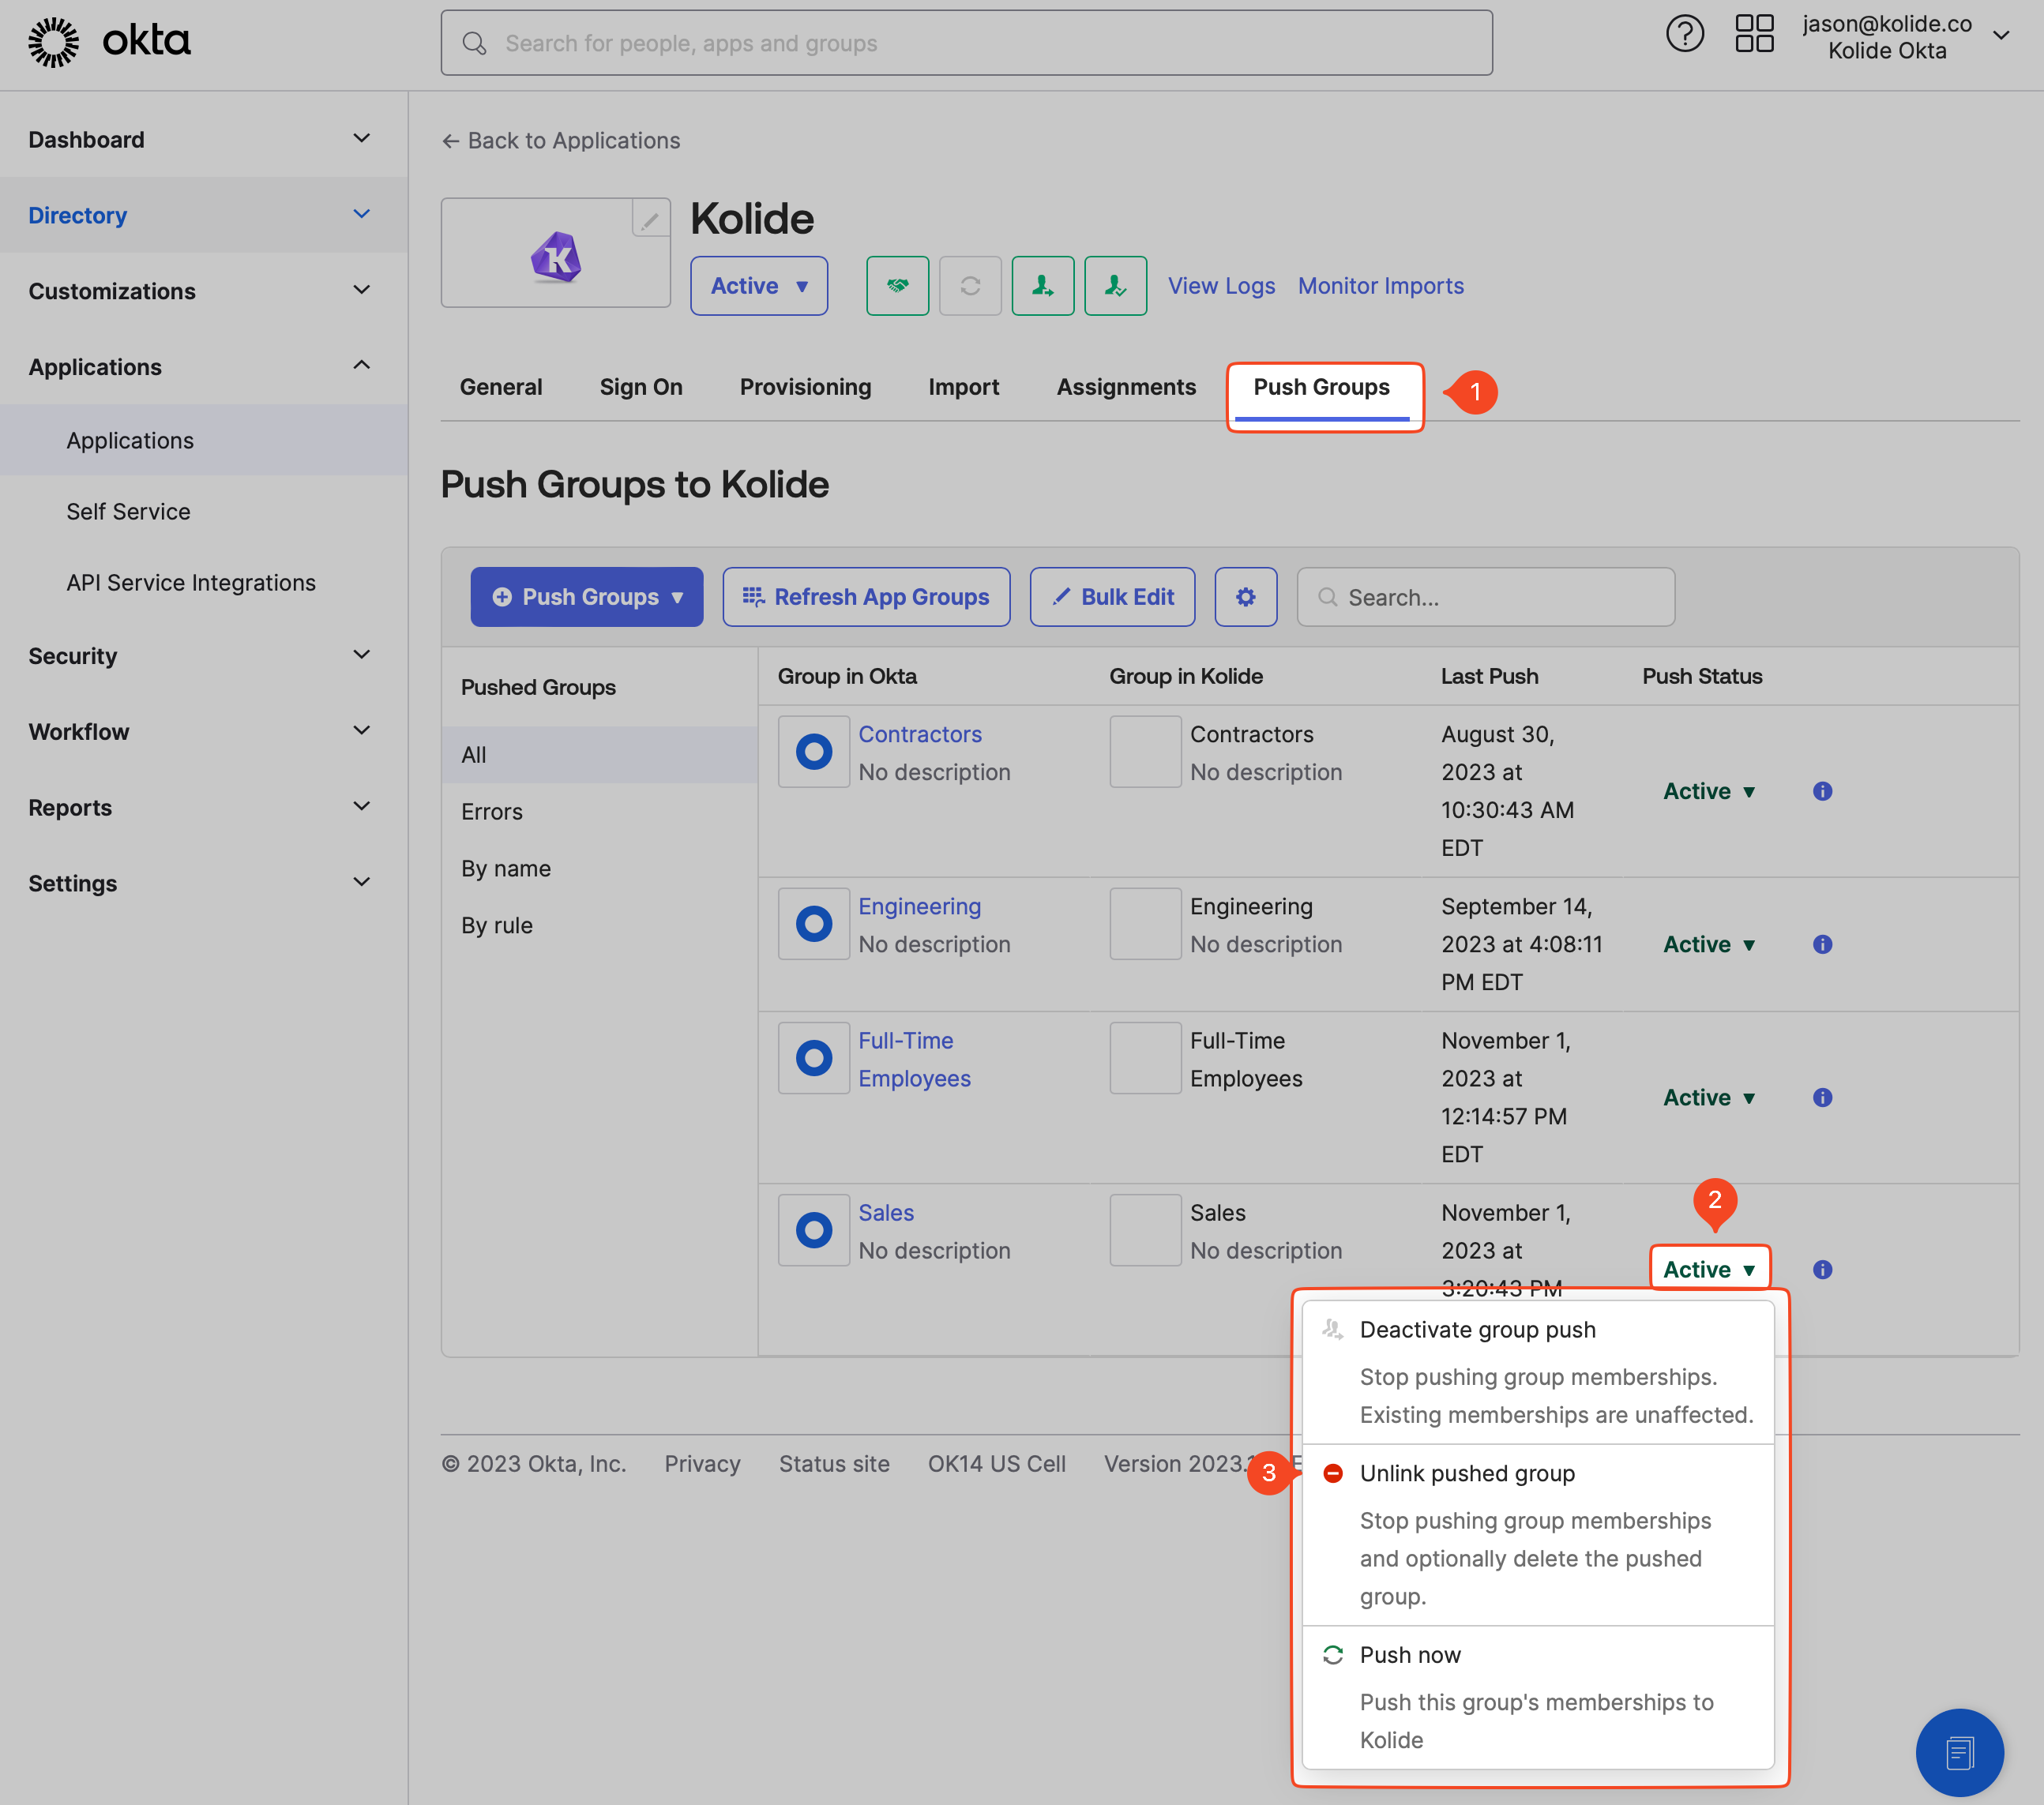
In the tabbed navigation, select Push Groups and then select the Active dropdown menu and choose Unlink push group.
In the modal that appears, ensure Delete the group in the target app is selected and then click Unlink.
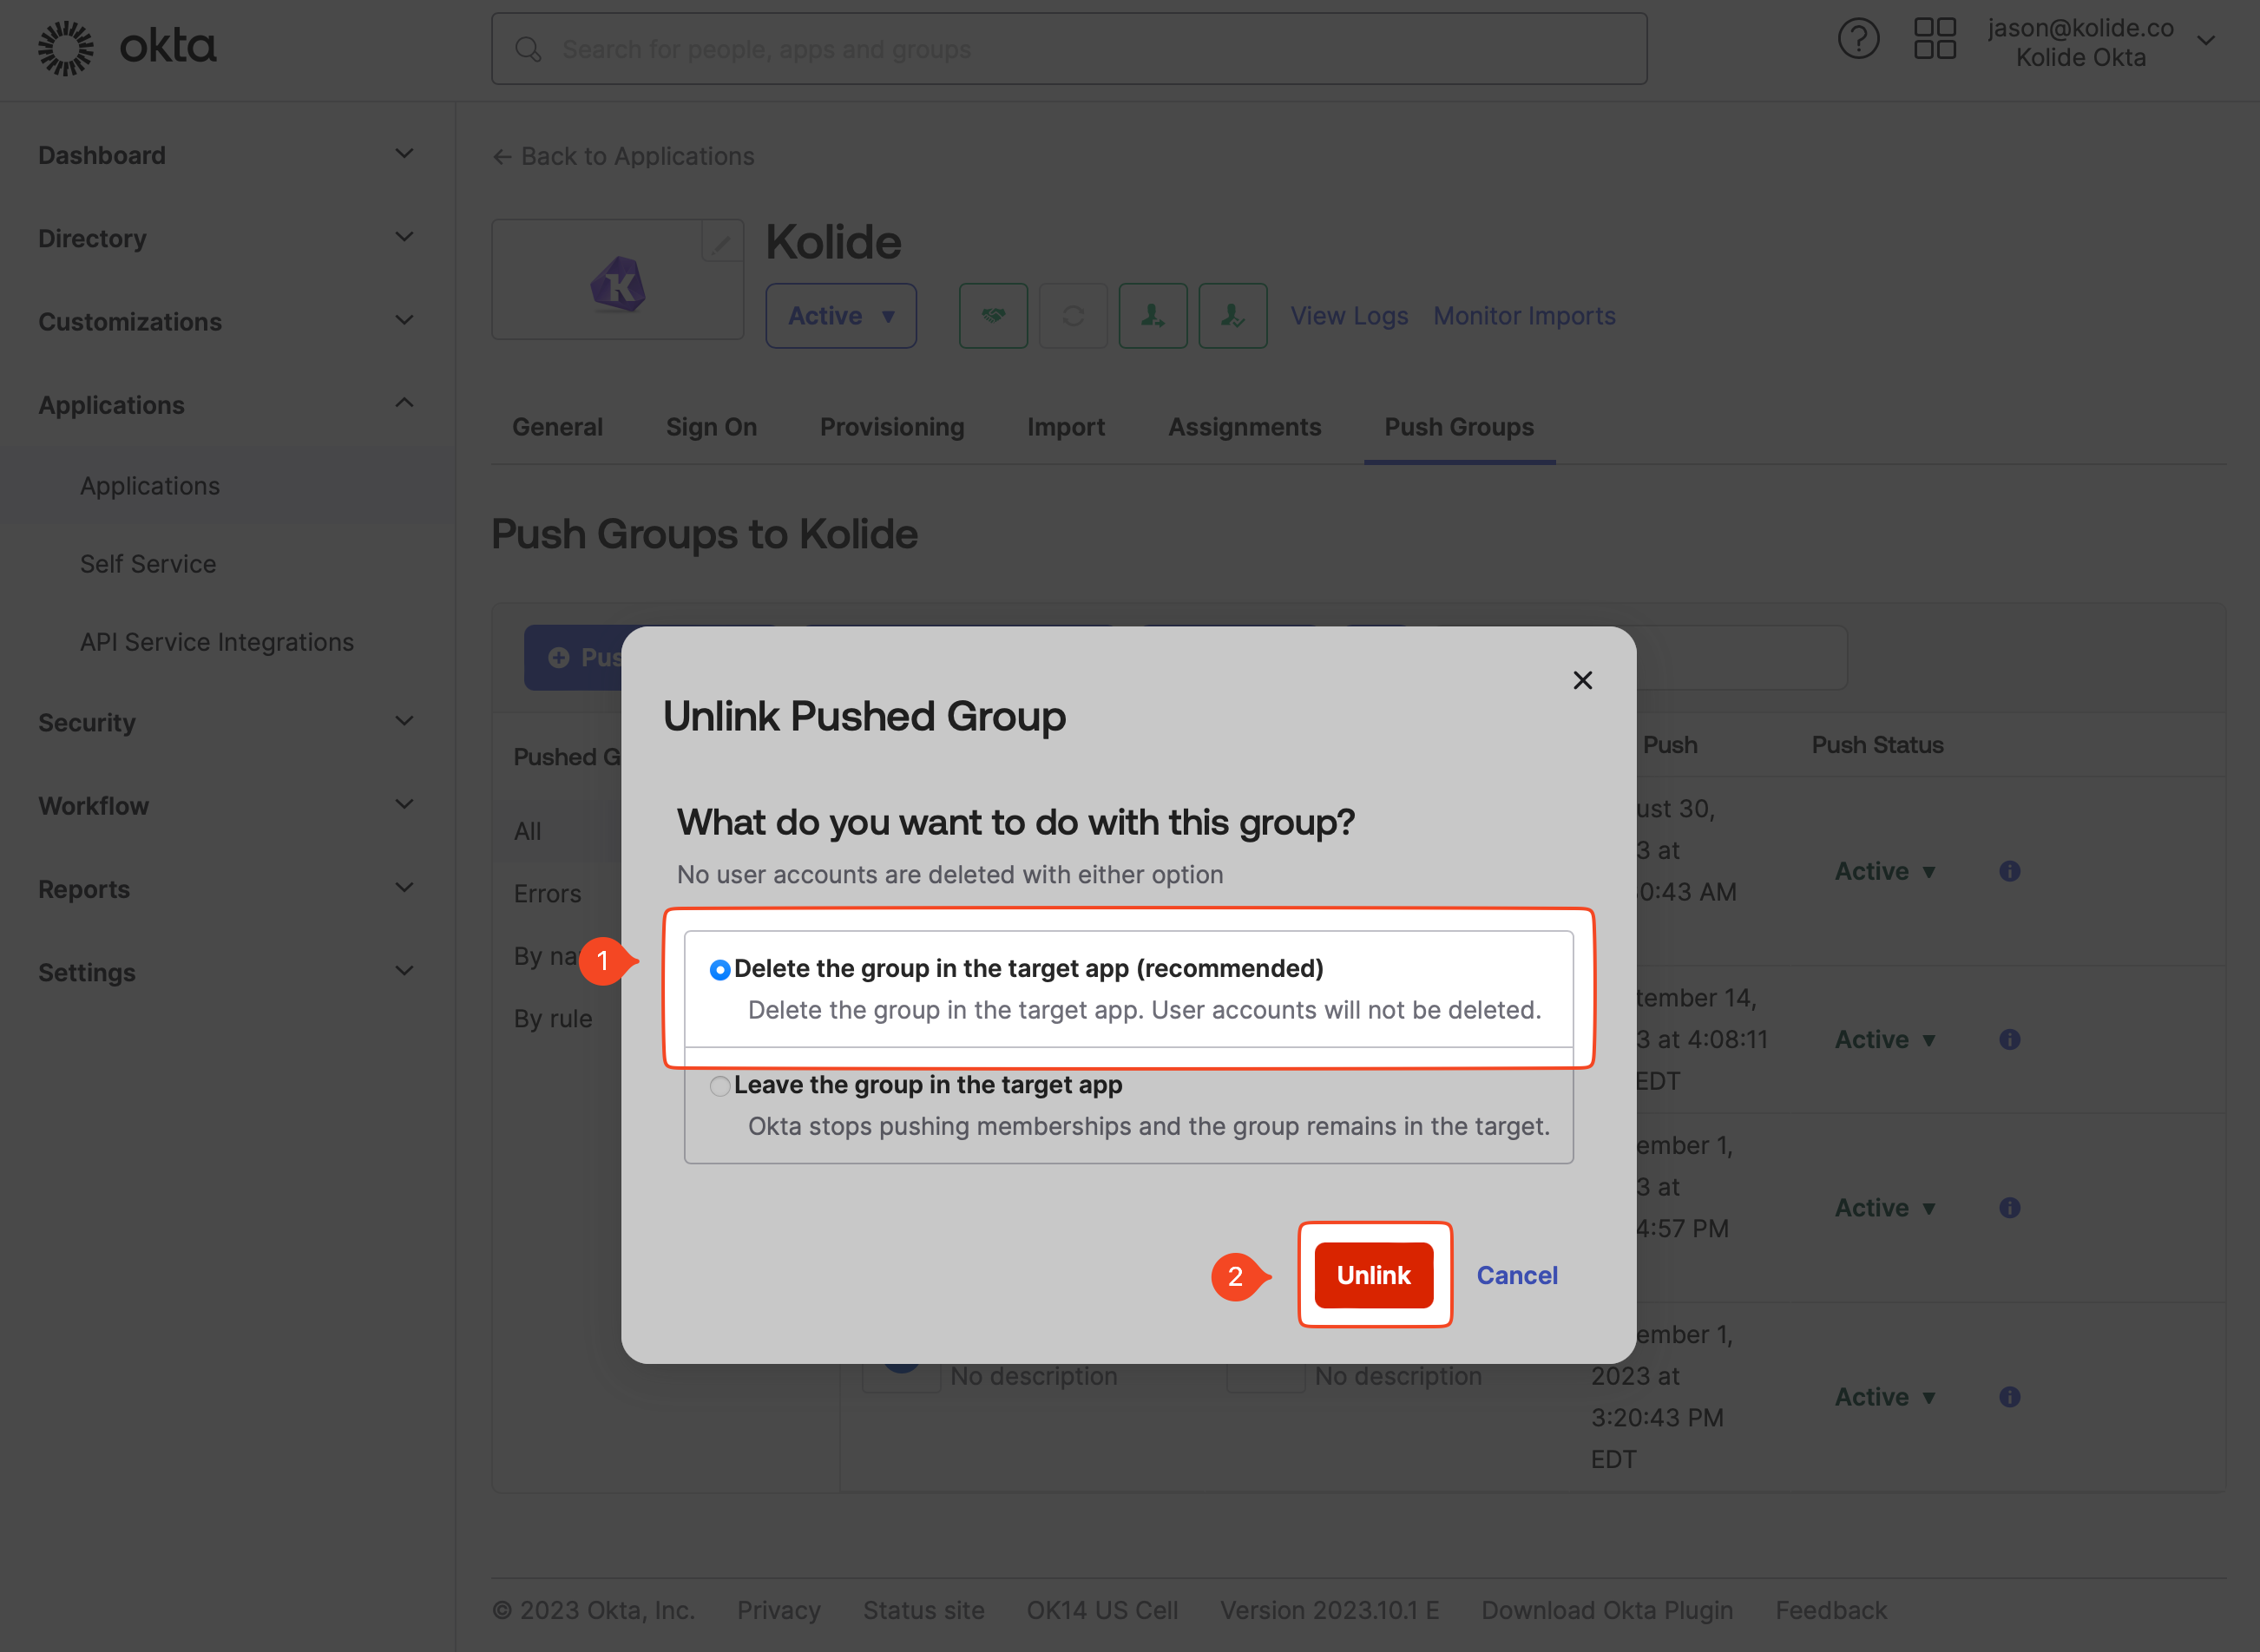
Once the steps above are completed, the group should disappear from both the Push Groups listing and the People page in the Kolide app.
Where Can You Use Okta Groups in Kolide?
In addition to displaying the group membership in the People section of the app, Kolide allows you to use Okta Groups to do the following:
Filter Devices By Okta Group
Once you’ve pushed an Okta Group, the Devices filter sidebar will include a new section named Okta Groups.
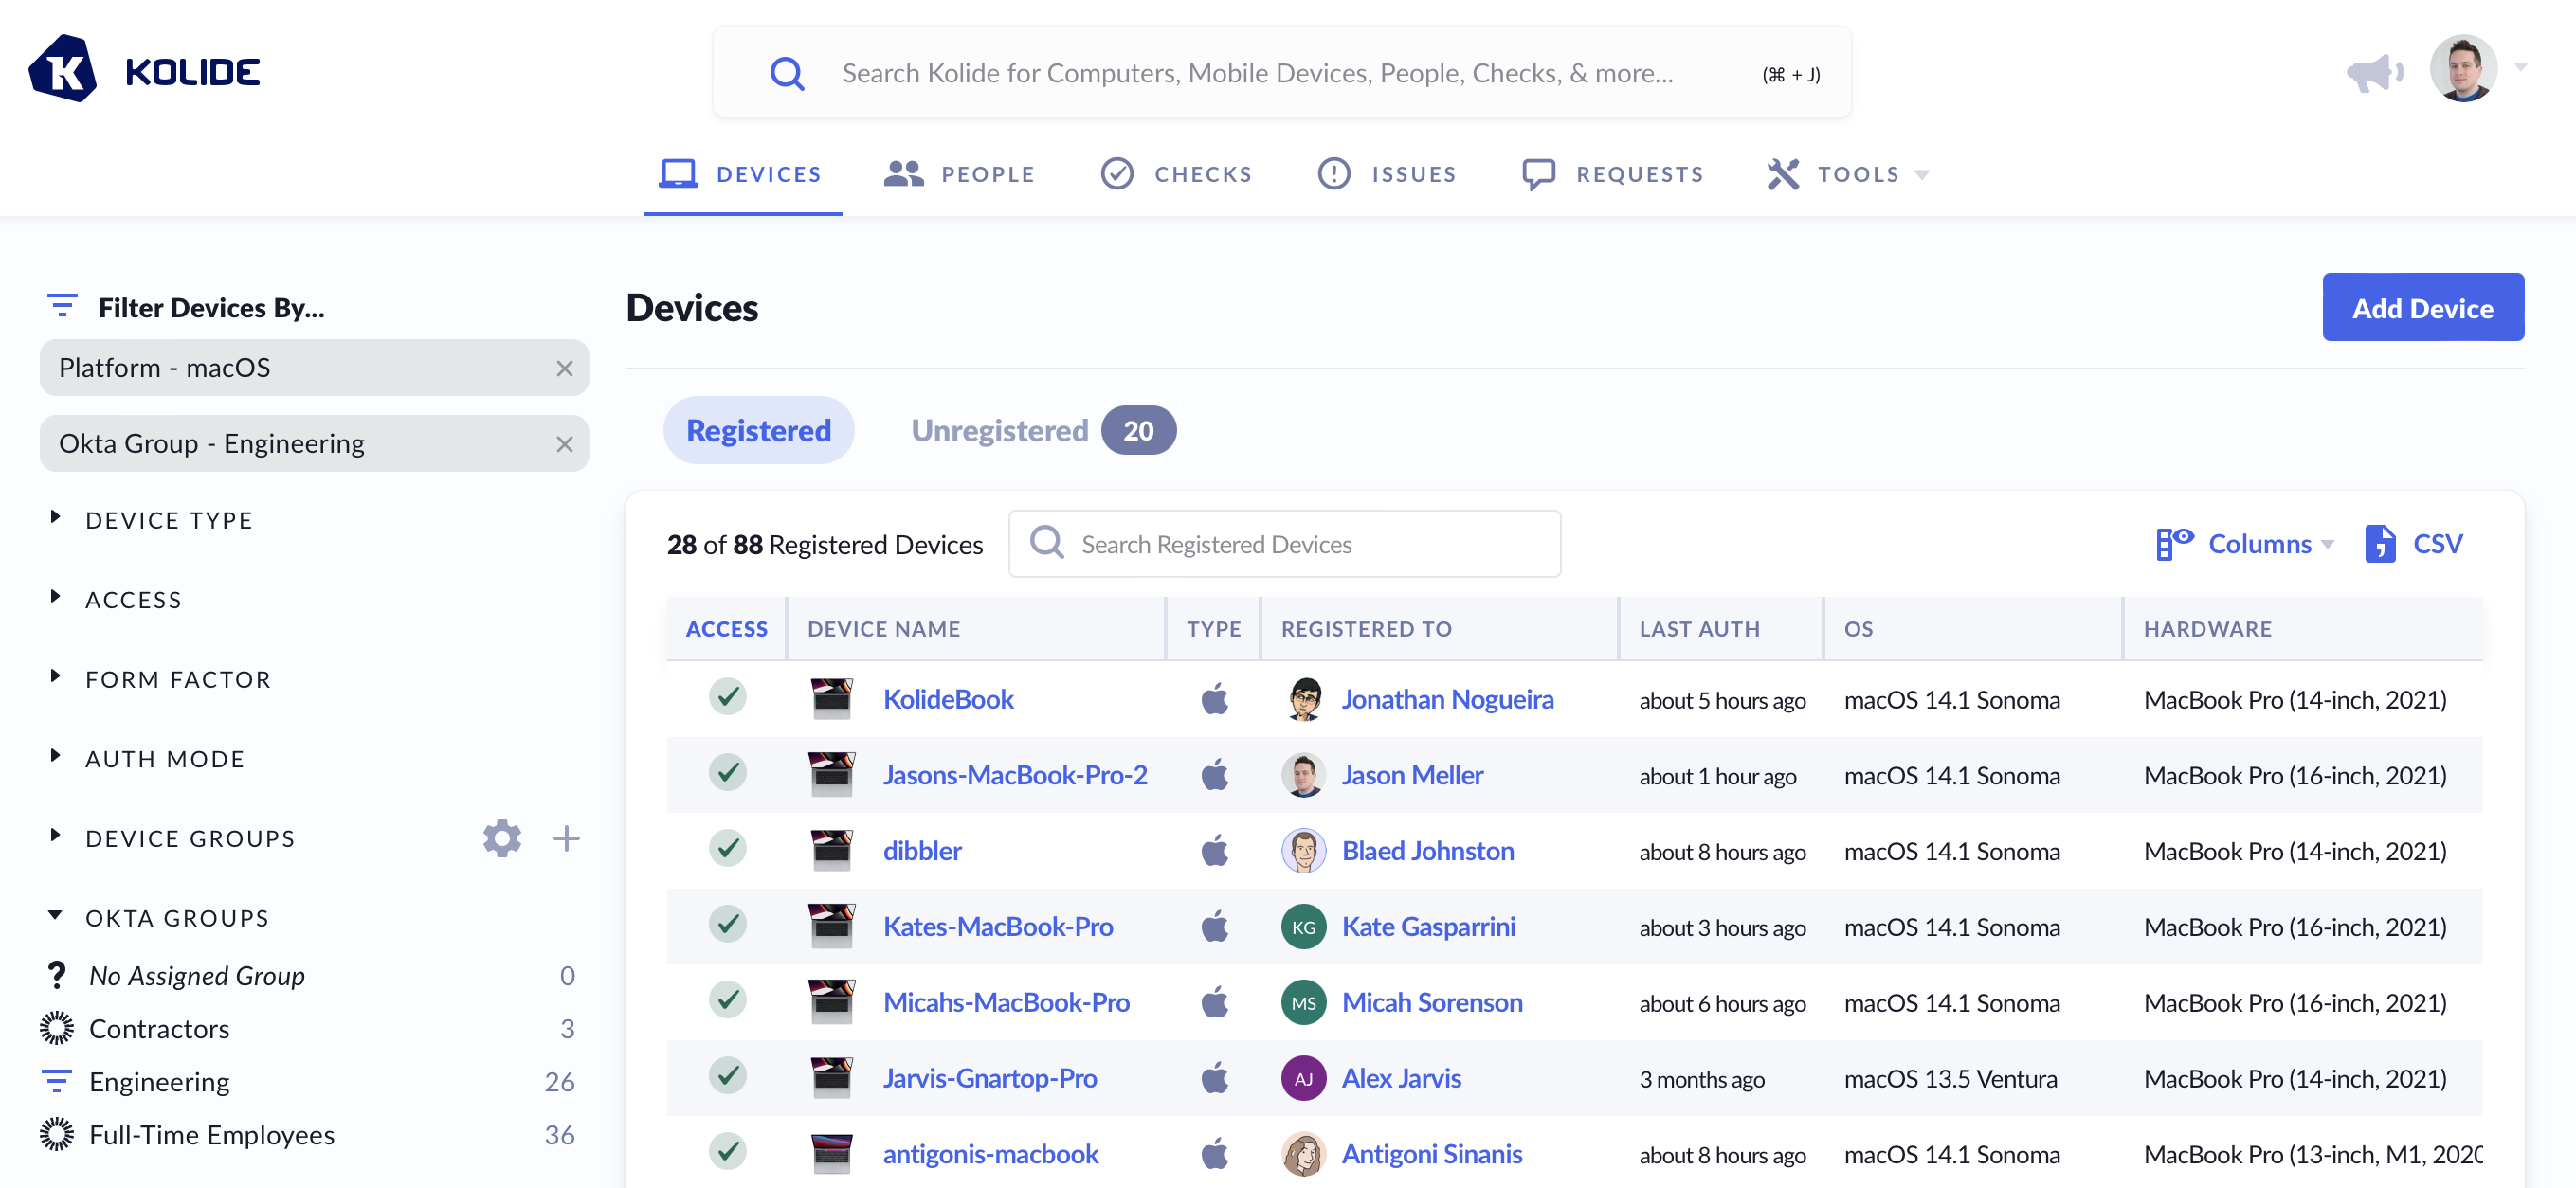
When you filter the list by an Okta Group, a device will show in the listing if the device is registered to a member of the group, or if the group is on the list of groups that are allowed to authenticate directly to the device.
Restrict Authentication By Okta Group
You can restrict who can authenticate to Kolide based on their Okta Group.
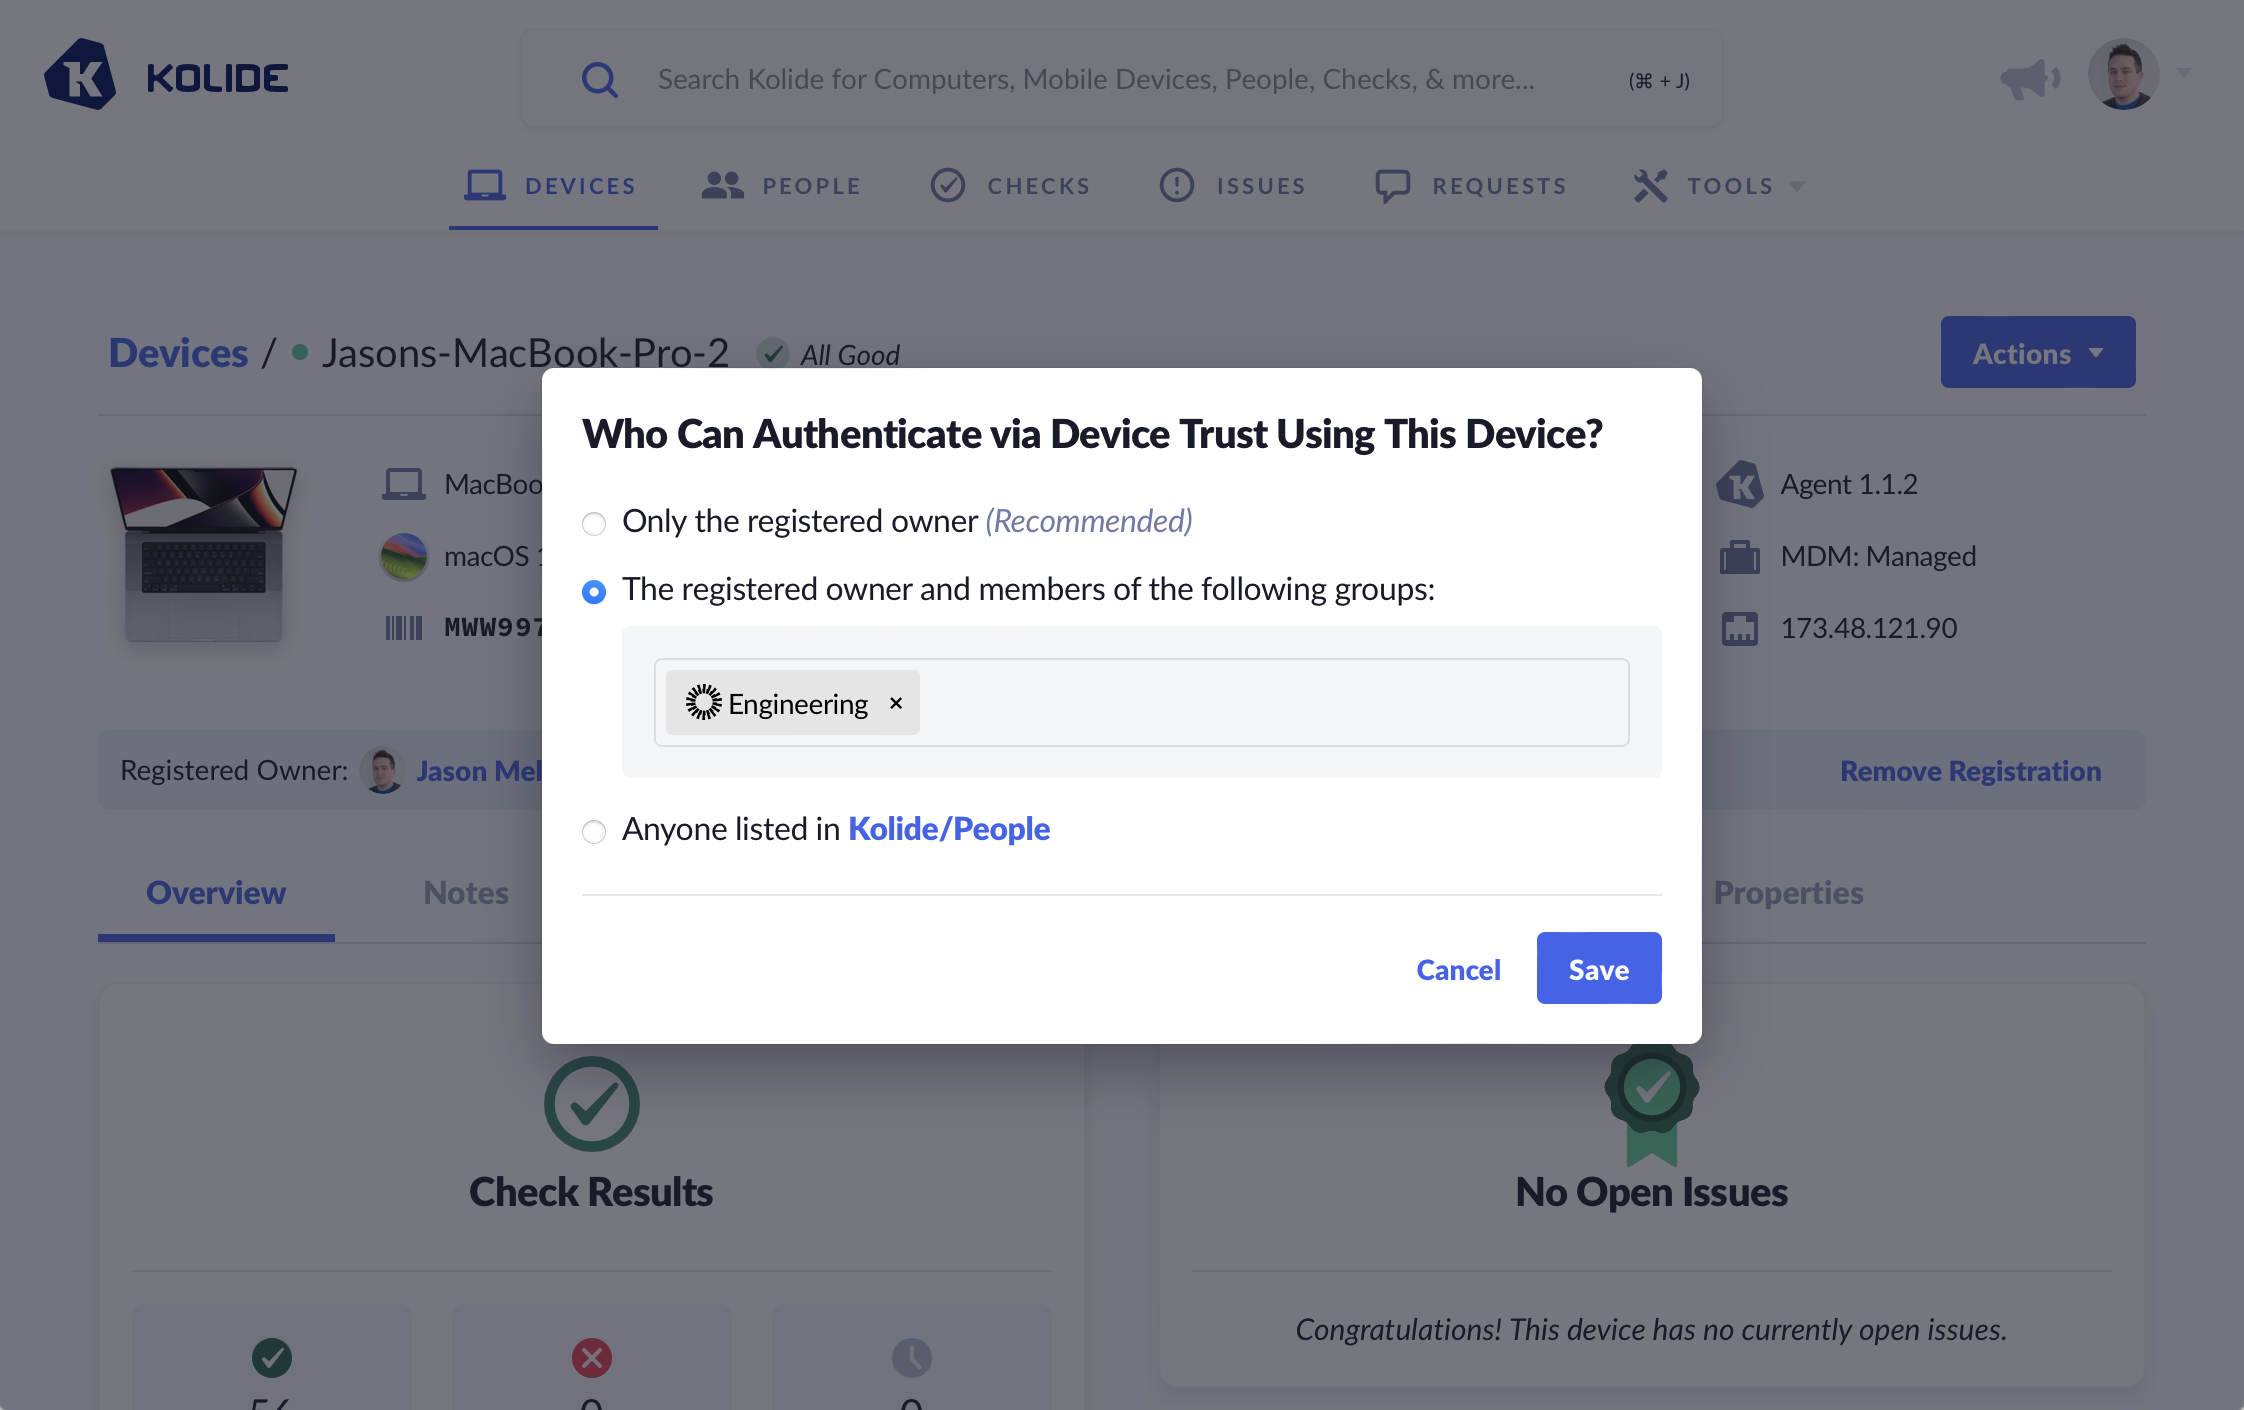
To learn more about this feature, see Device Registration - Authentication Modes.
Configure Checks Based On Okta Group
You can configure which devices are in-scope to run a Check and determine if the device should be blocked based on its Okta Group.
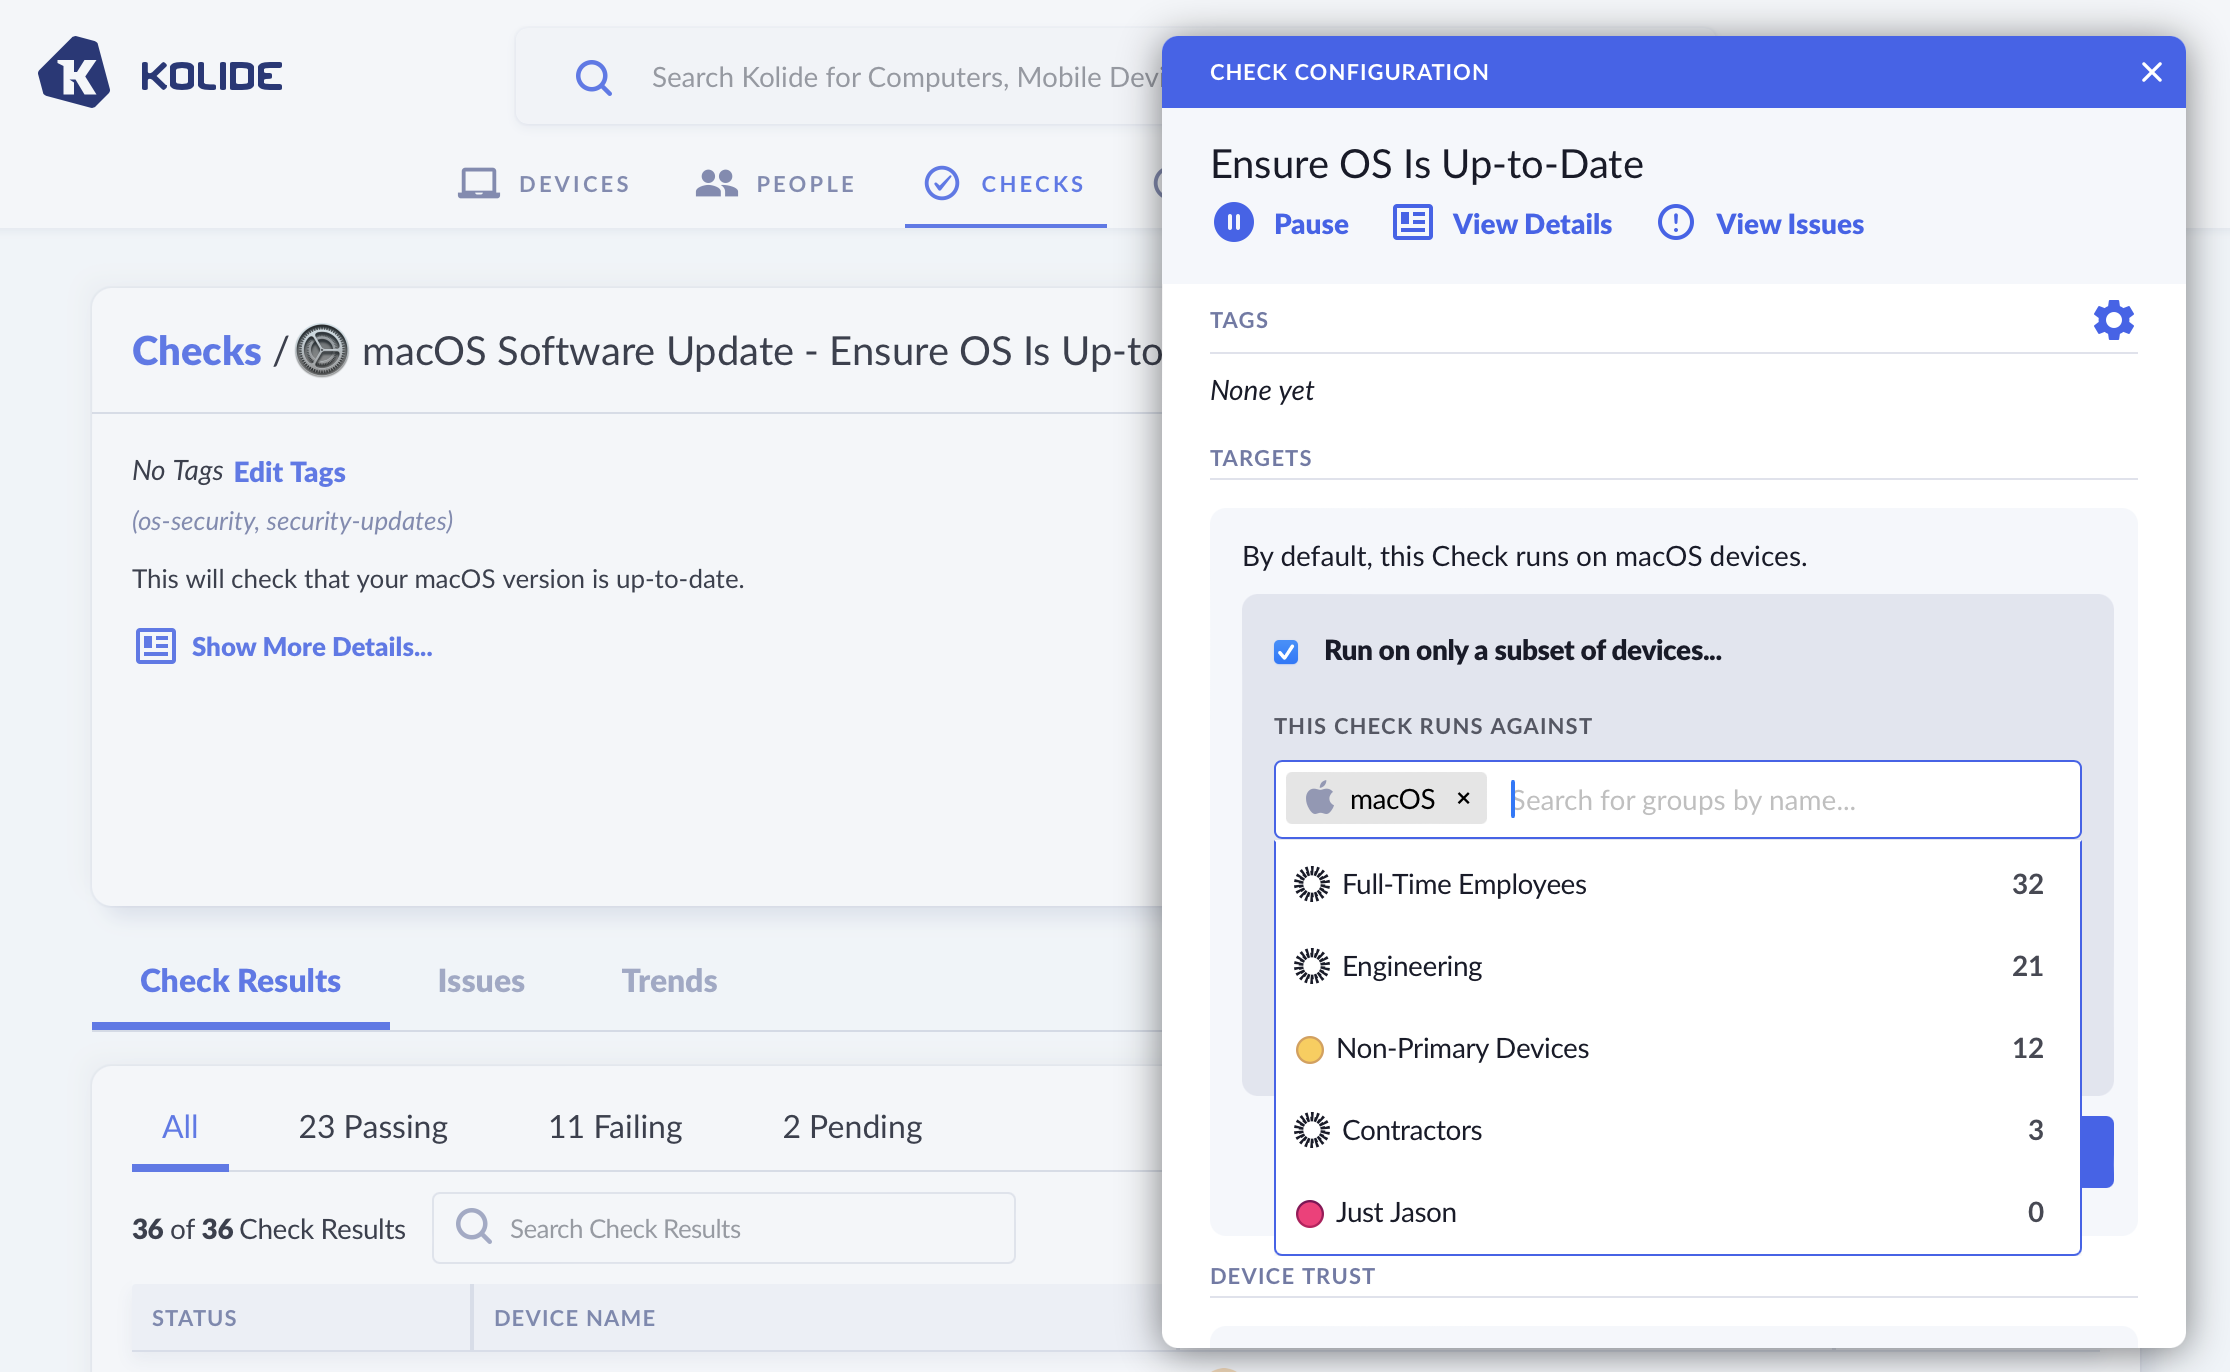
To learn more about this feature, see Checks - Controlling Targets and Checks - Limit Blocking to a Subset of Devices.